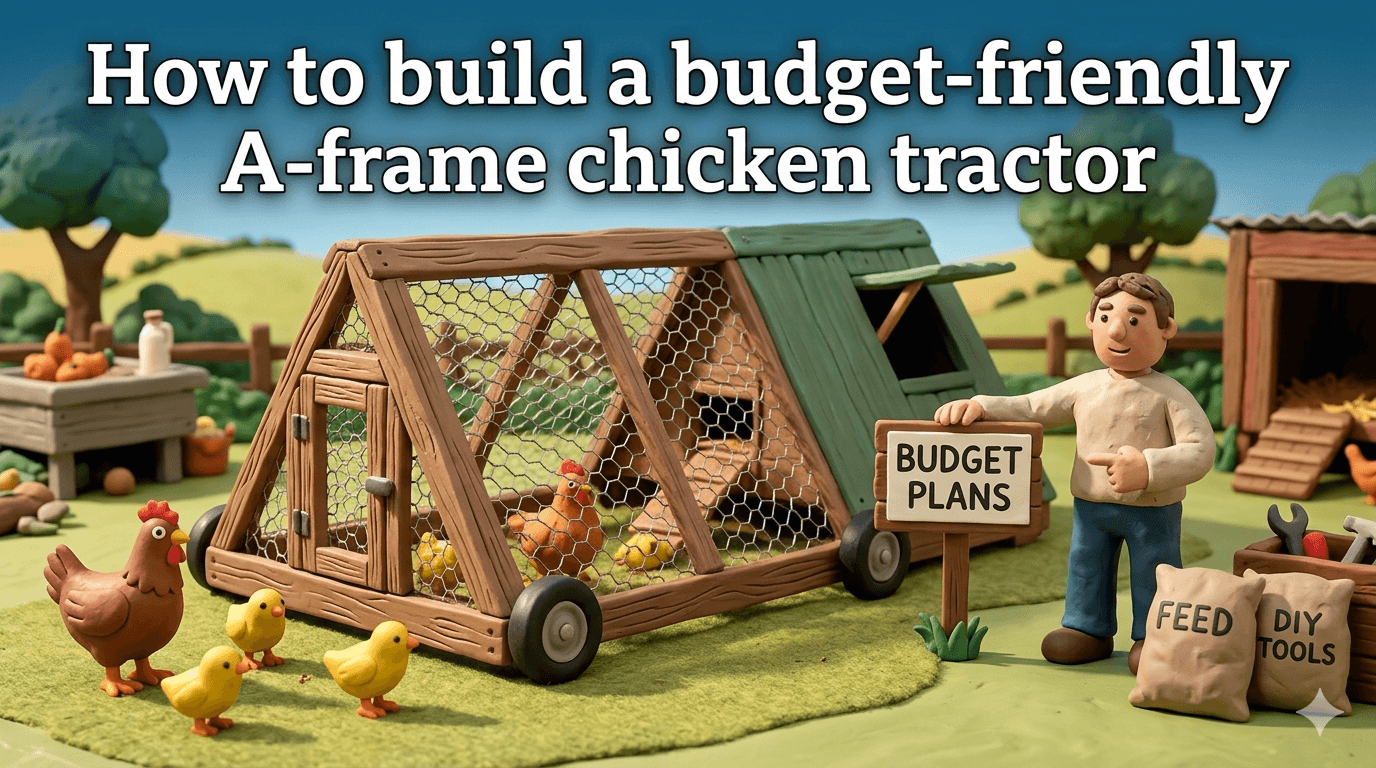
If you want happy hens, fresh eggs, and a healthier yard, an A-frame chicken tractor is one of the best small projects you can build. It is light, easy to move, and surprisingly cheap. You can finish this build in a weekend with basic tools and around $150 in materials.
This guide walks you through a budget A-frame chicken tractor that comfortably houses 4 to 6 standard hens. You will get a clear materials list, a simple cost breakdown, and step-by-step build instructions written for beginners. No fancy joinery. No expensive lumber. Just a sturdy, predator-resistant tractor your birds will love.
If you would rather build a stationary coop, take a look at our free chicken coop plans. For everything else mobile, simple, and beginner friendly, keep reading.
What Is an A-Frame Chicken Tractor?
An A-frame chicken tractor is a portable chicken shelter shaped like a triangle. The roof and walls are the same panels, which makes it strong, light, and cheap to build. There is no floor, so your birds eat fresh grass and bugs every day. You move the tractor across your yard or pasture every day or two, and your hens fertilize the soil as they go.
A regular chicken coop stays in one spot. A chicken tractor moves. That is the whole idea. Moving the flock keeps the grass alive, cuts down on smell, and reduces parasites and disease. It is also a smart pick for small backyards, urban homesteads, and renters who do not want a permanent build.
Why This A-Frame Build Is Budget Friendly
Most store-bought chicken tractors cost $400 to $900. This DIY plan keeps things under $150 by using common 2x2 and 2x4 lumber, hardware cloth, and basic galvanized roofing. There are no fancy cuts and no specialty hardware.
A few notes on cost:
- Lumber prices change. Check local prices before you start.
- You can save more by using reclaimed pallet wood for the frame.
- A free metal roofing offcut from a local supplier can knock off another $20 to $30.
If you are very tight on budget, this whole build can come in around $100 with smart sourcing.
How Big Should Your Chicken Tractor Be?
Sizing matters. Crowded chickens get stressed, peck each other, and lay fewer eggs. A good rule of thumb is 2 to 4 square feet per bird inside the shelter and 8 to 10 square feet of run space per bird outside.
The plan in this article is 4 feet wide by 8 feet long. The triangle ends rise about 4 feet at the peak. That gives you 32 square feet of footprint, which is plenty for 4 to 6 standard laying hens. Bantams and smaller breeds can fit a few extra.
If you want a tractor for more birds, scale the length up to 10 or 12 feet. Do not make it wider than 4 feet, or you will not be able to reach inside to clean.
Tools You Will Need
You do not need a workshop full of fancy tools. Here is the short list:
- Circular saw or miter saw
- Cordless drill with bits and a driver
- Tape measure and pencil
- Speed square or framing square
- Staple gun or hog ring pliers (for hardware cloth)
- Tin snips (for cutting hardware cloth and roofing)
- Safety glasses, work gloves, and ear protection
A chop saw makes the build faster, but a circular saw with a straight edge works just fine.
Materials List and Cost Breakdown
Here is the full materials list. Costs are approximate and will vary by region.
| Item | Quantity | Approx. Cost |
|---|---|---|
| 2x4 x 8 ft pressure-treated boards (base rails) | 2 | $20 |
| 2x2 x 8 ft furring strips (frame) | 10 | $35 |
| 1/2 in hardware cloth, 4 ft x 25 ft roll | 1 | $35 |
| Corrugated metal roofing, 2 ft x 8 ft panel | 2 | $30 |
| 1/4 in plywood, 2 ft x 4 ft (nest box) | 1 piece | $10 |
| Exterior wood screws, 2.5 in (1 lb box) | 1 | $9 |
| Exterior wood screws, 1.5 in (1 lb box) | 1 | $7 |
| Roofing screws with rubber washers | 1 small box | $8 |
| Heavy-duty staples or fence staples | 1 box | $5 |
| 4 in butt hinges | 2 pairs | $6 |
| Gate latch (raccoon-proof, two-step) | 1 | $5 |
| 8 in lawn-mower wheels with axle bolt | 2 | $14 |
| Rope or strap for handle | 1 | $4 |
| Exterior wood stain or paint (optional) | 1 quart | $12 |
| Total | ~$150 |
If you reuse pallet wood, scrap plywood, or leftover roofing, you can shave $30 to $50 off the total.
Step-by-Step Build Instructions
Here is the full build. Take your time, keep your cuts square, and do not skip the predator-proofing steps near the end.
Step 1: Cut the A-Frame End Pieces
Start with the two triangle ends. Each end is made from three 2x4 pieces.
- Cut two 2x4 boards to 4 feet 6 inches. These are your sloped rafters.
- Cut one 2x4 board to 4 feet. This is the base of the triangle.
- Set your saw to a 30 degree miter on each rafter end so they meet cleanly at the peak.
Do this twice so you have parts for both triangles.
Step 2: Build the Two Triangle Ends
Lay the parts flat on the ground in the shape of an A. Drive 2.5 inch exterior screws through the joints. Two screws per joint is plenty.
Check the corners with a square. A wonky triangle now means a wonky tractor later. Build the second triangle the same way.
Step 3: Connect the Triangles With Ridge and Base Rails
Stand the two triangles up, 8 feet apart, with the open bases on the ground.
- Run a 2x2 along the peak of both triangles. Screw it into each peak.
- Run two 2x4 base rails along the bottom, one per side. These are your skids and they should sit on the ground.
- Add a 2x2 stringer halfway up each slope on both sides for extra rigidity.
Stand back. You should see a strong A-frame box, 4 feet wide and 8 feet long.
Step 4: Frame and Skin the Nest Box and Roost Area
The back third of the tractor is your enclosed shelter. The front two thirds is the open run.
- Add a vertical 2x2 divider 2 feet 8 inches from the back end. This separates the run from the shelter.
- Skin the back triangle and the divider with 1/4 inch plywood. Cut to fit the triangle shape.
- Inside the shelter, add one 2x2 roost bar across the width, about 18 inches off the ground.
- Add a small nest box, around 12 by 12 by 12 inches, in one back corner. Two laying hens share one nest box just fine.
Drill a few 1 inch ventilation holes near the peak inside the shelter. Hens need airflow even in cold weather.
Step 5: Wrap the Run Section With Hardware Cloth
This is the most important step for predator protection. Use 1/2 inch hardware cloth, not chicken wire. Chicken wire keeps chickens in but does not keep predators out. Raccoons can rip right through it.
- Cut hardware cloth panels to fit each open side of the A-frame.
- Staple the cloth to the inside of the frame every 3 to 4 inches.
- Overlap seams by 2 inches and tie them shut with wire or hog rings.
Take your time here. Loose mesh is the most common reason a tractor fails.
Step 6: Add the Access Door and Egg Hatch
You need two openings. One full-size door so you can step in and clean, and one small hatch over the nest box so you can collect eggs without crawling.
- Build a simple 2x2 door frame to fit one of the side panels. Hinge it at the top or side.
- Build a small hatch over the nest box. Hinge it at the top so it lifts up and out of the way.
- Install raccoon-proof, two-step gate latches on both. A simple slide bolt is not enough.
Step 7: Attach the Roofing and a Rain Skirt
Lay the corrugated metal roofing panels along the top of the run, overlapping the peak.
- Drive roofing screws with rubber washers through the metal into the 2x2 stringers.
- Overhang the panels by about 2 inches on each side so rainwater drips clear of the frame.
- Add a small piece of scrap roofing or a thin board as a rain skirt above the access door so water does not run inside.
If you want extra shade in summer, throw an old tarp over the run section on hot afternoons.
Step 8: Add Wheels and a Pull Handle
This is what turns a coop into a tractor.
- Mount two 8 inch wheels on the back base rail. Use a bolt as the axle. Position the wheels so they are slightly off the ground when the tractor sits flat.
- Tie a sturdy rope or strap loop on the front base rail.
- To move it, lift the front by the rope. The back wheels swing into action and the tractor rolls easily.
If you find it too heavy, add a second pair of wheels in the front and use a wheelbarrow-style handle. But most builders find two wheels and a rope are plenty.
Predator-Proofing Tips That Actually Work
A pretty tractor that lets a raccoon in is a sad tractor. A few rules:
- Always use 1/2 inch hardware cloth, never chicken wire.
- Run a 12 inch hardware cloth apron flat on the ground around the perimeter when the tractor is parked overnight. Foxes and coyotes dig.
- Use two-step latches that need a press and a slide. Raccoons have hands and they will figure out simple latches.
- Close the egg hatch and door at dusk every single night.
- Walk the perimeter weekly and look for chewed mesh or loose staples.
If you live in bear country or have a heavy local raccoon population, add an inexpensive solar electric fence wire around the tractor at sundown.
How to Move Your Tractor Without Breaking Your Back
The whole point of a chicken tractor is moving it. Make moving easy and you will actually do it.
- Move the tractor every 1 to 2 days on grass. Move daily in summer.
- Lift the front rope, walk forward 6 to 8 feet, set it down.
- Always check the new spot for sharp rocks or holes that could leave a gap.
- Keep paths flat. Big bumps stress the frame and can pop staples loose.
In wet weather, move it more often. Chickens turn a wet patch into mud fast.
Cleaning, Care, and Maintenance
A clean tractor is a healthy tractor.
- Scrape and refresh the roost area weekly.
- Hose down the inside every month.
- Reseal the wood with a non-toxic exterior sealer once a year.
- Check screws, latches, and mesh every spring.
- Replace bedding in the nest box every 1 to 2 weeks.
In winter, park the tractor in a sheltered spot and add deeper bedding for warmth. You can also add a clear plastic sheet over the windward side as a wind break. Just keep ventilation holes open at the peak.
Common Mistakes to Avoid
A few traps to watch for, especially on your first build:
- Building it too heavy. Use 2x2 furring strips for the frame, not 2x4s.
- Skipping the rain skirt. Water inside the shelter leads to sick hens.
- Using chicken wire instead of hardware cloth. This is the number one reason tractors fail.
- Making it wider than 4 feet. You will not be able to reach all the way inside.
- Forgetting ventilation. Closed-up shelters get damp and breed respiratory issues.
- Underestimating raccoons. They are smart, strong, and patient. Latch everything.
Avoid these and you will have a tractor that lasts 5 to 10 years easily.
Frequently Asked Questions
How many chickens can fit in an A-frame chicken tractor?
The 4 by 8 foot tractor in this guide comfortably houses 4 to 6 standard laying hens. For more birds, scale the length up to 10 or 12 feet. Keep the width at 4 feet so you can reach inside to clean.
How often should I move a chicken tractor?
Move it every 1 to 2 days on grass. Move it daily in hot weather, after rain, or any time the ground starts to look bare. Daily moves keep the grass healthy, cut down on smell, and reduce parasites.
Is an A-frame chicken tractor predator proof?
It can be, if you build it right. Use 1/2 inch hardware cloth on every opening, run a mesh apron along the ground, and use raccoon-proof two-step latches. Close the tractor at dusk every night without fail.
Can I use a chicken tractor in winter?
Yes, with a few tweaks. Park it in a sheltered spot out of the wind. Add deeper bedding for warmth. Cover the windward side with a clear plastic sheet to block wind, but keep ventilation holes open at the peak. Hens are tougher in cold than most people think.
What is the best wood for a chicken tractor?
Pressure-treated 2x4s for the base rails since they touch the ground. Untreated 2x2 furring strips for the rest of the frame to keep weight down. Cedar is great if your budget allows, but it is not required. Avoid old reclaimed wood that may have lead paint.
Do I need a floor in a chicken tractor?
No. A floor adds weight and defeats the purpose. The whole point of a tractor is letting your hens scratch on fresh grass each day. Just add the hardware cloth apron at night for predator protection.
How long does an A-frame chicken tractor last?
With yearly maintenance, expect 5 to 10 years. Reseal the wood each spring, check the mesh, and replace any rusted screws or hinges as soon as you spot them.
Ready to Build Your A-Frame Chicken Tractor?
That is the whole build. A simple weekend project that gives you mobile, predator-resistant housing for around $150. Your hens get fresh grass, your yard gets free fertilizer, and you get great eggs.
If you want a stationary coop instead, check out our free chicken coop plans for small, medium, and large flocks. For more weekend builds, browse the full DIY hub.
Happy building, and happy homesteading.

Cole
Founder & Lead Researcher
Cole is the founder of Plan Your Homestead. He works in clinical research and brings a research-first lens to every guide on the site, drawing on a long family line of farmers for grounded, practical perspective.
More in DIY
More articles coming soon. Check back for new diy content.