There is a moment that comes for almost every new homesteader. You are standing in the kitchen with a counter full of fresh tomatoes, a bag of green beans from the garden, and a vague memory of your grandmother's pantry. You want to fill your shelves with shiny jars of food. You start reading. And within ten minutes you run into the question that stops everyone cold.
Should I use a water bath canner or a pressure canner?
The answer matters more than people realize. Choose the wrong method for the wrong food and you can make your family sick. Choose the right method and you can store real food on a shelf for a year or more, no freezer space required. The good news is the rules are simple once someone explains them in plain language.
This guide will do exactly that. We will cover the science behind the two methods, the foods each one was designed to handle, what equipment you need, what each canner costs, and how to decide which one belongs in your kitchen first. By the end you will know the answer for any food you might want to preserve. Let us get into it.
The Quick Answer
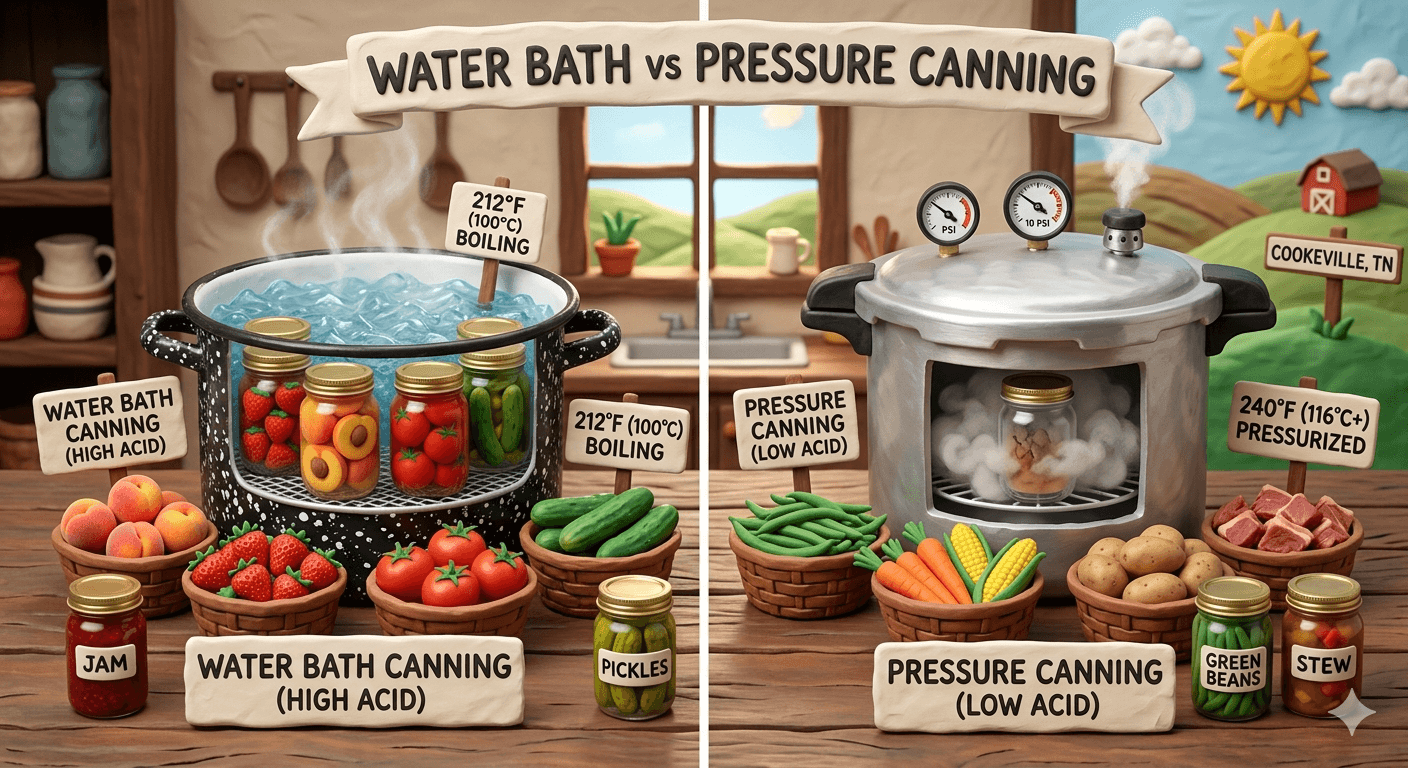
Water bath canning is for high acid foods. That includes jam, jelly, pickles, salsa, fruit, and tomatoes with added acid. The boiling water is hot enough to make these foods safe.
Pressure canning is for low acid foods. That includes plain vegetables, beans, meat, poultry, fish, soup, and stock. These foods need higher temperatures than boiling water can reach.
The two methods are not interchangeable. You cannot water bath green beans for longer to make up for the lower temperature. The science does not work that way. The rest of this article explains exactly why, and how to apply this rule to every food you might want to preserve.
Side by Side Comparison
| Feature | Water Bath Canning | Pressure Canning |
|---|---|---|
| Maximum temperature | 212°F (boiling) | 240°F (10 psi) |
| Foods it preserves | High acid foods only | Low acid and high acid foods |
| Typical equipment cost | $25 to $60 | $100 to $400 |
| Learning curve | Beginner friendly | Moderate, takes a few sessions |
| Typical processing time | 5 to 45 minutes | 20 to 90 minutes plus venting |
| Botulism safety | Acid prevents growth | High heat destroys spores |
| Best for | Jam, jelly, pickles, fruit, salsa, acidified tomatoes | Vegetables, beans, meat, soup, stock, stew |
| Not safe for | Plain vegetables, meat, soup, stock | No safety limit, but overkill for jam |
That table is your cheat sheet. Tape it inside a cabinet door if you find that helpful. Now let us look at why these differences exist.
The Science: Why Two Methods Exist
The reason there are two canning methods comes down to one organism. Clostridium botulinum. The spores of this bacterium live in soil and water. They sit harmlessly on raw produce until something gives them what they want. A sealed jar with no oxygen, low acid, and a moderate temperature is exactly that.
When those conditions line up the spores germinate. The bacteria grow. They produce a toxin that is one of the most poisonous substances on earth. You cannot see it. You cannot smell it. You cannot taste it. A jar of contaminated green beans looks and smells just like a safe one. That is why prevention matters so much.
There are two ways to stop the bacteria from growing inside a sealed jar. The first is to make the food too acidic for them. The second is to heat the food hot enough to kill the spores outright. Each canning method uses one of these strategies.
How Water Bath Canning Stops Botulism
Boiling water reaches 212°F at sea level. That temperature is plenty hot to kill mold, yeast, and most bacteria inside a jar. It is not hot enough to kill botulism spores. Those spores can survive boiling water for hours.
So why is water bath canning safe at all? Because of the food itself. High acid foods have a pH of 4.6 or below. At that acidity, botulism bacteria cannot grow even if the spores are still alive in the jar. The acid does the work that extra heat would otherwise do. The boiling water sterilizes everything else and the acid handles the one organism boiling cannot kill.
This is why the pH 4.6 line is sacred in canning. It is the difference between a method that works and a method that endangers your family. Tested water bath recipes are designed to keep finished food well below that line, with a safety margin built in.
How Pressure Canning Stops Botulism
Low acid foods do not have that acid protection. A jar of plain green beans has a pH around 6, well above the danger threshold. The only way to make those jars safe is to kill the botulism spores outright.
That requires sustained temperatures of 240°F. Boiling water cannot get there at any altitude on earth. A pressure canner can. By sealing the lid and trapping steam, the canner builds pressure inside the vessel. At 10 pounds of pressure at sea level, the temperature inside reaches 240°F. Hold a jar of green beans at that temperature for the prescribed time and the spores are destroyed. The food is safe to sit on a shelf for a year.
That is the entire reason pressure canning exists. It is not faster. It is not easier. It is the only way to safely preserve low acid foods at home.
Water Bath Canning at a Glance
Water bath canning is the older of the two methods and the easier one to learn. You fill jars with food, place lids on top, and submerge them in boiling water for a set time. As the jars cool, the lids seal. The food can sit on a shelf for a year or more.
What You Can Preserve
Water bath canning is the right choice for any food that is naturally acidic or has been acidified with vinegar, lemon juice, or citric acid. That covers a huge slice of what most homesteaders want to put up.
- Jams, jellies, marmalades, and preserves
- Fruit packed in syrup or juice
- Fruit pie fillings made with tested recipes
- Pickles and pickled vegetables
- Salsa made with a tested recipe
- Tomatoes with added lemon juice or citric acid
- Apple butter and other fruit butters
- Chutneys and relishes
- Vinegar based sauces
If you are working through a peach harvest, putting up cucumbers from the garden, or making jam from this year's strawberries, water bath canning is your method.
Equipment You Need
The equipment list is short and inexpensive. Most homesteaders can put together a complete water bath setup for under sixty dollars.
- A water bath canner or any tall stockpot
- A jar rack to keep jars off the bottom of the pot
- Mason jars in the size you need
- New flat lids and reusable bands
- A jar lifter
- A canning funnel
- A headspace measuring tool
- A clean towel and a ladle
A typical batch takes one to two hours from prep to cleanup. Processing time itself ranges from five minutes for some jams to forty five minutes for whole tomatoes. The full step by step process is covered in our water bath canning guide.
Why Beginners Start Here
There are three reasons water bath is the right starting point for almost everyone. The equipment is cheap. The technique is forgiving. And the foods you preserve are the ones most people actually want to eat. Nobody opens their pantry for the first time and craves canned green beans. They reach for the strawberry jam.
Pressure Canning at a Glance
Pressure canning uses a heavy sealed pot to trap steam and build pressure. That pressure raises the boiling point of water above 212°F. At 10 pounds of pressure at sea level, the temperature inside reaches 240°F, which is hot enough to destroy botulism spores in low acid foods.
What You Can Preserve
Pressure canning is the only safe home method for foods that do not have natural or added acidity. That covers most of what comes out of a working homestead garden in late summer and fall.
- All plain vegetables (green beans, corn, carrots, beets, peas, potatoes)
- Dried beans (black, pinto, kidney, navy, garbanzo)
- Meat, poultry, and fish
- Stocks, broths, and bone broth
- Soups, stews, and chili
- Mixed vegetable medleys
- Tomato sauces with meat or vegetables added
A pressure canner can also handle anything a water bath canner can. The reverse is not true. If you only buy one canner and you plan to preserve garden vegetables or meat, this is the one to buy.
Equipment You Need
The pressure canner itself is the main expense. Plan to spend at least a hundred dollars on a quality canner. The rest of the supplies overlap with water bath canning, so you will reuse most of them.
- A weighted gauge or dial gauge pressure canner
- A jar rack designed for that canner
- Mason jars in pint or quart size
- New flat lids and reusable bands
- A jar lifter, funnel, and headspace tool
Processing time ranges from twenty minutes for small jars of beans to ninety minutes for quart jars of meat. You also need to factor in venting time and natural pressure release time at both ends. A typical batch takes two to three hours from prep to cleanup. The full process is covered in our pressure canning guide.
The Learning Curve
Pressure canning sounds intimidating. It is not, but it does take a few sessions to feel natural. You have to vent the canner before sealing it. You have to bring it up to pressure and hold it steady. You have to let it cool naturally at the end. None of these steps are hard. They are just unfamiliar the first time. After two or three batches the rhythm becomes automatic.
Where People Get Confused
A few foods sit on the borderline and trip up new canners every season. These are the cases where the answer is not obvious from the food category alone.
Tomatoes
Tomatoes are the classic borderline food. Modern tomato varieties have a pH that hovers right around 4.6. Some are above. Some are below. You cannot tell by tasting. That is why every tested tomato recipe calls for added lemon juice or citric acid. The acid pulls the finished pH well below the safe threshold so the tomatoes can be safely water bath canned. Skip the acid and you have crossed into low acid territory, which means pressure canning or a real risk of botulism.
Salsa
Salsa is a mix of high acid tomatoes and low acid peppers, onions, and garlic. The recipe controls the safety. A tested salsa recipe specifies exact ratios of acidic and low acid ingredients along with vinegar or lemon juice. Follow that recipe and you can water bath the salsa. Improvise by adding extra peppers and you may have made a low acid product that needs pressure canning, even though it still tastes like salsa.
Pickled Low Acid Vegetables
Green beans, asparagus, carrots, and beets are all low acid foods. By themselves they require pressure canning. Pickle them in a tested vinegar brine and they become high acid food, safe for water bath canning. The pickling brine is doing the safety work, not the heat.
Fruit Butters and Sauces
Most fruit butters are high acid and water bath safe. The exception is anything with added low acid ingredients like cream, butter, or thickeners that change the pH. If a tested recipe does not exist for the version you want to make, do not invent one.
Warning
The two methods are not substitutes. You cannot make low acid food safe by boiling it longer in a water bath. Time does not replace temperature. Botulism spores can survive hours of boiling. Only sustained pressure canning at 240°F destroys them. Always follow a tested recipe from a trusted source like the USDA, the National Center for Home Food Preservation, or a current Ball Blue Book.
Equipment and Cost Comparison
The two canners look similar on a shelf. They are not. A water bath canner is a tall enameled pot with a wire jar rack. A pressure canner is a much heavier pot with a locking lid, a vent pipe, a pressure gauge or weight, and a safety release. The price difference reflects the engineering.
| Item | Water Bath | Pressure Canner |
|---|---|---|
| Canner itself | $25 to $60 | $100 to $400 |
| Replacement parts | Rack only | Gasket, gauge, weight, safety plug |
| Annual maintenance | None | Test dial gauge once a year |
| Lifespan | Decades | Decades with replaced gaskets |
The good news is that almost everything else carries over between the two methods. Once you own a basic canning toolkit, adding the second method only costs the canner itself.
You can reuse all of these between methods.
- Mason jars (any size you already own)
- Jar lifter, funnel, and headspace tool
- Reusable bands
- Magnetic lid lifter
- Kitchen towels and cooling rack space
You cannot reuse these.
- The canner pot itself
- The jar rack (sized to its own canner)
- The pressure gauge or weight (specific to the canner)
If you already own a tall stockpot, you can start water bath canning today for under thirty dollars in supplies. A pressure canner is a bigger investment but pays back fast once you start preserving garden vegetables and meat.
A Decision Framework
Here is a simple way to figure out which canner to buy first. Ask yourself three questions in order.
What Am I Trying to Preserve?
Look at what comes out of your kitchen, garden, or neighbor's harvest in a typical year. If your list is mostly fruit, jam, pickles, salsa, and acidified tomatoes, water bath canning will cover everything. If your list includes green beans, corn, dried beans, soup, stock, or meat, you need a pressure canner.
What Is My Budget?
A water bath setup costs about a quarter of a pressure canner setup. If money is tight, start with water bath. Build your skills, fill your pantry with high acid foods, and save up for a pressure canner. There is no rule that says you have to do everything in year one.
How Much Time Do I Have to Learn?
Water bath canning can be learned in a single afternoon. Pressure canning takes a few sessions to feel comfortable. If your schedule is full and you want results soon, start with water bath. If you have a free weekend and want to dive in, pressure canning is doable from day one.
Most homesteaders end up owning both eventually. That is fine. You do not need both at the same time.
Common Mistakes to Avoid
These are the mistakes that show up over and over in canning forums and at extension office calls.
Water Bathing Low Acid Foods
This is the dangerous one. Plain green beans in a water bath are not safe at any processing time. Plain meat in a water bath is not safe at any processing time. If a recipe online tells you to water bath any low acid food without added acid, close the tab and find a tested recipe.
Skipping the Dial Gauge Test
Dial gauge pressure canners can drift over time. A gauge that reads 10 pounds when actual pressure is 8 will under process your jars. That is a safety risk. Most county extension offices test gauges for free once a year. Use that service.
Not Adjusting for Altitude
Both methods need altitude adjustments. Water bath canning needs longer processing time at higher elevations. Pressure canning needs higher pressure. The adjustments are small but they are not optional. A quart of green beans at 5,000 feet needs more pressure than the same jar at sea level.
Reusing Flat Lids
The flat metal lid is single use. The sealing compound around the rim only seals once. Reuse it and you may get a false seal that fails weeks later. Bands can be reused for years. Lids cannot.
Cranking Bands Too Tight
Snug is the word. Finger tip tight. If you crank bands down hard before processing, air cannot escape during heating. The result is buckled lids and failed seals. Snug them and stop.
Tip
Altitude adjustments are the most common mistake new canners make. We are building a free canning calculator that does the math for any food, jar size, and elevation. It will save you flipping through charts every batch.
Frequently Asked Questions
Frequently Asked Questions
Yes, with one important note. Most pressure canners can be used as a water bath canner by leaving the lid unlocked or using a separate flat lid, so steam vents freely. The pot just acts as a tall stockpot. Check your canner's manual to confirm. The reverse is not true. A water bath canner cannot be used as a pressure canner because it is not built to hold pressure.
Because the problem is temperature, not time. Botulism spores can survive hours of boiling water. The only way to kill them is to reach 240°F, which boiling water cannot do at any altitude. A 30 hour water bath of green beans is no safer than a 30 minute one. Pressure canning is not a faster shortcut. It is a different physics problem.
Tomatoes hover right around the pH 4.6 safety line, and modern varieties are often less acidic than older ones. That is why every tested tomato recipe calls for added lemon juice or citric acid. With the added acid, tomatoes are safely water bath canned. Without it, treat them as low acid and pressure can them.
No. Most beginners start with water bath canning only. It is cheaper, faster to learn, and covers the foods most people actually want in their pantry. Add a pressure canner later when you want to start preserving garden vegetables, beans, or meat. Many homesteaders happily run on water bath alone for years.
A pressure cooker is for fast cooking. A pressure canner is for safe canning. Pressure cookers are generally too small to fit canning jars properly and may not maintain consistent pressure long enough for safe processing. Use a canner specifically labeled for canning. Some Instant Pot models have a canning function but the USDA does not currently recommend any electric pressure canner for low acid food.
Water bath canning is faster from start to finish. Processing times are shorter, there is no venting period, and the pot can be opened immediately when the timer ends. A typical water bath batch runs about an hour from prep to clean up. A pressure canning batch runs two to three hours because the canner has to vent before sealing and cool naturally before opening.
Where to Go From Here
If you are still deciding where to start, the answer for almost everyone is water bath canning. It is cheap, it is forgiving, and it covers the foods you most want to put up first. Read our water bath canning guide for the full step by step process. Pick a small batch of jam or pickles and put up your first jars this weekend.
When you are ready to expand into garden vegetables, beans, and meat, our pressure canning guide walks through the equipment, the venting steps, and the recipe basics. And if this is your very first time canning anything at all, our canning for beginners guide ties everything together with a beginner friendly first project.
The pantry full of jars is closer than you think. Pick a method. Pick a recipe. Start with one small batch. By next year your shelves will tell the story.

Cole
Founder & Lead Researcher
Cole is the founder of Plan Your Homestead. He works in clinical research and brings a research-first lens to every guide on the site, drawing on a long family line of farmers for grounded, practical perspective.
More in Food Preservation
More articles coming soon. Check back for new food preservation content.