So you want to power your homestead with the sun. Maybe you are tired of rising utility bills. Maybe the grid has failed you one too many times. Maybe you just love the idea of pulling electricity out of thin air with nothing but a few panels and a bit of patience. Whatever brought you here, welcome. You are about to learn one of the most empowering skills on a modern homestead.
Off grid solar power can feel overwhelming at first. The vocabulary alone scares most beginners off. Watts, volts, amp hours, depth of discharge, peak sun hours, MPPT, pure sine. It reads like a language nobody taught you in school. The good news is that you do not need an electrical engineering degree to get this right. You just need a friendly walkthrough and a willingness to do a little homework.
By the end of this guide you will understand exactly how an off grid solar system works. You will know the four core components and what each one does. You will know how to size a system to your real daily needs without overspending. You will know what it costs, what permits to expect, and which mistakes send most beginners back to the grid in their first year. Grab a notebook. Let us walk through it together.
What Off Grid Solar Power Actually Is
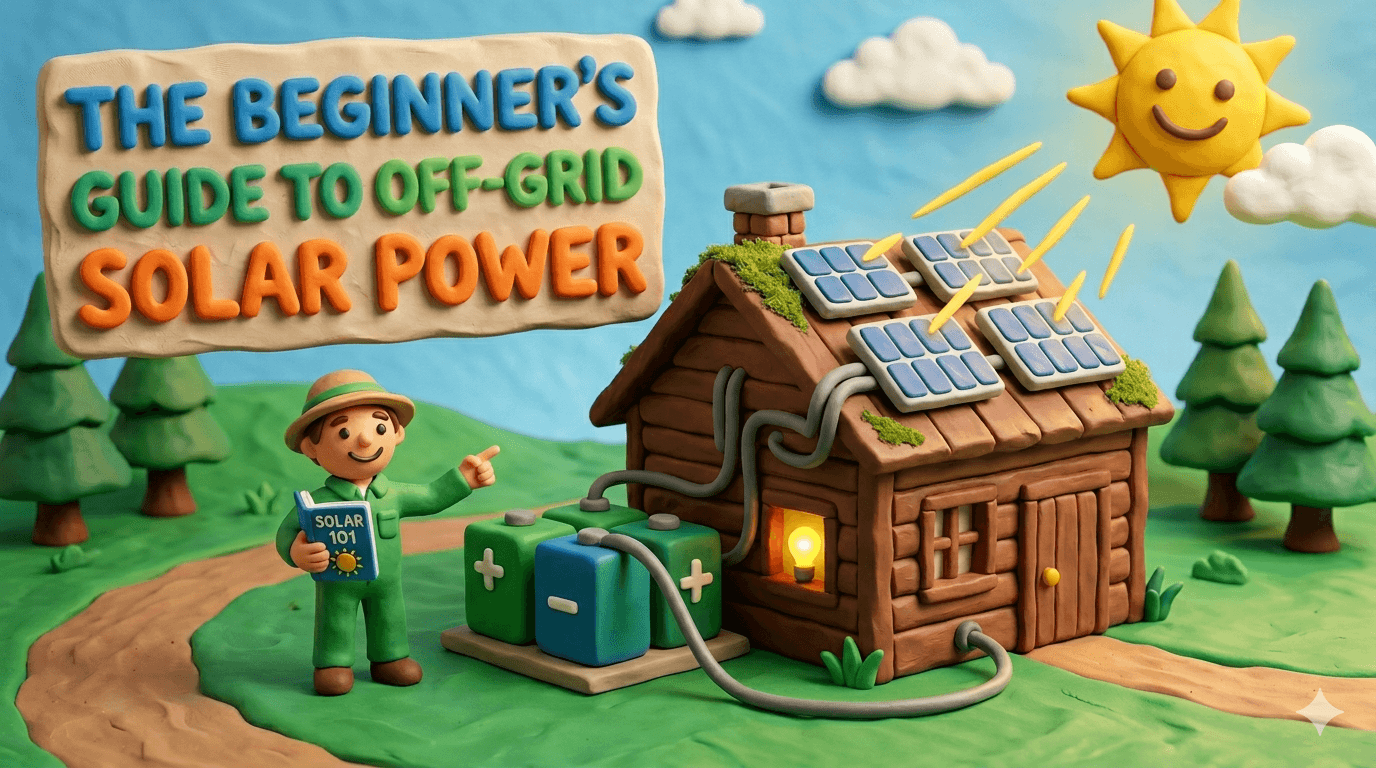
Off grid solar means your home makes its own electricity from sunlight and stores it in batteries. There is no utility connection. There is no monthly bill. When the sun goes down, your batteries keep the lights on. When the batteries run low, the sun fills them back up the next morning.
That is different from grid tied solar. A grid tied system feeds excess power back to the utility and pulls power from the utility at night. You still have a meter and a monthly account. A grid tied home with a battery backup is a third flavor, often called hybrid. The grid does the heavy lifting, and the batteries keep you running through short outages.
Off grid is the most independent of the three. It is also the most personal. Your daily power use, your local sunshine, and your weather all decide what your system needs to look like. Two homesteads ten miles apart can need very different setups based on tree cover, household habits, and how cold the winter gets.
Here is the simplest way to picture it. Think of your battery bank as a bank account. Your panels are your paycheck. Your appliances are the bills you pay each day. As long as your paycheck stays bigger than your spending, your account grows. Run a clothes dryer on a cloudy week and your account drains fast. Almost every smart decision in off grid solar comes back to that one idea.
The Four Core Components of an Off Grid Solar System
Strip away the marketing and almost every off grid solar setup comes down to four parts. Learn what each one does and the rest of the system will start to make sense.
Solar Panels
Solar panels turn sunlight into direct current electricity. They are the obvious part of the system, the rectangles you see on the roof or in the field. Modern panels are remarkably durable. Most are warrantied to produce at least 80 percent of their original output after 25 years. That is a long time.
You will see two main types at the homestead scale. Monocrystalline panels are cut from a single silicon crystal. They are slightly more efficient, look uniformly black, and cost a little more per watt. Polycrystalline panels are made from many smaller crystals, look bluish, and cost a touch less. For most beginners the difference is small. Pick monocrystalline if roof space is tight. Pick poly if you have plenty of room and want to save a few dollars per watt.
Panels are sized in watts. A common modern panel is around 400 watts. Two of those make 800 watts. Five make 2,000 watts. The math stays friendly.
Charge Controller
The charge controller sits between the panels and the battery bank. It regulates how much power flows into the batteries. Without one, your panels would overcharge the batteries and cook them within weeks.
There are two flavors. PWM controllers are older, cheaper, and best for very small setups. MPPT controllers are newer, smarter, and can squeeze 20 to 30 percent more energy out of your panels in cold or partly cloudy conditions. For any real off grid system, choose MPPT. The extra cost pays back in panels you do not have to buy.
A good rule of thumb is to size the charge controller a little larger than the maximum array output. That gives you headroom for cold sunny days when panels produce more than their rated wattage.
Battery Bank
The battery bank is the heart of any off grid system. Panels make power during the day. Batteries hold that power for nighttime, cloudy stretches, and short winter days. If panels are your paycheck, batteries are your savings.
Two chemistries dominate the homestead market. Lead acid batteries are older and cheaper up front. They like to live between 50 and 100 percent state of charge, which means you can only safely use about half of what you paid for. Lithium iron phosphate, often shortened to LiFePO4, costs more on day one but lasts three to five times longer, weighs less, charges faster, and lets you safely use 80 to 90 percent of the rated capacity.
For nearly every beginner today the right pick is LiFePO4. Lead acid still wins on price for tiny camper builds, but the math tips toward lithium fast once you scale up to a real home.
Inverter
Most appliances in your home run on alternating current at 120 or 240 volts. Your batteries store direct current at 12, 24, or 48 volts. The inverter bridges the two. It takes DC from the battery and turns it into AC for your outlets.
Pure sine wave inverters produce clean AC that is identical to grid power. Modified sine wave inverters are cheaper but rough on electronics, fridges, and anything with a motor. Always buy pure sine wave for a home system. The savings on a modified sine inverter are not worth the headaches.
Size the inverter to handle your largest simultaneous load with room to spare. A common starter inverter is 3,000 watts. A mid sized homestead often needs 4,000 to 6,000 watts. A large home with electric well pumps and shop tools may want 8,000 watts or a stacked pair.
How an Off Grid Solar System Works, Step by Step
Here is the whole story in five steps. Trace this once and the wiring diagrams in any manual will start to make sense.
- The sun hits the panels and silicon cells push out direct current electricity.
- That DC flows down a wire into the charge controller.
- The charge controller regulates voltage and current, then feeds the battery bank.
- The batteries store the power until you need it, day or night.
- When you flip a light switch, the inverter pulls DC from the batteries, converts it to AC, and sends it through your home's normal wiring.
That is it. Every other component in a typical system is there to monitor, protect, or expand on those five steps. Fuses and breakers protect the wires. A battery monitor tracks state of charge. A backup generator covers long cloudy stretches. The core flow never changes.
Start With an Energy Audit, Not a Solar Quote
Here is the single most expensive mistake new off grid homesteaders make. They call a solar installer first. The installer quotes a system based on the home's current grid usage, which is almost always inflated by inefficient appliances and habits the household never had to question. The result is a giant array and a giant bill.
The smarter move is to do an honest energy audit before you call anyone. List every device in your home that uses electricity. Note the watts each one draws and how many hours per day it actually runs. Multiply watts by hours to get watt hours per day. Add it all up. That total is your real daily target.
Most grid tied households use 25 to 35 kilowatt hours per day. Most thoughtful off grid households, after a good audit and a few easy upgrades, use 5 to 10 kilowatt hours per day. The gap is huge. The difference is not magic. It is LED lighting, an efficient fridge, a chest freezer instead of an upright, propane for the oven, and a clothesline in good weather.
A simple audit takes one weekend. Walk the house with a kill a watt meter and a notebook. Catch the phantom loads, the chargers that never come unplugged, the appliances on standby. Trim the easy fat first. You can save thousands on panels and batteries before you ever swipe a credit card.
Tip
Build a habit of watching watt hours, not dollars. Once you know your fridge runs 1,200 watt hours per day, every other decision gets easier. A new freezer that sips 600 watt hours per day pays for itself in fewer panels and a smaller battery bank. The hidden upgrade is always cheaper than the visible one.
Sizing Your Off Grid Solar System the Beginner Way
Solar sizing sounds technical, but the basic math is friendly. You only need four numbers.
- Your daily watt hour load from the audit you just did.
- The average peak sun hours your location gets each day. Most of the lower 48 sits between 4 and 5.5.
- The number of cloudy days you want your battery bank to ride out without sun.
- The system voltage you plan to run, usually 12, 24, or 48 volts.
Here is a worked example. Say your audit shows 6,000 watt hours of daily use. You live in an area that gets 4.5 peak sun hours on average. To recharge your batteries on a typical day, you need an array sized to about 1,500 watts of peak production. Add a generous safety factor for wiring losses, dust on the panels, and bad weather. A 2,000 watt array is a sensible target.
For batteries, plan to store at least three days of usage. With 6,000 watt hours per day, that is 18,000 watt hours of storage. With LiFePO4 you can use about 80 percent of that capacity, so you actually want closer to 22,000 watt hours of rated storage to be comfortable.
System voltage matters as your loads grow. A 12 volt system is fine for a camper or a tiny cabin. A 24 volt system is the friendly middle ground. A 48 volt system is the right pick for any real home with a clothes washer, well pump, or shop tools. Higher voltage means lower current, which means smaller wires, fewer losses, and cheaper installs at scale.
A handy planning rule is the 30 percent rule. Whatever your spring or fall numbers suggest, plan for 30 percent more capacity in winter. Short days and cloudy stretches eat into solar production fast. A small generator covers the worst weeks while your batteries recover.
Choosing the Right Solar Panels
Once you know your target array size, picking panels gets easier. A few rules carry most of the weight.
Match panel size to your space. If you have a generous south facing roof or a sunny field, larger 400 to 500 watt panels keep the install simple and the wiring tidy. If you are working with a small roof or a complex shape, smaller 200 to 300 watt panels give you more flexibility around vents and dormers.
Watch the warranty closely. A reputable panel carries a 25 year performance warranty and at least a 12 year product warranty. Skip cheap unknown brands. The savings up front are not worth a panel failure ten years in.
Shade is the enemy. A single shaded cell on a panel can cut the whole panel's output to near zero. Walk your site at different times of day and watch for tree shadows, chimneys, and power poles. If shade is unavoidable on part of the array, microinverters or DC optimizers can isolate the loss to one panel, but the cleanest answer is always full sun.
Pick your mount thoughtfully. A roof mount is the cheapest and most common for homes. A ground mount is friendlier to maintenance, easier to clean, and lets you tilt the panels for the season. A pole mount is great for snowy climates because you can sweep the snow off without climbing a ladder. Each mount type has a place.
Choosing the Right Battery Bank
The battery bank is where most of your money goes. It is also the part most beginners underspend on. A few honest facts will help you make the right call.
Here is a side by side look at the two common chemistries at the homestead scale.
| Feature | Lead Acid | Lithium Iron Phosphate |
|---|---|---|
| Usable capacity | About 50 percent of rated | 80 to 90 percent of rated |
| Cycle life | 500 to 1,500 cycles | 3,000 to 6,000 cycles |
| Typical lifespan | 3 to 7 years | 10 to 20 years |
| Weight per kWh | Heavy | About a third the weight |
| Up front cost | Lower | Higher |
| Cost per usable kWh over life | Higher | Lower |
| Maintenance | Water top off and venting | Almost none |
| Tolerance of partial charge | Poor | Excellent |
The takeaway is simple. Lead acid looks cheaper at the cash register. LiFePO4 is cheaper over the life of the system. For a real home, lithium is the friendly answer.
A few practical notes on batteries. Keep them in a temperature stable space. Lithium and lead acid both lose capacity in deep cold, and lead acid can vent hydrogen, which needs ventilation. Never mix chemistries in the same bank. Never mix old and new batteries in the same bank. Match age, brand, and chemistry across the whole bank or you will drag the strongest cells down to the weakest.
Warning
Battery banks store a tremendous amount of energy in a small space. A shorted lithium pack or a wet lead acid bank can start a fire that grows faster than you can react. Use the wire gauges the manufacturer specifies. Fuse every positive run within 18 inches of the battery. Install a class T fuse or a quality DC breaker as the main disconnect. The single most common cause of off grid fires is undersized wiring on a battery feed.
Charge Controller and Inverter Basics
The charge controller and the inverter are the two electronics that quietly do the most work. Get them right and your system runs for decades.
Here is a quick comparison of the two charge controller types.
| Feature | PWM | MPPT |
|---|---|---|
| Cost | Low | Higher |
| Efficiency | About 75 percent | About 95 percent |
| Cold weather gains | None | Significant |
| Panel and battery voltage matching | Must match closely | Flexible |
| Best fit | Tiny cabins, RVs | Any real home |
For sizing the controller, take your array's rated wattage and divide by the battery bank voltage to get the maximum amperage. Add 25 percent for cold sunny conditions. A 2,000 watt array on a 48 volt bank works out to about 42 amps, so a 60 amp MPPT controller is the friendly pick.
For the inverter, list your largest simultaneous loads and add them up. A microwave, a well pump, and a few lights together might pull 2,500 watts. Size at least one and a half times that number for surge protection. Watch the continuous wattage rating carefully. Motors and compressors briefly draw three to five times their rated wattage on startup, and a small inverter will trip out under that surge.
Choose a pure sine wave inverter from a reputable brand. Look for a high efficiency rating at low loads, since most off grid homes spend a lot of hours sipping just a few hundred watts. A built in transfer switch is a bonus that simplifies generator integration later on.
What an Off Grid Solar System Really Costs
Solar costs scale to the system you build. Tiny weekend cabin setups can run a few thousand dollars. Whole house off grid builds for a busy family can pass forty thousand. Most homesteaders land somewhere in the middle. Here is a friendly snapshot.
| Tier | System Size | Typical Spend | What You Get |
|---|---|---|---|
| Starter cabin or backup | 0.5 to 1 kW | $1,500 to $4,000 | A few panels, a small lithium bank, a 1,000 to 2,000 watt inverter. Runs lights, a small fridge, and electronics. |
| Small homestead | 2 to 3 kW | $8,000 to $18,000 | A full array, a 10 to 15 kWh lithium bank, an MPPT controller, a 3,000 to 5,000 watt inverter. Runs a real kitchen and a small well pump. |
| Full off grid home | 5 to 10 kW | $25,000 to $50,000 | A large array, 20 to 40 kWh of lithium storage, a robust inverter or stacked pair, monitoring, and a backup generator tie in. |
Here is a cleaner breakdown for the middle tier, which is where most beginners actually land.
| Category | Realistic Spend |
|---|---|
| Solar panels (2 kW array) | $1,800 to $3,500 |
| Battery bank (12 to 15 kWh lithium) | $5,000 to $9,000 |
| MPPT charge controller | $400 to $1,200 |
| Pure sine inverter (3 to 5 kW) | $1,200 to $3,500 |
| Mounting, wiring, breakers, fuses | $1,200 to $2,800 |
| Permits and inspections | $300 to $1,500 |
| Small backup generator (inverter type) | $800 to $2,500 |
| Labor if you hire out the install | $3,000 to $8,000 |
Numbers move quickly based on region, brand choice, and whether you do the install yourself. Build a buffer for surprises. There will be surprises. A patient buyer can also cut a build budget in half over a single winter by buying lightly used panels, surplus charge controllers, and battery modules pulled from data center upgrades.
Winter, Weather, and the 30 Percent Rule
Solar still produces in winter. Just less. A panel that pumps out 400 watts on a sunny June afternoon may only manage 80 watts on a gray December morning. Add snow on the glass and you can lose another big chunk for days at a time. New solar owners almost always underestimate this.
Plan for it from the start. Build the system with 30 percent more panel capacity and battery storage than your spring numbers suggest. Tilt ground mounted panels steeper in winter so snow slides off. Sweep accumulated snow off rooftop panels with a soft brush after each storm. A south facing array at a 45 to 60 degree tilt sheds snow well in most snowy regions.
Cold also slows lithium batteries. Charging a frozen LiFePO4 pack can damage it permanently. Most modern packs include a low temperature cutoff that simply refuses to charge below freezing. The friendly answer is to put your batteries in a conditioned space. An insulated battery box with a small thermostatically controlled heating pad keeps them happy through the worst cold snaps.
A small inverter generator is your insurance policy for the worst weeks. Stored fuel, a properly grounded inlet, and a transfer switch can turn a multi day blizzard from a crisis into an inconvenience. Run the generator a few hours at a time to top up the bank, then let solar finish the job once the sky clears.
A Realistic First Year With Off Grid Solar
Most beginners feel lost because they do not know what to tackle when. Here is a friendly first year arc. Your timing will shift with your climate, but the rhythm holds.
| Month | Focus |
|---|---|
| January | Run an honest energy audit. List every load. Set a realistic budget. |
| February | Read every solar manual you can find. Walk the property for shade. |
| March | Order a small starter kit. A few panels, an MPPT controller, one or two lithium batteries, a modest inverter. |
| April | Install panels. Wire a critical loads subpanel. Test through a planned outage. |
| May | Add capacity. Bring batteries to spec. Verify wire gauges and fuses. |
| June | Live on solar for a week without flipping the main breaker. Track watt hours daily. |
| July | Add the well pump or other big load. Watch surge behavior on the inverter. |
| August | Run a full week of summer loads. Note every weak point. |
| September | Service the generator. Order winter parts. Check chimney for the wood stove if you have one. |
| October | Tilt or sweep panels for winter. Top up battery storage. Test backup fuel. |
| November | First cold spell. Watch how cold affects production and battery performance. |
| December | Review the year. Plan next year's upgrades. Rest. |
For a wider companion calendar that covers water, waste, and heat alongside solar, pair this guide with our off grid living for beginners pillar.
Common Beginner Mistakes With Off Grid Solar
Almost every new off grid homesteader makes a version of the same handful of mistakes. The good news is that you can skip most of them by reading this section twice.
- Oversizing the array before doing an audit. Trim your load first, then size the panels. You can save thousands.
- Undersizing the battery bank. A big array means little if you cannot store the power for a cloudy stretch.
- Ignoring depth of discharge. A 10 kWh lead acid bank is really a 5 kWh usable bank. Plan around what you can actually use.
- Buying a cheap charge controller. A bargain PWM controller wastes the panels you just paid for. Pay once for a quality MPPT.
- Picking a modified sine inverter to save a few hundred dollars. Your electronics, fridge, and well pump will all complain.
- Mixing battery brands, ages, or chemistries. The weakest cell drags the whole bank down. Match everything.
- Skipping permits and inspections. A friendly inspector catches problems you cannot see. Skipping the paperwork is the fastest way to lose your homeowner insurance after a fire.
Avoid those seven and your first year will go better than most.
Permits, Codes, and Insurance
Solar work falls under the National Electrical Code and your local building department. Most counties require an electrical permit for any solar tied to a home, even on an off grid build. The permit is usually inexpensive, and the inspector is usually friendlier than the internet suggests.
A few quick rules carry most of the weight. Use wire and conduit rated for outdoor use. Ground the array and the system properly. Install rapid shutdown gear on rooftop arrays where local code requires it. Label every disconnect clearly so a first responder can shut down the system in a hurry. Keep a wiring diagram with the system.
Insurance is the other place beginners slip. Most homeowner policies require a permitted, inspected solar install before they will cover the building. Call your insurance company before you start. Tell them what you are building. Ask what documentation they want. A ten minute phone call saves a denied claim down the road.
For a state by state look at permits, codes, and off grid friendly laws, browse our state by state homesteading hub. It covers electrical, building, and right to live off grid rules across all 50 states.
Build Skills Alongside Hardware
Hardware decays. Skills compound. The best off grid solar owners are not the ones with the most expensive arrays. They are the ones who can fix what they have.
Here are the skills worth chasing in your first few years.
Multimeter basics. Learn to measure DC voltage, AC voltage, and resistance. Test every panel before you mount it. Spot a failing connection before it overheats. A 30 dollar meter and a free afternoon on YouTube unlock most of the troubleshooting you will ever need.
Wire gauge and fuse sizing. Undersized wire is the leading cause of off grid fires. Learn the basic ampacity tables. Always size the wire for the fuse, not the other way around. When in doubt, go one gauge larger.
Battery care. Each chemistry has its own maintenance rhythm. Lead acid needs distilled water and equalization charges. Lithium needs occasional balancing and a watchful eye on low temperature charging. Both like clean terminals and stable temperatures.
Reading the weather. Off grid homes that pay attention to weather waste fewer watt hours. Watch the forecast, time your laundry for sunny days, and run the dishwasher right after the bank hits full.
Generator maintenance. A backup generator is only useful if it starts. Run it monthly. Change the oil on schedule. Store stabilized fuel. Practice the transfer switch routine before you actually need it at 2 a.m. in a snowstorm.
A working off grid solar setup is a stack of small skills. Each one you add makes the next one easier.
You Can Start This Week
The biggest trap new off grid solar owners fall into is trying to build the perfect system before they begin. Perfection is the enemy of progress on a homestead. A small, working solar setup that runs your fridge and your lights during an outage is more valuable than a beautiful, fully optioned plan that never gets installed.
Pick one thing this week. Run the energy audit. Walk the property for shade. Order a single panel and a small lithium battery and wire up your first critical loads circuit. The first time you watch a fridge hum along on sunshine that fell on your roof an hour ago, the rest of the build stops feeling so abstract.
When you are ready for more, our off grid hub gathers every cluster guide as we publish them. Pair this article with our off grid living for beginners pillar for the bigger picture across water, waste, and heat, and lean on our homesteading for beginners pillar for the broader homesteading roadmap.
You can do this. We are glad you are here.
Frequently Asked Questions
Most thoughtful off grid homes use 5 to 10 kilowatt hours per day, which usually means a 4 to 8 kilowatt array depending on local sun. That is roughly 10 to 20 panels at modern wattages. Your real number depends on your daily watt hours and your average peak sun hours, so an honest energy audit is the right first step.
Yes, and a fridge is one of the easiest big loads to plan around. A modern energy efficient fridge uses about 1,000 to 1,500 watt hours per day. A 400 watt panel and a single small lithium battery can carry that load through a sunny stretch. A chest freezer is even friendlier to off grid solar because it cycles less often.
For a real home, yes. Lithium iron phosphate batteries cost more on day one, but they last three to five times longer, let you use 80 to 90 percent of the rated capacity, charge faster, and need almost no maintenance. The cost per usable kilowatt hour over the life of the bank is significantly lower.
Yes, just less than in summer. Short days, low sun angles, and snow on the glass all reduce output. Plan for 30 percent more capacity than a spring sized array, tilt panels steeper in winter, sweep snow off after storms, and keep a small inverter generator on hand for the worst weeks.
Your battery bank carries the home overnight. If you sized the bank to hold 2 to 3 days of usage, a normal night barely makes a dent. By morning the sun fills the bank back up. A battery monitor that shows state of charge is the friendly way to keep an eye on the rhythm.
For a year round home, yes. A small inverter generator is the cheapest insurance against a long cloudy stretch in winter. Most off grid homesteaders run their generator only a handful of hours per year, but those hours matter. Plan for it from the start with a transfer switch and a clean inlet.
Almost always, yes. Most counties require an electrical permit for any solar tied to a home. Insurance companies require permitted, inspected installs before they will cover the building. The permit is usually inexpensive, and the inspection is usually friendly. Skipping it is the fastest way to lose insurance coverage after a fire.
Start with a small starter kit. One or two panels, an MPPT charge controller, a single lithium battery, and a 1,000 to 2,000 watt pure sine inverter. The total cost can land under 1,500 dollars. Wire it to a critical loads subpanel with a fridge, a few lights, and a router. You will learn more in one season than any guide can teach you.

Cole
Founder & Lead Researcher
Cole is the founder of Plan Your Homestead. He works in clinical research and brings a research-first lens to every guide on the site, drawing on a long family line of farmers for grounded, practical perspective.
More in Off-Grid
More articles coming soon. Check back for new off-grid content.