Backyard beekeeping is having a moment, and for good reason. One healthy hive can hand you jars of honey, beeswax for projects, and a garden that explodes with fruit. This guide walks you through everything you need to start your first hive, from picking the right box to landing a smooth first season.
Why Bees Belong on a Homestead
Bees pull more weight on a small property than almost any other animal. A single colony pollinates roughly a two mile radius around your homestead. That means bigger tomatoes, heavier berry bushes, and apple trees that actually set fruit.
You also get honey. A healthy hive in a good location can produce 30 to 60 pounds of surplus honey in a typical year. Add in beeswax for candles, salves, and lip balm, and the hive starts paying for itself by season two.
The best part for busy homesteaders is the time commitment. A hive needs about an hour every two weeks during the active months, and almost nothing in winter. Compare that to chickens or goats, and bees feel like a quiet, low maintenance gift.
How a Honey Bee Colony Works
Every hive is a single super organism made up of thousands of bees with very different jobs. Knowing the basic cast of characters makes every later decision easier.
The queen is the only bee laying eggs. She can lay up to 2,000 eggs a day in peak season. A healthy queen is the heartbeat of your hive, and most colony problems trace back to her.
Worker bees do everything else. They are all female. They clean cells, feed brood, build comb, forage, and guard the entrance. Workers live about six weeks in summer and several months in winter.
Drones are the male bees. Their only job is to mate with queens from other colonies. They cannot sting, and the colony kicks them out before winter to save resources.
Brood is the next generation. Eggs hatch into larvae in three days, get capped after about nine days, and emerge as adult bees around day 21. When you inspect a hive, you are really checking on the queen and her brood.
Choosing Your First Hive
You will hear strong opinions about hive types. Each one has fans, and any of them can work. Here is the honest breakdown.
Langstroth
The Langstroth is the standard rectangular box hive you picture in your head. It uses removable frames that stack vertically in boxes called supers. Almost every supplier, every beekeeping book, and every local mentor uses this style.
The big advantage is parts. Frames, foundation, replacement boxes, and accessories are everywhere. If you have a problem, someone within an hour of you has likely solved it on a Langstroth.
The trade off is weight. A full honey super can weigh 60 to 80 pounds, which makes inspections and harvests a workout.
Top Bar
A top bar hive is a long horizontal trough with bars across the top instead of frames. Bees build natural comb hanging down from each bar. You inspect by lifting one bar at a time, never picking up a heavy box.
Top bars are cheaper to build, easier on your back, and work well for hobbyists who do not care about maximum honey. The downside is lower honey yields and fragile comb that can break if you handle it roughly.
Warre
The Warre hive is a tall narrow stack designed to mimic a hollow tree. You add new boxes from the bottom and harvest from the top. It needs less hands on management but is harder to inspect.
Warre hives appeal to beekeepers who want a more natural approach. They are not the easiest place to start because most learning resources assume you are running a Langstroth.
Our Recommendation
Start with a Langstroth. You will have the easiest time finding equipment, finding mentors, and finding answers when something goes sideways. You can always experiment with other styles in year three.
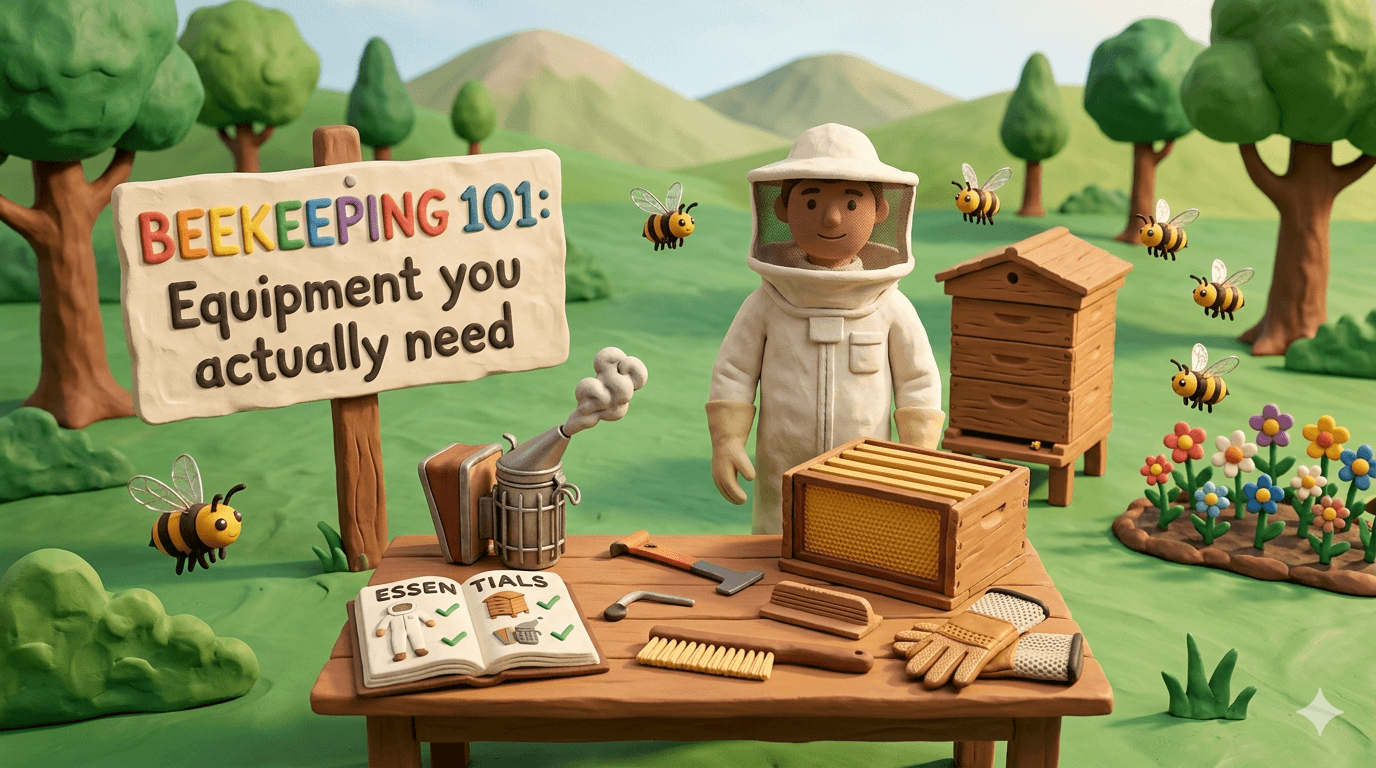
The Equipment You Actually Need
Walk into any beekeeping store and you can spend $1,500 before lunch. You do not need most of it. Here is the short list that gets you through year one.
Hive bodies and frames. A starter setup is one bottom board, two deep brood boxes, ten frames per box, an inner cover, and an outer telescoping cover. This is your bees' house.
Bee suit, gloves, and veil. A full suit with an attached veil is the safest bet for your first season. You can downgrade to a jacket later once you know how your bees behave.
Smoker. A stainless smoker calms the bees during inspections. Skip the cheap ones; a quality smoker lasts decades.
Hive tool. This is a flat metal pry bar made for prying frames apart. Buy two, because you will lose one in the grass on day one.
Frame grip. This is a spring loaded clamp that lets you lift frames cleanly. Optional, but worth the $15.
Feeder. New colonies need sugar syrup until they build out comb. An entrance feeder or top hive feeder both work fine.
Tip
A good starter kit from a reputable supplier will run you $250 to $400 and includes everything above. Piecing it together yourself rarely saves money your first year, and you risk ending up with mismatched parts. Save the DIY runs for year two.
You can skip the honey extractor, the queen marking kit, the refractometer, and the fancy beetle traps for now. Buy them when you actually need them.
Getting Your Bees
Bees are not optional accessories you grab at the feed store. You order them in advance, usually months ahead, and they arrive in spring. You have three real ways to get your first colony.
Package bees. A package is a screened box of about three pounds of bees, roughly 10,000 workers, plus a separately caged queen. You shake them into your empty hive on installation day. Packages are the cheapest option at around $150 to $200 and the easiest to ship.
Nucleus colony (a "nuc"). A nuc is a small working colony on five frames, complete with brood, honey, and a laying queen. You transfer the frames straight into your hive. Nucs cost more, usually $200 to $300, but they get going much faster than a package.
Swarm capture. A swarm is free bees that have left their old hive looking for a new home. If you get on local swarm lists, you may get a call. This is the cheapest path but the least predictable for a true beginner.
If you have the budget, start with a nuc. The colony is already established, the queen is proven, and you skip several weeks of nervous waiting.
Warning
Order your bees in January or February for spring delivery. Reputable suppliers sell out fast, and waiting until April usually means scrambling for whatever is left or skipping the year entirely.
The best place to find a good supplier is your local bee club. They know which producers in your region are reliable, which queens overwinter well, and who to avoid.
Setting Up Your Apiary
Apiary just means the spot where your hives live. The site you pick affects how strong the colony grows and how much your neighbors love or hate you.
Aim for morning sun. Hives that warm up early get bees flying earlier in the day, which means more foraging time. A spot that gets sun by 9am is ideal.
Block the wind. A fence, hedge, or row of evergreens behind the hive cuts cold winter wind and helps the colony hold heat. Bees are not afraid of cold, but they hate constant drafts.
Provide a water source within 50 feet. Bees need water year round. If you do not give them one, they will find your neighbor's pool, dog bowl, or kiddie pool, which is exactly the call you do not want.
Point the entrance away from foot traffic. Bees fly out in a beeline at the entrance. If that beeline crosses your back porch, you have a problem. Aim them at a fence or open field instead.
Check local rules. Most cities and towns allow backyard hives, but many have setback rules, hive count limits, or registration requirements. A 10 minute call to your county extension office saves a lot of headaches.
Your First Year With Bees
Beekeeping follows the seasons. Here is roughly what your first 12 months look like.
Spring (install month). You hive your package or nuc, feed sugar syrup until they build comb, and check weekly to confirm the queen is laying. Resist the urge to dig in too deep. A quick lift and look is enough.
Late spring to summer. The colony explodes. Add a second brood box once they fill the first. Inspect every two weeks. Watch for swarm cells, which are queen cells along the bottom of frames. If you see them, you have a few days to act.
Mid summer to early fall. This is the main honey flow. Add honey supers above the brood boxes. Most year one colonies should not be harvested heavily, but you may pull a small surplus if they are strong.
Fall. Test for varroa mites and treat if needed. Mites are the single biggest killer of backyard hives. Make sure the colony has 60 to 80 pounds of honey stored for winter, or feed sugar syrup to top them off.
Winter. Hands off. The bees cluster inside the hive, eat their stores, and stay alive by vibrating their wing muscles. Your only job is to make sure the entrance stays clear of snow and to check the weight of the hive on warm days.
Early spring. If they made it, you have a strong colony heading into year two with a real shot at a serious honey harvest.
Costs to Get Started
Here is a realistic startup budget for one Langstroth hive in year one.
| Item | Cost |
|---|---|
| Complete hive starter kit (boxes, frames, covers) | $250 to $400 |
| Bee suit, gloves, veil | $80 to $150 |
| Smoker | $30 to $50 |
| Hive tool (x2) | $20 |
| Frame grip | $15 |
| Feeder | $15 to $25 |
| Bees (nuc or package) | $150 to $300 |
| Sugar for spring feeding | $20 |
| Mite treatment for fall | $25 |
| Total | $605 to $1,005 |
Most beginners land in the $600 to $800 range. You can shave that by building your own hive boxes from cedar or pine, which drops the kit cost to around $100, but plan to spend a weekend in the shop.
Common Beginner Mistakes
These are the rookie errors that take down most first year hives. Avoid them and your odds shoot way up.
- Inspecting too often. Every time you open the hive, you set the colony back a day. Weekly is plenty. Every two weeks is better once they are established.
- Skipping mite treatment. Varroa mites kill more hives than anything else. Test in late summer, treat if you find more than three mites per 300 bees, and treat again if needed before winter.
- Harvesting honey too early. Year one bees need their honey to survive winter. Pull only what is truly surplus, and never if the hive feels light.
- Putting the hive in the wrong spot. A shaded, damp, windy site stresses the colony all season. Pick the location before you order bees.
- Going in without a smoker lit. A few puffs of cool smoke calms the bees. Skipping it is the fastest way to get stung and to wreck your inspection.
- Going solo. Find a local bee club within your first month. Mentors save you hundreds of dollars and several panicked phone calls.
Frequently Asked Questions
Frequently Asked Questions
Plan on zero. Your bees need their honey to survive winter, and a year one colony is still building comb and growing. Strong colonies may give you 10 to 20 pounds of surplus, but the real harvest comes in year two and beyond, when 30 to 60 pounds is normal.
Yes, honey bees are docile compared to wasps or yellow jackets. They sting only when they feel the hive is threatened. Place the hive away from foot traffic, point the entrance at a fence or open field, and your kids and dogs can play in the yard without issue.
It depends on where you live. Some cities require registration, others have hive count limits or setback rules from property lines. Call your county extension office or city hall before you order bees. Most areas allow at least one or two hives in a residential yard.
Roughly an hour every two weeks during the active season, from spring through early fall. In winter, you can go a month or more without checking. The biggest time investment is the first install day and the fall harvest, both of which run a few hours.
A swarm is when about half the colony leaves with the old queen to find a new home. It is natural and not a disaster, but you lose roughly half your bees and most of your honey crop. Swarms can be prevented by giving the colony enough room and watching for swarm cells during inspections.
Absolutely. Urban beekeeping is booming, and city bees often outperform rural ones because of diverse flowering plants in yards and parks. Just check local rules, place the hive thoughtfully, and consider keeping the colony to one or two hives to keep neighbors happy.
Build your own hive boxes from rough cut cedar or pine, buy a basic suit and smoker secondhand from a local club, and split a nuc with another beginner. This path can get you started for $300 to $400 instead of $700, but expect to put in extra time and lean on a mentor.
Your First Hive Awaits
Beekeeping is one of those rare hobbies that gives back more than it asks. You feed your garden, harvest your own honey, and watch a tiny ecosystem run itself in your backyard. The setup is real work, but once the hive is in place, the bees mostly do the rest.
Start with one Langstroth hive, order your bees this winter, and find a local club before spring. By next fall, you will have your own jars on the shelf and a much better answer to "what should I add to the homestead next?"
For more on building out your homestead, browse our full Animals hub, see how to predator proof your chicken coop, or read our guide to Nigerian Dwarf goats. And if you are still piecing your homestead plan together, our home page is the best place to start.

Cole
Founder & Lead Researcher
Cole is the founder of Plan Your Homestead. He works in clinical research and brings a research-first lens to every guide on the site, drawing on a long family line of farmers for grounded, practical perspective.
More in Animals
More articles coming soon. Check back for new animals content.