Dry, seasoned firewood ready on the worst night of the year. That is what a good wood shed gives you. No more flipping a soggy tarp in the dark. No more chasing rolling logs across an icy yard.
This guide walks you through a simple lean-to firewood storage shed you can build in a single weekend. You will get a clear materials list, the right tools, exact cut sizes, and step by step build instructions. The basic shed costs around $80 to $250 depending on how much lumber you can salvage. Built right, it holds a full cord of split wood, sheds rain and snow, and lets air move through to season the next round.
If you already have a compost setup nearby, take a peek at our free three-bin compost plans for a matching weekend build. Otherwise, grab a tape measure and let us get into it.
What Is a Firewood Storage Shed?
A firewood storage shed is a small, open sided structure built to do two jobs at once. It keeps rain and snow off your wood. And it lets wind move through the stack so that wet, freshly split rounds can dry into hot, clean burning fuel.
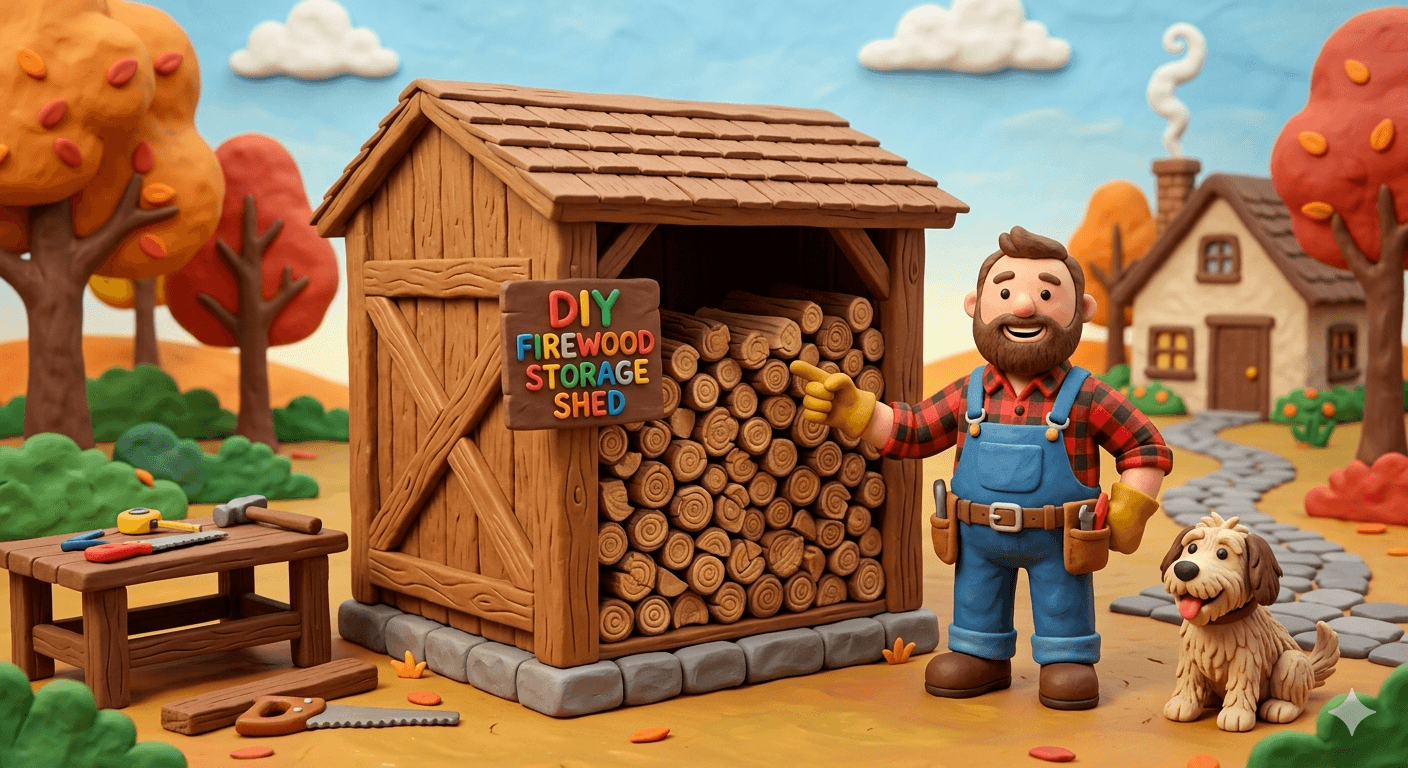
The classic homestead version is a lean-to. One tall back wall, one shorter front wall, and a single sloped roof in between. Open sides, a raised floor, and enough overhang to keep the bottom row dry in a sideways rain.
A free-standing shed adds a peaked roof and a fourth wall, which looks tidier but costs more and slows airflow. For most homesteads, the lean-to wins on price, build time, and seasoning speed.
Why a Wood Shed Beats a Tarp Pile
A blue tarp over a stack of rounds works for a season. Maybe two. After that, the tarp shreds, the wood pile leans, and the bottom row turns to mulch.
A real shed solves all of that:
- Faster seasoning. Open sides and a raised floor let air move freely, so green wood dries in 6 to 12 months instead of 18.
- Less rot. A raised floor keeps your bottom row off the dirt, where rot and bugs start.
- Easier loading. No flapping tarp, no cold puddle on the top of the stack.
- Safer pest distance. A defined structure away from the house keeps mice, termites, and carpenter ants at bay.
- Cleaner yard. No tarps slumped under snow. No tarp shreds in the bushes by April.
- Better burns. Drier wood means hotter fires, less creosote, and a cleaner chimney.
- It lasts for years. A simple cedar or treated lean-to runs 15 plus years with basic care.
If you heat with wood, a shed pays for itself in faster seasoning and lower chimney sweep bills inside two winters.
How Much Firewood Will It Hold?
Sizing is mostly about cords. One full cord is a stack 4 ft tall by 4 ft deep by 8 ft long, or 128 cubic feet of split wood. A face cord (also called a rick) is one third of that, the same 4 ft by 8 ft footprint but only one log length deep.
For most households, a 6 ft tall by 4 ft deep by 8 ft long shed is the sweet spot. That holds roughly one full cord with a little headroom for kindling and a top off layer. If you burn through more than two cords a winter, build two sheds side by side rather than one giant one. Smaller sheds dry wood faster.
The plans below target a 6 ft (back) by 5 ft (front) by 4 ft deep by 8 ft long lean-to. That gives you about 160 cubic feet of usable storage, room for one full cord plus a bit, and a roof slope that sheds rain and snow without sagging.
Where to Site the Shed
Where you put the shed matters almost as much as how you build it.
Aim for these conditions:
- Full sun, especially morning sun. Sun on the open side dries wood fast.
- Prevailing wind across the open face. That carries moisture out of the stack.
- At least 20 ft from the house. Wood piles attract bugs you do not want in your siding. Local fire codes often require this distance too. Check yours before you build.
- Off the foundation and out from under trees. Tree drip rots roofs. Foundations stay drier without a wood pile leaning on them.
- Near the path you actually walk in winter. A shed 100 ft uphill in deep snow gets used a lot less than one 30 ft from the back door.
A south or west facing open front gets the best mix of sun and wind in most climates.
Warning
Many local fire codes require firewood to be stored a minimum distance from the house, and some HOAs restrict shed size or placement. Check your municipal code and HOA rules before you cut a single board.
Tools You Will Need
You can build this with basic tools. Here is the short list.
Essentials:
- Cordless drill and impact driver
- Circular saw
- Tape measure, pencil, and a square
- 4 ft level
- Sledgehammer or post driver
- Post hole digger or auger (if setting posts in concrete)
- Hammer
- Tin snips (for metal roofing)
- Heavy work gloves and safety glasses
- Sturdy work boots
Optional but nice:
- Chop saw or miter saw for clean cross cuts
- Reciprocating saw
- Chalk line
- Step ladder for the roof
- Cordless brad nailer for trim
A helper makes the wall framing twice as fast. This is a good one to share a beer over.
Materials List and Cost Breakdown
Costs are approximate and vary by region. The lower numbers assume some salvage. The higher numbers assume new lumber from a big box store.
| Item | Quantity | Approx. Cost |
|---|---|---|
| 4x4 x 8 ft pressure treated posts | 4 | $60 |
| 16 in solid concrete deck blocks | 4 | $32 |
| 2x6 x 8 ft pressure treated (floor frame) | 4 | $44 |
| 2x4 x 10 ft (front and back wall plates) | 4 | $40 |
| 2x4 x 8 ft (studs and rafters) | 14 | $84 |
| 1x4 x 8 ft cedar or pine (side slats) | 16 | $96 |
| 5/4 x 6 deck boards (floor sleepers) | 6 | $60 |
| 26 in x 8 ft corrugated metal roof panels | 3 | $90 |
| Roofing screws with rubber washers (1 lb) | 1 | $14 |
| Hurricane ties or rafter ties | 8 | $16 |
| 3 in exterior screws (5 lb box) | 1 | $30 |
| 2.5 in exterior screws (1 lb box) | 1 | $9 |
| 16d galvanized framing nails (5 lb box) | 1 | $14 |
| Drip edge, 10 ft | 1 | $10 |
| Exterior wood stain or sealer, 1 gal | 1 | $35 |
| Total new | ~$634 | |
| Total with heavy salvage | ~$80 to $200 |
If you have a stack of free pallets and a pile of old metal roofing, you can finish this build for under $100. If you buy everything new at retail prices, expect closer to $250 once tax is included. The table above shows the middle ground.
Tip
Ask local roofers and pole barn builders for short lengths of leftover metal roofing. Pieces under 8 ft are often free or close to it. Used barn metal works great for a wood shed where small dings do not matter.
Step by Step Build Instructions
Plan a full Saturday for the build. Sunday for the roof and finishing.
Step 1: Lay Out and Level the Site
Pick your spot using the siting tips above. Clear sod, weeds, and rocks from a 5 ft by 9 ft footprint.
Mark the four corners with stakes. Pull diagonals corner to corner with a tape measure to check for square. The two diagonals should match within a half inch. Adjust until they do.
Add 2 inches of crushed gravel inside the footprint and rake it level. Gravel keeps the base dry, drains water away, and makes the deck blocks sit flat.
Step 2: Set the Deck Blocks
Place a 16 in concrete deck block at each of the four corners. Use a long board and a 4 ft level to check that all four blocks sit at the same height.
Add or remove gravel under each block until everything is dead level. This step takes the most patience. Skip it and your shed will lean for the rest of its life.
Step 3: Build the Floor Frame
Cut two 2x6 x 8 ft boards as side rails. Cut three 2x6s to 45 inches as joists. Build a simple ladder frame, side rails on the outside, joists evenly spaced inside.
Use 3 inch exterior screws or 16d galvanized nails at every joint. Set the finished frame on top of the four deck blocks.
Check level again. Shim with cedar shingles if needed. Once level, tack the frame to the blocks with masonry adhesive or simply let gravity hold it.
Lay your 5/4 deck board sleepers across the joists, spaced about 4 inches apart. These hold your firewood off the floor frame so air can move under the bottom row.
Step 4: Set the Posts
Cut two of the 4x4 posts to 7 ft (back wall) and two to 6 ft (front wall). Stand each post inside a corner of the floor frame and screw the bottom of the post into the side and end rails with three 3 inch exterior screws on each face.
Plumb each post with a 4 ft level. Brace temporarily with scrap 1x4s nailed to stakes in the ground until the walls go up.
If your site is exposed to high wind, dig 24 inch deep post holes at each corner instead and set the posts in concrete. The shed becomes much harder to move but rides out storms better.
Step 5: Frame the Back and Front Walls
Cut a 2x4 x 8 ft as the back top plate. Toe screw it across the tops of the two 7 ft back posts. Repeat with a 2x4 x 8 ft front top plate across the two 6 ft front posts.
Add a single mid height 2x4 horizontal stringer on each side wall, about 36 inches off the floor. This stringer becomes the nailer for your slatted side walls in step 7.
The 1 ft height difference between the back wall and the front wall gives you a roughly 1 in 8 roof slope. That sheds rain fast and handles snow loads up to about 30 lb per square foot in most regions.
Step 6: Cut and Install the Rafters
Cut three 2x4 x 5 ft rafters. Mark a plumb cut on the high end and a plumb cut on the low end so the rafter sits flat on both top plates.
Lay the first rafter across the front and back top plates at one end. Adjust until the overhang is even on both sides, roughly 6 inches off the back and 6 inches off the front. Screw down with a hurricane tie at each end.
Repeat with a center rafter and a third rafter at the other end. Triple check that the tops are level across the run with a string line. A wavy roof line shows up the first time it rains.
Step 7: Sheath and Roof
Lay the three corrugated metal roofing panels across the rafters. Each panel runs the 5 ft front to back direction. Overlap each adjacent panel by one full corrugation.
Drive a roofing screw with a rubber washer through every other corrugation crest into each rafter. Crest screws (not valleys) keep water out. Add drip edge along the front and back eaves and screw it down through the metal.
Trim any overhang with tin snips. Wear gloves. Cut metal edges are sharp.
Step 8: Slat the Side Walls and Back
The back wall and the two short side walls get slatted with 1x4 boards. Leave a 1 inch gap between every board. Those gaps are not laziness. They are your airflow, and the entire reason a shed seasons wood faster than a tarp.
Run the slats horizontally on the side walls, screwed into the corner posts and the mid height stringer. On the back wall, run them horizontally too, screwed into the back posts.
Leave the front wide open. That open face is where you load wood, and where the prevailing wind sweeps the stack.
Tip
Paint or stain the inside of the back wall a dark color before you slat it. The dark surface absorbs sun on cold days and adds a few extra degrees of drying heat to the back of the stack.
Step 9: Optional Kindling Cubby
A small kindling shelf on one end keeps your dry tinder separate from the main stack and easy to grab.
Cut three pieces of 1x6 to 18 inches. Screw a U shaped box to the inside of one end wall, about 36 inches off the floor. Slat it open on top so kindling stays dry but breathes.
Tuck a small bundle of newspaper or fatwood inside and you have a one stop fire starting station.
Step 10: Stain, Seal, and Finish
Wait a week or two if you used pressure treated lumber so the wood can dry. Then apply a single coat of exterior stain or sealer to all exposed wood. Pay extra attention to the cut ends, which soak up water fastest.
Touch up the stain every 2 to 3 years. A 30 minute reseal each spring doubles the life of the shed.
That is the full build. Stand back and admire your work.
Lean-To vs Free-Standing: Which Should You Build?
Both designs work. The right choice depends on your site and how much wood you burn.
Build a lean-to if:
- You burn one to two cords a winter
- You have a tight spot along a fence line or shed wall
- You want the cheapest, fastest build
- You want the best airflow and fastest seasoning
Build a free-standing shed with a peaked roof if:
- You burn three plus cords a winter and need a divided two cord shed
- You have an open lot with no nearby structures to lean against
- You want a tidier look that matches a barn or coop
- You expect heavy snow loads above 40 lb per square foot
The 6 ft x 4 ft x 8 ft lean-to in this guide is the right answer for most homesteads. If you need more capacity, build two side by side rather than one twice the size. Smaller sheds always dry wood faster.
Seasoning Tips and Stacking Patterns
Filling the shed correctly is just as important as building it.
A few rules that make a big difference:
- Split before you stack. Whole rounds dry slowly. Splits dry fast because the moisture leaves through the open faces.
- Stack bark side up on the top row. Bark sheds water, keeping rain out of the top of the pile.
- Stack bark side down on lower rows. That lets moisture wick down and out.
- Leave space between the back wall and the stack. Even an inch helps air move.
- Crisscross the ends in stable towers. Each end of the row gets a small log cabin style stack to lock the pile in place.
- Try a Holz Hausen for round shape. A round, self supporting stack drains water like a thatched roof and seasons fast. It works best outside the shed.
Wood burns best when its moisture content is below 20 percent. A $20 pin style moisture meter from the hardware store takes the guesswork out. Stick the pins into a freshly split face and read the number.
Most hardwoods take 9 to 18 months in a good shed. Softwoods dry in 4 to 8 months. Oak is the slowest. Plan to split and stack oak two summers ahead of when you want to burn it.
Maintenance Through the Seasons
A wood shed is low maintenance, but a few habits keep it standing for decades.
Spring: Sweep out bark, dust, and any leftover splinters. Pull anything that has rotted or molded on the bottom row. Top off the stain on cut ends.
Summer: Reseal the roof screws if any rubber washers look cracked. Knock back any weeds growing up around the base.
Fall: Top off the shed with the season's split wood. Stack heaviest, longest seasoned wood at the front so it is grabbed first. Newer rounds go in the back to keep drying.
Winter: Brush snow off the roof after big storms. A foot of wet snow on a lean-to roof can total 200 to 400 pounds. The roof can take it, but clearing it adds years.
Inspect the side slats every spring. Replace any that have rotted. The shed itself should run 15 to 25 years on basic upkeep.
Common Mistakes to Avoid
A few traps to watch for, especially on your first build.
- Building right against the house. Pests, fire risk, and code issues all stack against you.
- No raised floor. Wood on dirt rots and bugs win.
- Solid side walls. Without slat gaps, the shed turns into a humidity box and seasoning slows to a crawl.
- Tiny roof overhang. Less than 4 inches of overhang means the bottom row gets soaked in sideways rain.
- Skipping the level check. A leaning shed turns into a falling shed within a few winters.
- Stacking green wood in the front and seasoned in the back. You will dig past good wood to get green, and the green stuff will not dry behind the wall.
- Pressure treated lumber where it touches the firewood. The treatment chemicals are not meant to leach into stuff you burn. Keep treated wood to posts and floor frame only.
Avoid these and your shed will keep dry, hot wood ready for every cold night for years.
Frequently Asked Questions
Frequently Asked Questions
Most hardwoods need 9 to 18 months in a good shed with open sides and a raised floor. Softwoods like pine and fir can be ready in 4 to 8 months. Oak is the slowest, often needing 18 to 24 months. A $20 moisture meter is the only sure test. Wood burns clean when it reads below 20 percent.
It is best not to. Wood piles attract termites, carpenter ants, and mice that move into siding and fences. Most fire codes also require a setback from the home. Build the shed at least 20 ft from the house and a foot or two off any fence so air can flow behind it.
It depends on your area. Many municipalities allow accessory structures under 100 to 120 square feet without a permit, and a 4 ft by 8 ft lean-to fits inside that limit. HOAs may have stricter rules on size, color, and placement. Check both before you start.
Dense hardwoods like oak, hickory, sugar maple, and ash burn the longest and hottest. Softwoods like pine, fir, and spruce light easily but burn fast and leave more creosote. A mix is ideal. Use softwoods for kindling and shoulder season fires, hardwoods for cold winter nights.
Keep the stack 20 ft from the house, raise the floor at least 4 inches off the ground, and never spray firewood with insecticides since you will burn that smoke later. Rotate stock by burning the oldest wood first. Avoid treating the inside of the shed with chemicals.
The roof framing in this plan, with 2x4 rafters on 24 inch centers, handles up to about 30 lb per square foot of snow load. That covers most of the lower 48. In heavy snow regions, upgrade the rafters to 2x6 on 16 inch centers and use 5/8 inch plywood under the metal for added stiffness.
Ready to Build Your Firewood Storage Shed?
That is the whole build. A weekend of work, mostly basic lumber, and a structure that pays you back every cold night for the next 20 winters.
For more weekend builds, browse the full DIY hub. And if you are still planning out the rest of your homestead winter prep, take a look at our free three-bin compost plans for the next project on the list.

Cole
Founder & Lead Researcher
Cole is the founder of Plan Your Homestead. He works in clinical research and brings a research-first lens to every guide on the site, drawing on a long family line of farmers for grounded, practical perspective.
More in DIY
More articles coming soon. Check back for new diy content.