Free water falls on your roof every time it rains. A simple rainwater catchment barrel lets you grab some of that water and save it for your garden. The whole build takes a Saturday afternoon and a few basic tools.
This guide walks you through plumbing a single 55 gallon barrel from a downspout. You will get a clear materials list, a step by step build, and the simple plumbing that turns a plain plastic drum into a real water source. Total cost runs about $80 to $150 depending on what you can source secondhand.
If you plan to water raised beds with this rig, take a look at our free raised garden bed plans too. Otherwise, grab your drill and let us get into it.
What Is a Rainwater Catchment Barrel?
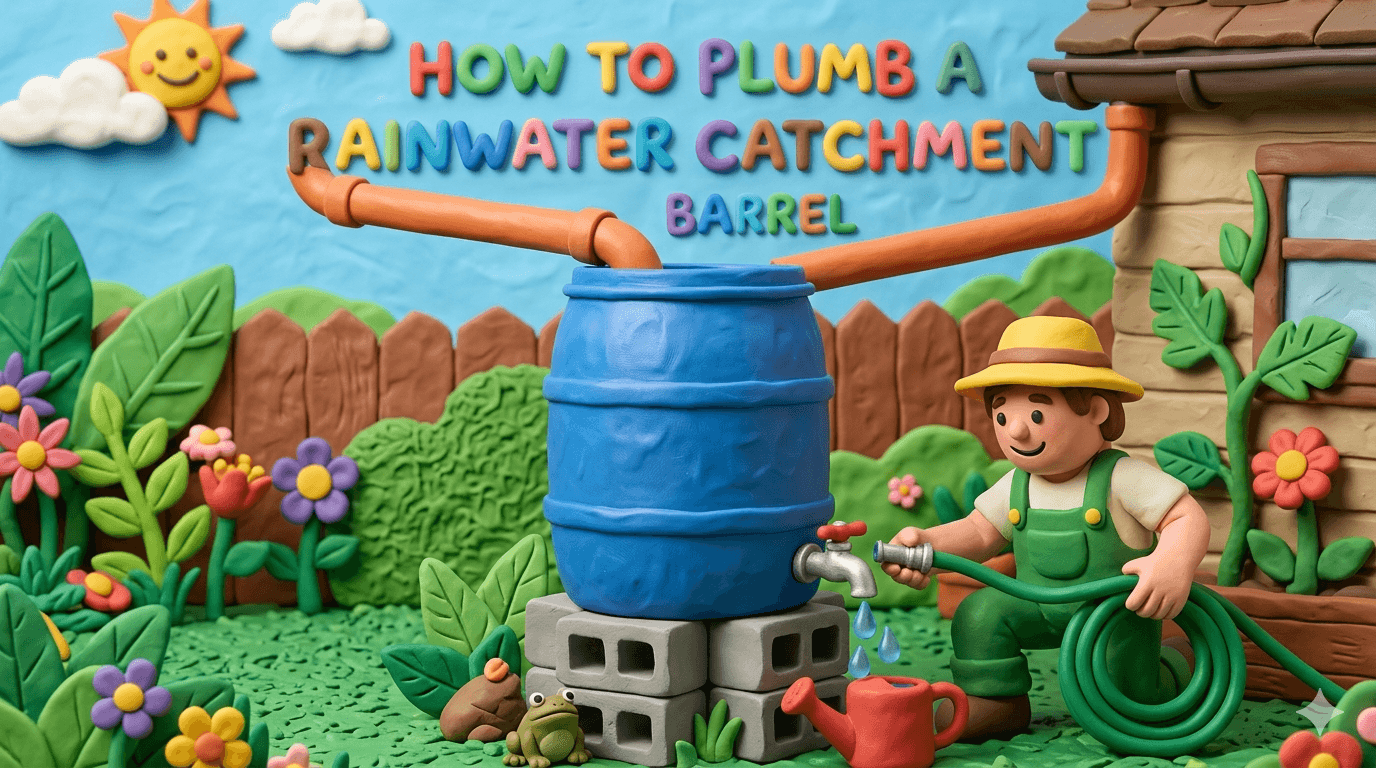
A rainwater catchment barrel is a sealed drum that collects runoff from your roof. Rain hits the roof, runs into the gutter, flows down a downspout, and drops straight into the barrel. A spigot near the bottom lets you fill watering cans or hook up a hose.
Most home setups use a 55 gallon food grade plastic barrel. That size fills up fast in even a light rain, costs very little, and fits behind a downspout without taking over the yard.
A good barrel has four basic plumbing points. An inlet on top where the water goes in. A screened opening to keep mosquitoes and debris out. An overflow near the top so the barrel never bursts. And a spigot near the bottom so you can use the water.
Get those four right and you have a system that just works.
Why Catching Rainwater Is Worth It
A single 55 gallon barrel is small, but the payoff is bigger than the volume.
- Free, soft water for your garden. Rainwater has no chlorine and no minerals. Plants love it.
- Lower water bills. Every gallon you catch is a gallon you do not pay for.
- Drought resilience. Even one barrel covers a few dry days in summer.
- Less runoff erosion. Slowing the flow off your roof protects your yard and any downhill garden beds.
- A first step toward off grid water. Once you trust one barrel, scaling up is just more barrels.
If you grow your own food, the upgrade pays for itself in a season or two. You will also notice that plants watered with rainwater simply look better.
Is It Legal to Catch Rainwater?
In most of the United States, yes. A handful of western states have rules about how much you can collect or what you can do with it. A few even offer rebates.
Before you build, check your state and local rules. Our state by state homesteading guides cover the basics, but always confirm with your county or city water authority. Most rules only kick in at much bigger volumes than a single barrel.
How Much Water Will You Actually Catch?
Use this simple formula:
Roof area in square feet x rainfall in inches x 0.623 = gallons collected.
Worked example. A 1,000 square foot roof in a 1 inch rainfall produces about 623 gallons. A typical downspout drains a quarter to a third of your roof. So one downspout in that storm dumps roughly 150 to 200 gallons.
Your 55 gallon barrel will fill up in the first 10 minutes of a real storm. That is why the overflow outlet is so important. Skip it and the barrel will pop a seam or push water back up the gutter and into your siding.
Tools You Will Need
You can build this with very basic tools. Here is the short list:
- Cordless drill with a full bit set
- 1 inch hole saw or spade bit (for the spigot)
- 2 inch hole saw (for the overflow)
- 4 inch hole saw or jigsaw (for the inlet)
- Adjustable wrench
- Tape measure and pencil
- Level
- Hacksaw (for cutting the downspout)
- Tin snips (if your downspout is metal)
- Caulk gun
- Heavy work gloves
- Safety glasses
A step ladder helps if your downspout drops more than 5 feet from the gutter.
Materials List and Cost Breakdown
Costs are approximate. Used food grade barrels are easy to find for $15 to $30 if you ask around.
| Item | Quantity | Approx. Cost |
|---|---|---|
| 55 gallon food grade plastic barrel (opaque) | 1 | $15 to $40 |
| 3/4 in brass spigot with threaded shank | 1 | $12 |
| 3/4 in bulkhead fitting (or rubber washer kit) | 1 | $8 |
| 1 in PVC bulkhead fitting (overflow) | 1 | $7 |
| 1 in PVC elbow and short pipe stub | 1 set | $5 |
| Downspout diverter kit (3 in x 4 in or round) | 1 | $30 to $45 |
| 1/4 in stainless mesh screen, 12 in x 12 in | 1 | $6 |
| Food grade silicone sealant | 1 tube | $7 |
| Concrete blocks or 4x4 cinder block stand | 4 to 6 | $20 |
| Pressure treated 2x4 (8 ft) for stand top | 2 | $14 |
| 3 in exterior wood screws (small box) | 1 | $6 |
| First flush diverter kit (optional) | 1 | $25 to $40 |
| Total | ~$80 to $150 |
If you skip the first flush diverter and find a free barrel, you can finish this build for under $60.
How to Pick the Right Barrel
Not every barrel is a rain barrel. Pick the wrong drum and you can leach chemicals into your soil or grow algae you do not want.
Look for these features:
- Food grade only. The barrel should have once held food, juice, vinegar, or olives. Never use a drum that held fuel, solvents, or unknown chemicals.
- Opaque, dark color. Light blocks algae growth. Blue, black, or dark green barrels work well. Translucent white barrels grow green sludge in a week.
- 55 gallon size. Big enough to be useful, small enough to handle alone.
- Removable or open top. Makes cleaning much easier. A closed top barrel works too if you cut a clean inlet hole.
- Sturdy bottom. Check for cracks or thin spots. A full barrel weighs over 450 pounds.
Good places to source barrels:
- Car wash supply companies
- Beverage bottlers and breweries
- Olive oil and vinegar suppliers
- Local farms and homesteaders on Facebook Marketplace
- Restaurant supply auctions
Always rinse a used barrel several times before you use it, even if it held something harmless.
Step-by-Step Build Instructions
Plan on a relaxed afternoon for the whole job. Most of the time goes into the stand and the downspout cut, not the plumbing.
Step 1: Pick the Site and Build a Sturdy Stand
The barrel goes right under a downspout. Pick one closest to your garden.
A full 55 gallon barrel weighs about 460 pounds. The stand has to be strong, level, and high enough that you can fit a watering can under the spigot. Aim for 16 to 24 inches off the ground.
Build a simple stand from concrete blocks. Stack two rows of blocks in a square pattern, large enough to support the full base of the barrel. Top the blocks with two pressure treated 2x4s laid side by side and screwed together. Use a level on top of the 2x4s and shim with scrap if needed.
A wobbly stand is the number one cause of rain barrel failure. Take the time to get this right.
Step 2: Install the Spigot Near the Bottom
The spigot is your access point. Set it about 3 to 4 inches up from the bottom. That leaves room for sediment to settle below the outlet.
Mark the spigot location with a pencil. Drill a pilot hole, then use a 1 inch hole saw to cut the final hole. Clean the burrs with sandpaper.
Slide the bulkhead fitting through from the inside of the barrel. Tighten the outer ring with an adjustable wrench until the rubber gasket compresses and seals. Thread the brass spigot into the bulkhead. Hand tight plus a quarter turn with a wrench is plenty.
Run a thin bead of food grade silicone around the seam on the outside as a backup seal. Let it cure overnight before you fill the barrel.
Step 3: Add the Overflow Outlet Near the Top
The overflow is not optional. When the barrel fills, water has to go somewhere safe, away from your foundation.
Mark a spot 2 inches below the top edge of the barrel. Drill a pilot hole and cut with a 2 inch hole saw. Install a 1 inch PVC bulkhead fitting the same way you installed the spigot. Thread a short PVC stub and an elbow on the outside so overflow water shoots straight down or away from the house.
Aim the overflow at a garden bed, a swale, or another barrel. Do not aim it at your foundation or your neighbor's basement window.
Step 4: Cut the Inlet and Add a Mosquito Screen
The inlet is where rainwater enters the barrel. If your barrel has a removable lid, you can drill the inlet hole right through the lid. If it is a closed top drum, cut the inlet directly into the top.
Use a 4 inch hole saw or a jigsaw to cut a clean opening that matches your downspout diverter outlet. Sand the edges smooth.
Cut a piece of 1/4 inch stainless mesh screen about 2 inches larger than the hole. Lay it across the inlet and secure it with a rubber band, a hose clamp, or a few small screws into the lid.
The screen does two jobs. It keeps leaves and roof grit out of the barrel, and it keeps mosquitoes from laying eggs in your water. Both are important.
Warning
Mosquitoes need only a teaspoon of standing water to breed. A barrel without a tight screen turns into a mosquito factory in less than a week. Check the screen every spring.
Step 5: Install a Downspout Diverter
A downspout diverter is the small piece of plumbing that routes water from the downspout into your barrel. When the barrel fills up, most diverters automatically send extra water back into the regular downspout.
Hold the diverter against your downspout and mark the cut line at the height that matches your barrel inlet. Use a hacksaw on plastic downspouts or tin snips on metal ones. Cut clean and square.
Slide the upper end of the cut downspout into the top of the diverter. Slide the lower section onto the bottom. Most kits include screws or clips to lock everything in place.
Run the short flexible hose from the diverter side outlet over to the inlet on your barrel. Aim the hose downhill all the way so water never sits in the line.
Step 6: Add a First-Flush Diverter
A first flush diverter is a vertical pipe that catches the first few gallons of dirty roof runoff before letting cleaner water flow into the barrel. The first wave of water carries bird droppings, dust, pollen, and roof grit. You do not want any of that in your garden water.
A simple first flush diverter is just a length of 4 inch PVC capped at the bottom, with a small drain hole the size of a pencil lead. Rain enters at the top through a tee fitting. The pipe fills up first. Once full, water rises into the tee and flows on into your barrel. Between rains, the small drain hole slowly empties the pipe so it is ready next time.
Size the first flush volume at about 1 gallon for every 100 square feet of roof draining into the barrel. For a typical downspout, a 4 inch pipe by 30 to 40 inches tall works well.
Tip
A first flush diverter is the single biggest upgrade you can make to a rain barrel system. The water that ends up in the barrel is dramatically cleaner. Your plants and your screen will thank you.
Step 7: Connect Everything and Test for Leaks
With the stand built and all the plumbing installed, set the barrel on the stand. Hook the diverter hose to the inlet. Make sure the overflow is aimed where you want it.
Now test. Fill the barrel from a garden hose to about three quarters full. Watch every fitting for at least 10 minutes. The most common leak points are the spigot bulkhead and the overflow bulkhead. Tighten if needed and add silicone if a slow drip continues.
Empty the barrel through the spigot. Check that the flow is strong. If the stream is weak, your spigot may be partially blocked or the bulkhead washer may be folded. Take it apart and reseat it.
Once the barrel passes the leak test, you are done. Wait for the next rain.
Winterizing Your Barrel
In any climate that drops below freezing, you need to winterize. Water expands when it freezes. A full barrel left out in a hard freeze will crack the bulkheads or split the drum.
In late fall:
- Open the spigot and drain the barrel completely.
- Disconnect the diverter hose from the barrel.
- Reroute the downspout for winter, either by installing the original elbow or by using a flexible extension.
- Empty and store any first flush diverter.
- Flip the barrel upside down or store it in a shed.
In spring, reverse the steps. Rinse the barrel, check the screen, and reconnect everything.
Maintenance and Care
A rainwater catchment barrel is low maintenance, but a little attention keeps it clean and reliable.
- Clear leaves from your gutters twice a year. Clogged gutters mean no water reaches the barrel.
- Rinse the mosquito screen every month during the rainy season.
- Open the spigot fully once a month to flush sediment from the bottom.
- Inspect every fitting in spring for cracks, drips, or stiff washers.
- Scrub the inside of the barrel once a year with a brush and a mild vinegar solution. Rinse well.
- Replace the first flush drain hole if it ever clogs. A wire or paperclip clears it fast.
With basic upkeep, a single barrel build lasts 8 to 10 years. The barrel itself often outlives the plumbing.
Common Mistakes to Avoid
A few traps to watch for, especially on your first build:
- Skipping the overflow. A barrel without an overflow will pop a seam or push water back into your siding.
- Setting the barrel on the ground. No height means no flow. You will not be able to fill a watering can.
- Using a clear or translucent barrel. Algae will turn the water green within days.
- Forgetting the screen. Mosquitoes find unscreened water within a week.
- Aiming the overflow at the foundation. Water near a foundation finds its way into basements.
- Using a barrel that held chemicals. Even after rinsing, residues can leach into your garden.
- Hand drinking from the barrel. Roof runoff is not safe to drink without serious filtration and treatment.
Warning
Never drink untreated rainwater from a roof catchment system. Roof grit, bird droppings, asphalt particles, and metal residues all end up in the barrel. This water is for plants, animal troughs (with care), and outdoor cleaning only.
Avoid these and your rain barrel will run for years with almost no fuss.
Frequently Asked Questions
Frequently Asked Questions
In most US states, yes, especially at small home volumes. A few western states have stricter rules about how much you can collect or what you can use it for. Always check your state and local water authority before you build. A single 55 gallon barrel is below the threshold of nearly every regulation.
No, not without serious filtration and treatment. Roof runoff carries bird droppings, dust, asphalt particles, and metal residues. Use barrel water for gardens, outdoor cleaning, and washing tools. If you want potable rainwater, that is a much bigger system with first flush, multi stage filtration, and UV or chlorine treatment.
Cover every opening with 1/4 inch stainless steel mesh screen and inspect it monthly. A tight screen keeps adult mosquitoes from laying eggs in the water. If any get past the screen, mosquito dunks (BTI) are a safe biological control that does not harm plants or pets.
Yes, if you leave it full in a hard freeze. Drain it completely in late fall, disconnect the hose, reroute the downspout, and store the barrel upside down or in a shed. In mild winters with only occasional light freezes, leaving it half full may be okay, but draining is always safer.
It is enough for a small kitchen garden of about 200 to 400 square feet, especially if you water by hand or with drip irrigation. For larger gardens, chain two or three barrels together with linking kits. The same plumbing scales easily, just add more barrels.
Yes. Add a second bulkhead fitting near the bottom of each barrel and connect them with short pieces of 3/4 inch hose or PVC. Water flows between barrels and they all fill at the same rate. Use one overflow on the last barrel in the chain. This is the easiest upgrade once you outgrow your first barrel.
Ready to Plumb Your Rain Barrel?
That is the whole build. A weekend project, a modest budget, and free water for your garden every time it rains. Once you trust your first barrel, adding a second or third is the easiest upgrade on the homestead.
When you are ready to put that water to work, check out our free raised garden bed plans and our DIY three bin compost system. For more weekend builds, browse the full DIY hub.
Happy building, and happy harvesting.

Cole
Founder & Lead Researcher
Cole is the founder of Plan Your Homestead. He works in clinical research and brings a research-first lens to every guide on the site, drawing on a long family line of farmers for grounded, practical perspective.
More in DIY
More articles coming soon. Check back for new diy content.