Home canning is one of the most useful skills a homestead cook can have. You take a bushel of tomatoes or a sack of green beans and turn them into shelf stable jars that feed your family all winter. The first time you crack open a jar of your own salsa in February, you understand why generations of cooks have done this work.
Canning is also a place where shortcuts can hurt people. The same closed jar that protects your food from spoilage can shelter dangerous bacteria if the process is not done right. Botulism, the worst of the canning risks, is rare today precisely because researchers spent decades figuring out exactly how long, how hot, and how acidic a jar of food has to be in order to be safe.
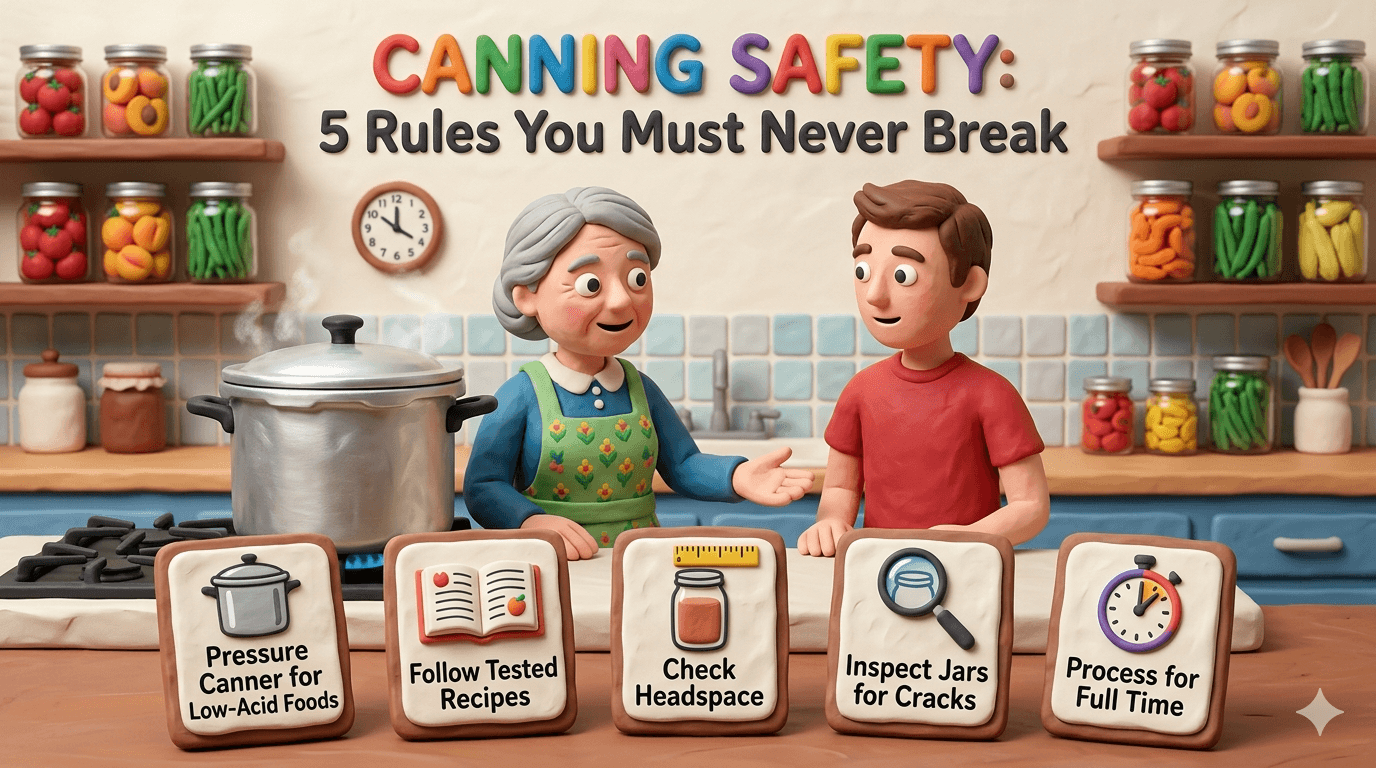
This guide lays out the five rules every home canner must follow. None of them are optional. None of them are old fashioned. Every one is backed by the USDA Complete Guide to Home Canning and the National Center for Home Food Preservation. Read these rules once, then keep them in mind every single time you light the burner.
Why Canning Safety is Different from Other Cooking
Most cooking is forgiving. You taste as you go, you adjust the salt, you cook a little longer if the chicken looks pink. Canning does not work that way. Once a jar is sealed and on the shelf, you cannot taste it for safety. You cannot smell danger through the lid. The choices you made during processing are the only thing standing between your family and a jar full of bacteria.
The biggest threat is Clostridium botulinum, the bacterium that produces botulism toxin. It thrives in low oxygen environments like sealed jars. It is invisible. It does not change the look, smell, or taste of the food. The toxin it produces can paralyze and kill, and a single contaminated jar has been enough to put whole families in the hospital.
The good news is that botulism is preventable. The bacterium cannot grow in highly acidic foods. It cannot survive temperatures hit by a properly run pressure canner. It cannot start in the first place if the recipe and method match the food. Every canning safety rule is really one rule restated in different ways. Hit the right temperature, for the right time, in the right kind of food, every single time.
Warning
You cannot taste, smell, or see botulism in a jar. The toxin is odorless and tasteless. The only protection is doing the canning correctly the first time. Never sample a jar to check if it is safe. If anything looks wrong, the jar goes in the trash.
Rule 1: Only Use Tested, Current Recipes
The first rule sounds boring until you understand what it really means. A tested recipe has been studied in a lab. Researchers measured the acidity, the density, the heat penetration into the center of the jar, and the time it takes to kill spoilage organisms at the standard processing temperatures. Every variable was checked. The result is a recipe you can trust.
An untested recipe is a guess. It might be a beautiful guess from a great cook, but the math behind safety has never been done. A spoonful more onion, a bigger jar, a thicker sauce, or a different vinegar can be the difference between safe food and a hospital bill. The recipe might work nine times out of ten. The tenth jar is the one that hurts someone.
Trusted, tested sources include the USDA Complete Guide to Home Canning, the National Center for Home Food Preservation at nchfp.uga.edu, the current Ball Blue Book, and recipes published by your state university extension service. These are the gold standard. They are also free or inexpensive, and they cover almost every food a home canner wants to put up.
Be careful with old cookbooks, family recipes, and Pinterest pins. Canning science has changed a lot since 1970. Recipes that were considered safe forty years ago, including many tomato recipes and some fruit butter recipes, are now known to be too risky for current standards. A recipe from grandma is a memory. It is not a safety guarantee.
The rule for adapting recipes is simple. Do not. You can swap a different fresh herb for the one in the recipe. You cannot reduce the salt, change the ratio of vegetables to liquid, swap the kind of vinegar, or add a thickener. Each of those changes affects how heat penetrates the jar and how acidic the contents stay. If you want to make a new combination, find a tested recipe that already includes it.
Note
Trusted recipe sources for home canning:
- USDA Complete Guide to Home Canning (free PDF online)
- National Center for Home Food Preservation, nchfp.uga.edu
- Ball Blue Book Guide to Preserving (current edition)
- Bernardin Guide to Home Preserving (Canada)
- So Easy to Preserve, University of Georgia
- Your state cooperative extension service
Rule 2: Match the Method to the Food's Acidity
The second rule is the one most often broken. Foods are split into two groups based on pH. High acid foods have a pH at or below 4.6. Low acid foods sit above 4.6. The 4.6 line is not arbitrary. It is the pH at which Clostridium botulinum can no longer grow.
High acid foods can be safely canned in a water bath canning process. The boiling water reaches 212 degrees Fahrenheit at sea level, which is hot enough to kill yeasts, molds, and the bacteria that can grow in acidic environments. Fruits, jams, jellies, pickles with a tested vinegar ratio, and most fruit based salsas all fall in this group.
Low acid foods cannot be safely canned in a water bath. Botulism bacteria can survive boiling water for hours. The only way to make these foods safe in a jar is to heat them to 240 degrees Fahrenheit using a pressure canning process. Pressure canners build steam pressure inside a sealed pot, which pushes the boiling point of water far above 212 degrees. Vegetables, beans, meat, poultry, fish, soups, stews, and broths all need pressure canning.
Some foods sit on the line and surprise people. Tomatoes are technically a high acid food, but modern varieties have drifted toward less acidity. Tested recipes now require either added bottled lemon juice or citric acid in every jar, even for plain tomato sauce. Salsa needs a tested ratio of vegetables to acid, otherwise the low acid peppers and onions push the pH above the safe line. Figs, white peaches, Asian pears, and ripe melons are also low acid and need acidification or pressure canning depending on the recipe.
If you want a quick reference on which method to use for which food, the water bath vs pressure canning guide walks through the differences and the foods that fall in each camp. Bookmark it next to your stove.
The mistake to avoid is treating a low acid food like a high acid food. Plain green beans in a water bath will not be safe even if the jars seal beautifully. Plain corn, mushrooms, pumpkin, and meat all require pressure canning. There is no shortcut. There is no clever boil time that makes the water bath work. If the food is low acid, the canner has to be pressurized.
Rule 3: Process for the Full Time at the Right Temperature or Pressure
The third rule is about timing. Tested recipes give you a processing time, a temperature, and a pressure. Every one of those numbers matters, and the time only counts when the temperature or pressure is right.
For water bath canning, processing time starts the moment the water returns to a full rolling boil after the jars are loaded. If the boil drops because cold jars were added, restart the timer when it climbs back up. Boiling for the full listed time, with the lid on, is the rule. Never reduce the time because the food looks done.
For pressure canning, the timer does not start when the canner is on the burner. It starts when the canner has vented for the full venting time and reached the listed pressure. From that moment, the pressure must stay at or above the listed level for the full processing time. If the pressure drops, even briefly, you reset the clock and start over.
Two kinds of gauges exist on home pressure canners. A weighted gauge, sometimes called a jiggler or a rocker, makes a steady chuffing or rocking sound when the canner is at the right pressure. A dial gauge has a needle that points to the current pressure. Dial gauges drift over time and need to be tested every year by your county extension office. Weighted gauges do not drift. Both are accurate when used correctly.
Warning
Never shorten a processing time, even by one minute. The times in tested recipes are calculated to bring the cold center of the jar up to a temperature that destroys spoilage organisms. Pulling jars early leaves a window where bacteria can survive. The food will not look any different. The danger is invisible.
A few habits make full processing easier. Use a kitchen timer with an alarm, not the stove clock. Stay nearby for the entire process. Keep an eye on the boil or pressure the whole time so you can catch a drop the moment it happens. Plan around the canner. Do not run the canner while you are also picking up kids or watching a show in another room.
Rule 4: Adjust for Your Altitude
The fourth rule is the one most often forgotten by people who just moved or who learned to can at a friend's house. Altitude changes the boiling point of water. The higher you live, the lower the temperature at which water boils. Lower temperatures mean less heat penetration into the jar. To compensate, you either boil longer (water bath) or use higher pressure (pressure canning).
The cutoff for adjustment in water bath canning is 1,000 feet above sea level. Below that, follow the recipe as written. Above that, you add time according to the chart. In pressure canning, the cutoff is also 1,000 feet, but instead of adding time you raise the pressure on the gauge.
Here are the standard adjustments used in tested recipes:
| Altitude (feet) | Water bath: extra time | Pressure canner: dial gauge | Pressure canner: weighted gauge |
|---|---|---|---|
| 0 to 1,000 | None | 11 psi | 10 psi |
| 1,001 to 2,000 | Add 5 minutes | 11 psi | 15 psi |
| 2,001 to 3,000 | Add 10 minutes | 12 psi | 15 psi |
| 3,001 to 6,000 | Add 15 minutes | 13 psi | 15 psi |
| 6,001 to 8,000 | Add 20 minutes | 14 psi | 15 psi |
| 8,001 to 10,000 | Add 25 minutes | 15 psi | 15 psi |
If you do not know your altitude, type your zip code into a free online elevation tool or check the USGS map for your county. Write the number on a sticky note and tape it to the inside of your canner lid. You will use it every time.
A canner that lives at 5,500 feet and follows a sea level recipe is producing jars that have not been heated long enough or hot enough to be safe. The food might seal. The food might taste fine. The food can still grow botulism. Altitude adjustment is not optional in any tested recipe.
Rule 5: Inspect Every Seal Before You Eat From the Jar
The fifth rule is the last line of defense. Even when everything in the process went right, jars sometimes fail. A small chip on the rim, a piece of food caught under the lid, or a pull on the band before the seal cooled can all leave a jar that looks fine but is not actually sealed. A jar that is not sealed has air inside. Air with food at room temperature is exactly where bacteria like to grow.
After the jars cool fully, usually 12 to 24 hours after processing, check every seal. Press the center of the lid with your finger. A sealed lid is concave and does not flex when pressed. An unsealed lid pops up and down with light pressure. Tap the lid with a spoon. A sealed jar makes a clean, high pitched ring. An unsealed jar makes a dull thunk. Lift the jar by the lid alone, gently, over a counter. A sealed jar holds. An unsealed jar releases.
Any jar that fails the seal test goes into the refrigerator for use within a few days, or the freezer for longer storage. Do not put an unsealed jar on the shelf. Do not try to reprocess after 24 hours. Reprocessing only works in the first 24 hours, and it requires a new lid and another full processing cycle.
Once jars are stored, look at them again before you open one for dinner. Walk through this short checklist every single time:
- Is the lid still concave or has it bulged upward?
- Is the liquid clear or has it turned cloudy?
- Are there any signs of mold, fizzing, or sediment that should not be there?
- Does the jar leak when picked up or show dried food along the seal?
- When you open it, does it pop normally or does it spurt liquid out?
- Does the food smell normal or does it smell off?
A yes to any of those questions means the jar gets thrown out. Do not taste. Do not feed it to the dog. Wrap the jar in plastic, label it as discarded canning, and put it in the outdoor trash where animals cannot get to it.
Warning
Never taste a suspect jar. Botulism toxin is odorless and tasteless, and a tiny amount can make you very sick. The only safe response to a questionable jar is to throw it away. A two dollar jar of green beans is not worth a hospital visit.
For low acid home canned food that you are nervous about, the USDA recommends boiling the contents for ten minutes (longer at altitude) before serving. Boiling for ten minutes destroys botulism toxin even if it has formed. This is a backstop, not a substitute for safe processing, but it is a strong second layer of protection for soups, vegetables, beans, and meats.
Common Canning Practices to Avoid
A handful of unsafe practices show up over and over online. None of them are tested. None of them are safe. Skip every one.
Oven canning. Heating jars in a dry oven does not transfer heat fast enough into the food, and dry heat can shatter the jars. Tested recipes always use water or steam.
Dishwasher canning. Dishwashers do not get hot enough to process food, and they cannot hold a steady temperature. They are fine for sterilizing empty jars, not for canning.
Microwave canning. Microwaves heat food unevenly and cannot maintain processing temperatures. There is no microwave canning method approved by the USDA.
Open kettle canning. Pouring hot food into jars and screwing on lids without processing might create a vacuum seal, but it does not destroy bacteria inside the jar. This was common decades ago and is no longer considered safe.
Inverting jars to seal. Flipping hot jars upside down does not replace processing. Even if a seal forms, the food inside has not been heated long enough at high enough temperatures to be safe.
Reusing single use lids. Standard two piece canning lids are designed for one use only. The sealing compound flattens after the first processing and will not seal reliably again. Reusable lids exist (Tattler, ForJars), but you must follow the manufacturer's instructions exactly.
Atmospheric steam canners for low acid food. Steam canners are now approved for some high acid foods at sea level, but they cannot reach the temperatures needed for low acid foods. Use a true pressure canner for green beans, corn, meat, and broth.
When in doubt, stick to a true water bath pot, a true pressure canner, and a tested recipe. The shortcuts are the part of canning that hurts people.
Frequently Asked Questions
Frequently Asked Questions
Botulism is paralysis caused by a toxin produced by Clostridium botulinum bacteria. The bacteria thrive in low oxygen environments, like sealed jars of low acid food, and the toxin they produce attacks the nervous system. Symptoms can include blurred vision, slurred speech, drooping eyelids, difficulty swallowing, and muscle weakness that can spread to the breathing muscles. Untreated botulism can be fatal. Most cases of foodborne botulism in the United States now come from improperly home canned food, which is why the safety rules are so strict.
No. Botulism toxin is odorless, tasteless, and invisible. A jar can be deeply contaminated and look, smell, and taste completely normal. This is why tasting suspect jars is so dangerous, and why the safety of home canning depends entirely on following tested recipes and tested processes from the start.
Glass canning jars are reusable indefinitely as long as they are not chipped on the rim. Inspect the rim before every use. Metal screw bands are also reusable until they rust or warp. Standard flat lids with the sealing compound are single use only. Once a flat lid has been processed, the compound is permanently flattened and will not reliably seal a second time. Reusable lids made by Tattler and ForJars are an exception, but they require a different sealing technique.
Any elevation above 1,000 feet above sea level requires altitude adjustment for canning. The higher you go, the more time or pressure you need to add. If you are unsure of your elevation, search your zip code on a free elevation lookup or check a topographic map. Most of the United States above the eastern half is over 1,000 feet, including most of Texas, the entire Mountain West, and much of the upper Midwest.
No. There are no USDA tested recipes for canning milk, butter, cream, cheese, or any other dairy product. Dairy is low acid and very dense, which makes safe heat penetration unpredictable, and several outbreaks have been traced to home canned dairy. Freezing is the safe way to store extra dairy at home. Skip any recipe online that claims to safely can butter, no matter how confident the source sounds.
If you catch the failed seal within 24 hours of processing, you have two options. You can refrigerate the jar and use the contents within a week, or you can reprocess the jar with a brand new lid for the full original processing time. Reprocessing requires the same canner, the same boil or pressure, and the same time as the original recipe. After 24 hours, refrigeration or freezing is the only safe option. Do not put an unsealed jar on a pantry shelf.
Properly canned, sealed jars stored in a cool, dark place are safe to eat for at least one year, and many last two to three years before quality begins to fade. Quality drops faster than safety. Color, texture, and flavor decline with time, but a jar that is sealed, stored cool, and shows no signs of spoilage remains safe well past the one year mark. Rotate your pantry and eat the oldest jars first.
Yes. When the recipe is tested, the method matches the food, the processing time is full, the altitude is adjusted, and the seal is verified, home canning has an excellent safety record. The risk of botulism in home canning is real, but it is also entirely avoidable. Millions of jars are canned safely every year by home cooks who follow the same five rules in this guide.
Atmospheric steam canners are now approved by the USDA for high acid foods at sea level, processed for 45 minutes or less. They are not safe for low acid foods, which still require a true pressure canner. They are also not approved for long process times or for use at high altitudes without further research. If you have a steam canner, use it only for tested high acid recipes that fit within the approved guidelines.
No. Tested tomato canning recipes call for bottled lemon juice or commercial citric acid because their acidity is standardized. Fresh lemons vary in acidity from one lemon to the next and can be too weak to bring the jar safely below the 4.6 pH line. Use bottled lemon juice or citric acid in every tomato recipe that calls for it, exactly as written.
Keep Canning, Keep Your Family Safe
The five rules are simple to read and easy to follow once you build the habit. Use a tested recipe. Match the method to the food. Process for the full time at the right temperature or pressure. Adjust for altitude. Inspect every seal. That is the whole list. Every other detail of home canning hangs on these five points.
Skim them again before your next canning day. Tape them to the inside of a cabinet door. Walk through them once you have your recipe selected and your canner heating. The few minutes it takes to confirm you are following all five rules is the cheapest insurance in your kitchen.
When you are ready to put the rules into practice, the water bath canning guide walks you through high acid foods step by step, and the pressure canning guide covers low acid foods, equipment, and gauge testing. If you are still deciding which method fits a particular food, the water bath vs pressure canning breakdown will sort it out fast.
Safe canning is a tradition worth carrying forward. Stack a few jars on the shelf this week, follow every rule, and enjoy the satisfaction of feeding your family from work you did with your own hands.

Cole
Founder & Lead Researcher
Cole is the founder of Plan Your Homestead. He works in clinical research and brings a research-first lens to every guide on the site, drawing on a long family line of farmers for grounded, practical perspective.
More in Food Preservation
More articles coming soon. Check back for new food preservation content.