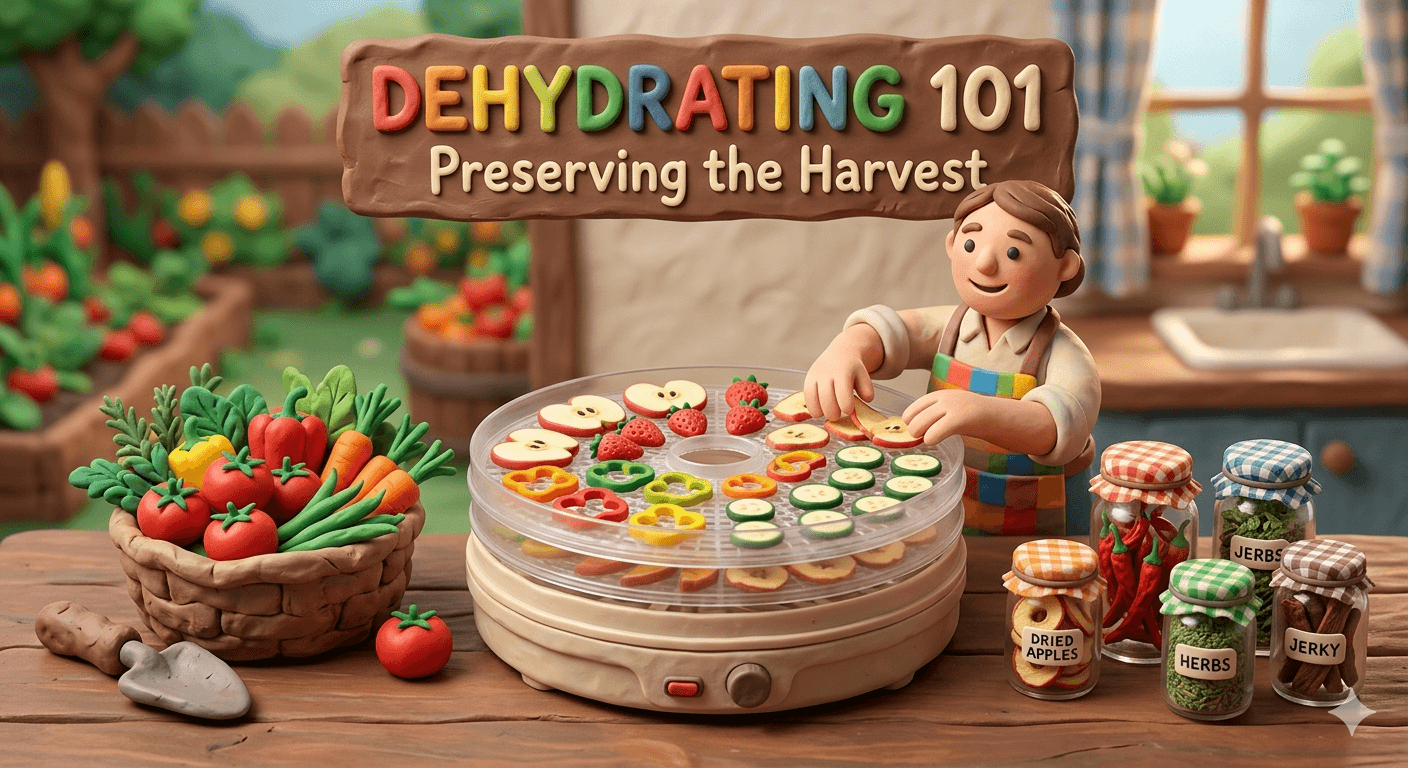
Dehydrating is the gentlest, simplest way to preserve almost anything you grow or buy in season. You do not need a pressure canner. You do not need a chest freezer. You do not need to learn a long list of safety rules. All you need is fresh food, low heat, and patient airflow.
This guide walks you through the entire process from start to finish. By the end, you will know how to turn ripe apples into chewy snacks, summer tomatoes into winter pasta sauce, fresh herbs into pantry staples, and lean beef into homemade jerky. You will know what to dry, what temperature to use, how long it takes, and how to store everything so it lasts for months or years.
You can absolutely do this on your first try. Dehydrating is forgiving. The food tells you when it is done. Mistakes are usually fixable, and the worst case is a slightly chewier batch of apple slices than you planned. Once you fill your first jar with home-dried food, you will start looking at every grocery sale and garden harvest a little differently.
How Dehydrating Preserves Food
Spoilage needs water. Bacteria, yeast, and molds all need moisture to grow. Enzymes inside the food itself also need water to break down flavor, color, and texture. Pull the moisture out and you take away the conditions those problems need to survive.
Fresh fruit can be 80 to 90 percent water by weight. Fresh vegetables run 70 to 95 percent. Lean meat sits around 70 percent. When you dry food properly, you bring that moisture content down below about 20 percent for fruit, below 10 percent for vegetables, and around 15 percent for jerky. At those levels, microbial growth essentially stops. The food becomes shelf stable without refrigeration, freezing, or chemical preservatives.
Dehydrating uses gentle, steady warm air to evaporate water from the surface of the food. As the surface dries, more moisture migrates from the inside out, and the air carries it away. The temperature stays low enough to protect flavor, color, and most of the nutrition. Vitamin C and a few heat sensitive compounds take a small hit. Minerals, fiber, and most other nutrients survive almost intact.
Three things have to be working at the same time. Heat warms the food enough for water to evaporate. Airflow carries that moisture away before it sits on the food and slows things down. Time gives the inside of the food a chance to catch up with the outside. Get those three right and dehydrating works every time.
Note
Drying is one of the oldest food preservation methods on earth. Long before refrigerators, people dried meat, fish, fruit, and grains in the sun and over fires. The science is the same today. We just have better tools to control temperature and airflow.
Why Dehydrate Your Harvest
Dehydrating is the easiest way to put food on a shelf without buying a single jar or freezer bag. Once your food is dry, it does not need power, water, or special storage. A coffee can of dried apples on a pantry shelf will outlast almost any other form of preserved fruit you can make at home.
The space savings are dramatic. Ten pounds of fresh tomatoes shrink down to about a quart jar of dried slices. A bushel of apples fits into a couple of half gallon jars. If your freezer is full and your canning jars are tied up, dehydrating gives you another way to keep a big harvest from going to waste.
The flavor often gets better, not worse. Drying concentrates the natural sugars in fruit and the savory notes in vegetables. Sun dried tomatoes, dried mushrooms, and dried peppers all have a depth of flavor you cannot get from the fresh version. A spoonful of dried tomato powder will deepen a soup the way nothing else will.
Cost is hard to beat. A modest electric dehydrator will pay for itself in a single big tomato season or a couple of jerky batches. Running one for a full day uses less electricity than most refrigerators use in the same window. Compared to buying dried fruit, jerky, or freeze dried backpacking meals, the savings add up fast.
Dehydrated food also travels well. It is light, compact, and shelf stable. Backpackers, hunters, and busy parents all lean on dried food for the same reasons. A bag of dried apple slices and a packet of jerky beat a soggy granola bar every time.
If you want shelf stable jars of soups, sauces, and acid foods, water bath canning is a great companion skill. If you want crunchy probiotic foods in your fridge, lacto-fermentation is hard to beat. Dehydrating fits in between as the lowest effort, longest shelf life option in your preservation toolkit.
Equipment You Need
You can start dehydrating with almost no gear. A few small upgrades make life easier as you go.
An electric dehydrator
A dedicated electric dehydrator is the most reliable tool for the job. It holds a steady temperature, moves air across the food evenly, and runs in the background while you do other things.
Stackable round dehydrators are the most common starter unit. Trays stack on top of a heater base, and warm air rises through the stack. They are inexpensive, easy to store, and great for fruit, herbs, and small batches. The downside is that the bottom trays usually dry faster than the top, so you have to rotate.
Box style dehydrators look like small ovens. A fan and heater on the back push air horizontally across each tray. They cost more, but they dry more evenly, hold more food, and handle thicker items like jerky and fruit leather without rotation. If you plan to dehydrate often, a box style unit is a worthwhile upgrade.
Look for two features no matter which style you choose. An adjustable thermostat, ideally with a range from about 95 degrees to 165 degrees Fahrenheit, lets you match the temperature to the food. A timer is a nice convenience but not strictly necessary.
Your oven
You can absolutely dehydrate in a standard kitchen oven. The catch is that most ovens do not run cool enough on their own. Set the oven to its lowest setting (often 170 degrees Fahrenheit) and prop the door open with a wooden spoon to let moisture escape. A small fan aimed at the gap dramatically improves airflow.
Convection ovens work even better because the built in fan moves air across the food the way a dehydrator does. Air fryer ovens with a dehydrate setting can also work for small batches.
The downsides of oven dehydrating are higher energy cost, less precise temperature control, and the fact that your oven is tied up for the whole drying time. It is a fine way to start, especially if you are not sure you will dehydrate often. Just keep an eye on the temperature and rotate trays so things dry evenly.
Sun and air drying
If you live somewhere hot, dry, and breezy, sun drying is free. It works best for thinly sliced fruit and herbs in climates with low humidity, daytime temperatures above 85 degrees Fahrenheit, and at least three or four days of clear weather.
Lay the food on screens, cover it with cheesecloth to keep insects off, and bring it inside at night so dew does not undo your progress. Air drying without sun works well for hardy herbs, garlic, and onions hung in small bunches in a warm, well ventilated room.
In humid climates, sun and air drying are tough. Mold often beats you to the food. An electric dehydrator is the safer bet.
Trays, mesh sheets, and fruit leather inserts
Most dehydrators come with basic trays. A few accessories are worth adding. Fine mesh sheets keep small items like herbs, sliced peppers, and chopped onions from falling through. Solid plastic or silicone fruit leather sheets give you a smooth surface for purees that would otherwise drip everywhere. Parchment paper works in a pinch.
A sharp knife or mandoline
Even slicing is the single biggest factor in even drying. A sharp chef's knife works fine, but a mandoline makes the job almost effortless. Aim for slices around one quarter inch thick for most fruit and vegetables. Thinner slices dry faster and make crispier chips. Thicker slices stay chewy.
If you are slicing by hand, take your time and try to keep every piece the same thickness. Mixed thicknesses on one tray means some pieces are leathery while others are still soft.
Storage containers
Drying is only half the job. You also need a way to keep moisture out of the finished food. Glass jars with tight lids, vacuum sealed bags, and mylar bags with oxygen absorbers are the three best options.
A vacuum sealer is a worthwhile investment if you dry food often. Vacuum sealed jars and bags keep dried food at peak quality for years. Mylar bags with oxygen absorbers extend that even further and are the gold standard for long term pantry storage.
Tip
For a first dehydrator, a basic stackable model with an adjustable thermostat is hard to beat. You can add accessories as you go and upgrade to a box style unit later if you fall in love with the process.
The Four Stages of Dehydrating
Almost every dehydrating project moves through the same four stages. Knowing them ahead of time makes the rest of this guide easier to follow.
The first stage is prep. You wash, peel if needed, and slice the food into uniform pieces. Uniform size is the most important rule of dehydrating. A tray of mixed thicknesses dries unevenly, no matter how careful you are with temperature.
The second stage is pre-treat. Some foods benefit from a quick blanch, an acid dip, or a marinade before they hit the trays. Apples and pears stay light if you dip them in lemon water. Tough vegetables like carrots and broccoli dry faster after a brief blanch. Lean meats need a salty cure or marinade to be safe as jerky. Not every food needs pre-treatment. Most herbs and tomatoes go straight to the trays.
The third stage is dry. You arrange the food on the trays in a single layer with space around each piece, set the temperature, and let the dehydrator run. Drying times depend on the food, the slice thickness, the humidity in your kitchen, and the dehydrator itself. The food is done when it has the right texture and no remaining moisture, not when the timer says so.
The fourth stage is condition. After the food cools, you pack it loosely into a glass jar for about a week and shake it once a day. Any moisture left in some pieces will redistribute to drier pieces. If you see condensation inside the jar, the batch is not fully dry and needs to go back on the trays. Conditioning is the step most beginners skip, and it is the reason their stored food sometimes molds months later.
Walk through these four stages every time and you will get reliable results, even with foods you have never dried before.
Step by Step: Your First Batch of Dried Apples
Apples are the perfect first project. They are forgiving, they slice easily, they dry fast, and the finished product is something almost everyone enjoys. Once you have done one batch, you can adapt the same method to almost any fruit.
Step one: choose and wash your apples
Pick firm, sweet apples with no soft spots. Honeycrisp, Fuji, Gala, and Pink Lady all dry beautifully. Tart varieties like Granny Smith give you a chewier, more concentrated result. Avoid mealy or bruised fruit because those flaws get worse as the apple dries.
Wash the apples under cool running water. Scrub gently with your hands or a soft brush to remove any wax or grit.
Step two: peel and core (optional)
Peeling is optional. The skin holds nutrients and natural pectin, so leaving it on is fine. The skin does get a little chewy when dried, which some people love and others find tough.
Coring is essential if you are slicing rounds. A simple apple corer pushes through the center in one motion. If you do not have one, slice the apple from top to bottom, then cut around the core with a paring knife.
Step three: slice evenly
Cut the apples into rounds or wedges between one eighth and one quarter inch thick. A mandoline makes this almost effortless. The thinner the slice, the crispier the finished result. The thicker the slice, the chewier and more leathery it will be.
Try to keep the slices uniform. A tray of mostly even slices with a few thicker pieces is fine. A tray with wildly different thicknesses will dry unevenly no matter what you do.
Step four: pre-treat to keep them light
Apples brown quickly when sliced. The browning is harmless but not pretty. A short dip in acidulated water keeps them looking bright.
Mix three tablespoons of bottled lemon juice into a quart of cool water. Drop the apple slices in as you cut them, let them soak for about three minutes, then drain on a clean towel. Ascorbic acid powder dissolved at the same ratio works even better if you have it. Plain water with no acid is fine if you do not mind a more golden color.
Step five: arrange on the trays
Lay the slices flat on the dehydrator trays in a single layer. Leave a little space between slices so air can move around each piece. Touching is fine, overlapping is not.
If you have a stackable dehydrator, put thicker pieces on the bottom trays where the airflow is strongest.
Step six: dry at 135 degrees
Set your dehydrator to 135 degrees Fahrenheit. This is the sweet spot for fruit. It is warm enough to drive off moisture quickly but cool enough to protect color and flavor.
Let the apples run for six to twelve hours. Variation is normal. Slice thickness, kitchen humidity, how full the dehydrator is, and the dehydrator itself all play a role.
Check after about four hours. Rotate the trays if you are using a stackable unit. From there, peek every hour or two until the slices look done.
Step seven: test for doneness
Pull a slice from the dehydrator and let it cool for a few minutes. Warm fruit always feels softer than it really is.
For chewy apple chips, the slice should feel leathery and bend without breaking. Tear one in half. The torn edges should be dry, not wet or sticky. For crisp apple chips, the slice should snap when you bend it. Test a few slices from different trays before pulling the whole batch.
If some slices are done and others are not, remove the finished pieces and let the rest run another hour or two.
Step eight: cool, condition, and store
Spread the finished apples on a tray or paper towel and let them cool to room temperature. Skipping this step traps steam in the storage jar.
Pack the cooled slices loosely into a glass jar with a tight lid. Fill the jar about two thirds full so there is room for the slices to move around. Shake the jar once a day for about a week. If condensation forms on the inside of the glass, the apples need more drying time. Spread them back on the trays for another hour or two and try again.
Once the apples pass conditioning, transfer them to your long term storage. Sealed jars in a cool, dark pantry will keep them at peak quality for six to twelve months. Vacuum sealed bags or mylar with oxygen absorbers stretch that to several years.
The same eight steps work for pears, peaches, plums, mangoes, pineapple, and bananas. Adjust the slice thickness and watch the texture rather than the clock.
Pre-Treatments and When to Use Them
Pre-treatment is the step that turns a good batch into a great one. Not every food needs it, but the foods that do benefit a lot.
Acid dips stop browning in light colored fruit. Apples, pears, peaches, and bananas all darken quickly once they are cut. A three to five minute soak in lemon water or ascorbic acid solution keeps them bright. Pineapple and grapes, which are already acidic, do not need this step.
Blanching softens tough vegetables and stops the enzymes that cause off flavors and color loss in storage. Drop carrots, green beans, broccoli, cauliflower, peas, and corn into boiling water for two to four minutes, then plunge them into ice water to stop the cooking. Drain well before drying. Blanched vegetables also rehydrate faster later.
Steam blanching is gentler than boiling and keeps more nutrients in the food. Hold the vegetables above boiling water for three to five minutes, then ice and drain. Use this for greens, peas, and small dice that would otherwise turn to mush in a boiling pot.
Syrup blanching is for fruit you want extra sweet and chewy. Simmer the fruit in a light syrup for a few minutes, drain well, and dry. The result is similar to commercial dried mango or pineapple. It is delicious but uses more sugar than a plain dry.
Marinades and cures are essential for jerky. Lean strips of beef, venison, or turkey need salt to draw out moisture and slow bacterial growth during drying. A basic cure is one teaspoon of curing salt (containing sodium nitrite) per five pounds of meat, mixed with the rest of your marinade. Soak the meat overnight in the fridge before drying. Pre-cooking the meat to 160 degrees Fahrenheit before drying is the safest path. The USDA recommends this step for all home jerky.
Skin cracking speeds up drying for small fruit with a tough waxy skin. Drop blueberries, grapes, or cranberries into boiling water for thirty seconds, then ice. Tiny cracks form in the skin so moisture can escape. Skip this step and your blueberries will still be plump and damp days later.
Note
Whether to pre-treat is a quality call, not a safety call (with the exception of jerky). A batch of dried apples without an acid dip will be browner but still safe to eat. A batch of jerky without a proper cure or pre-cook is a real food safety risk. When in doubt with meat, follow USDA jerky guidance to the letter.
Drying Temperatures and Times Reference
The numbers below are starting points. Your dehydrator, kitchen humidity, and slice thickness all affect the actual time. Watch the food, not the clock.
Fruit
| Fruit | Prep | Temperature | Approximate time | Doneness cue |
|---|---|---|---|---|
| Apples | Slice 1/4 inch, optional acid dip | 135 F | 6 to 12 hours | Leathery and pliable, no wet spots |
| Bananas | Slice 1/4 inch | 135 F | 8 to 14 hours | Crisp or chewy depending on preference |
| Strawberries | Slice 1/4 inch | 135 F | 8 to 12 hours | Brittle when fully dry |
| Blueberries | Crack skin in boiling water | 135 F | 14 to 24 hours | Hard and rattly |
| Peaches and nectarines | Halve, pit, slice 1/2 inch | 135 F | 10 to 16 hours | Pliable, no juice when squeezed |
| Pears | Slice 1/4 inch, optional acid dip | 135 F | 10 to 16 hours | Leathery and pliable |
| Pineapple | Slice 1/4 to 1/2 inch | 135 F | 10 to 16 hours | Pliable and slightly sticky |
| Grapes | Crack skin in boiling water | 135 F | 24 to 48 hours | Wrinkled, leathery raisin |
| Mango | Slice 1/4 inch | 135 F | 8 to 12 hours | Pliable and chewy |
| Tomatoes | Slice 1/4 inch or quarter | 135 F | 8 to 12 hours | Leathery, no moisture in flesh |
Vegetables
| Vegetable | Prep | Temperature | Approximate time | Doneness cue |
|---|---|---|---|---|
| Carrots | Slice or shred, blanch 3 minutes | 125 F | 6 to 10 hours | Hard and brittle |
| Green beans | Trim, blanch 2 to 3 minutes | 125 F | 8 to 12 hours | Brittle, snaps when bent |
| Bell peppers | Slice or chop | 125 F | 6 to 10 hours | Brittle and crisp |
| Onions | Slice or chop thin | 125 F | 6 to 12 hours | Crisp, easy to crumble |
| Mushrooms | Slice 1/4 inch | 125 F | 6 to 8 hours | Light and crisp |
| Zucchini | Slice 1/4 inch | 125 F | 6 to 10 hours | Brittle |
| Tomatoes (sauce style) | Halve cherry or slice 1/2 inch | 135 F | 8 to 14 hours | Leathery to brittle |
| Corn | Cut off cob, blanch 2 minutes | 125 F | 6 to 12 hours | Hard kernels |
| Peas | Blanch 2 minutes | 125 F | 8 to 12 hours | Hard and shriveled |
| Kale and other greens | Wash and dry, tear into pieces | 115 F | 4 to 8 hours | Crumbles between fingers |
Herbs
| Herb | Prep | Temperature | Approximate time | Doneness cue |
|---|---|---|---|---|
| Basil, oregano, thyme | Wash, pat dry, leave on stems | 95 to 105 F | 2 to 4 hours | Leaves crumble easily |
| Parsley, cilantro | Wash, pat dry, remove stems | 95 to 105 F | 2 to 4 hours | Brittle and crumbly |
| Mint, sage, rosemary | Wash, pat dry, leave on stems | 95 to 105 F | 2 to 4 hours | Crumbles easily |
| Chives | Slice fresh | 95 to 105 F | 2 to 4 hours | Light and brittle |
Meat (jerky)
| Meat | Prep | Temperature | Approximate time | Doneness cue |
|---|---|---|---|---|
| Beef jerky | Trim fat, slice 1/4 inch, marinate, pre-cook to 160 F | 160 F | 4 to 8 hours | Bends and cracks but does not break, no moisture beads |
| Venison or turkey jerky | Trim fat, slice 1/4 inch, marinate, pre-cook to 165 F | 160 F | 4 to 8 hours | Same as beef |
| Ground meat jerky | Mix with cure and seasonings, press into strips, pre-cook to 160 F | 160 F | 4 to 6 hours | Firm, not greasy |
Lower temperatures protect color, flavor, and nutrients but take longer. Higher temperatures speed things up and are the right call for meat for safety reasons. Stay inside the ranges above and you will be in good shape.
Conditioning: The Step Most People Skip
Conditioning is the quiet hero of long term storage. It is the difference between a jar of dried apples that lasts a year and a jar that grows mold in three months.
Even when food looks and feels evenly dry, it almost never is. Some pieces hold a little more moisture than others. If you seal the batch into a jar right away, that moisture has nowhere to go. Over time it migrates and creates damp spots where mold can grow.
Conditioning lets the moisture even out before final storage. Pack your cooled, dried food loosely into a clean glass jar so it is about two thirds full. Seal the jar with a tight lid. Set it on the counter where you will see it.
Shake the jar once a day for seven to ten days. After each shake, look closely at the inside of the glass. If you see condensation, droplets, or fogging, the food is not fully dry. Spread it back on the trays for another hour or two of drying, then start the conditioning over.
If the jar stays clear and dry for a full week, the batch is ready for long term storage. Transfer it to your final container and label the jar with the food and the date.
This one habit will save you from losing batches of perfectly dried food to invisible moisture pockets.
Best Foods to Dehydrate
Some foods are made for dehydrating. Start here while you build confidence.
Apples. Sweet, forgiving, and crowd pleasing. The classic first project.
Bananas. Slice thin for crisp chips. Slice thick for chewy banana strips. Both are wildly better than the store version.
Tomatoes. A garden full of ripe tomatoes turns into a half gallon of dried tomato slices. Grind them into tomato powder for the best soup base you have ever tasted.
Bell peppers and hot peppers. Slice or chop and dry until brittle. Hot peppers can be ground into homemade chili flakes and chili powder.
Mushrooms. Dried mushrooms keep their flavor for years and rehydrate beautifully into stocks, risottos, and gravies.
Zucchini. When zucchini takes over the garden, slice it thin and dry it for soup add ins or zucchini chips.
Kale and leafy greens. Drying greens at low heat preserves color and crunch. Crumble dried kale into smoothies, soups, or pasta.
Onions and garlic. Both dry well and grind into seasoning powders that beat anything from a jar.
Fresh herbs. Almost any herb dries beautifully. Basil, oregano, thyme, rosemary, sage, mint, parsley, and dill all keep their flavor for a year or more in a sealed jar.
Strawberries, blueberries, peaches, mangoes, and pineapple. All of these dry into snack worthy fruit. Peaches and mangoes are especially good as chewy strips.
Jerky. Lean beef, venison, or turkey marinated, cured, pre-cooked, and dried makes the best protein snack you can carry.
Fruit leather. Puree any combination of ripe fruit, spread thin on a fruit leather sheet, and dry into rollable snacks.
Soft, juicy, high fat foods like avocados and fatty cuts of meat are harder to dry well. Skip those for now and stick to the list above.
Storage and Shelf Life
Drying is half the job. Storage is the other half. Once your food is conditioned and ready, the goal is to keep it cool, dark, dry, and sealed away from oxygen.
Glass jars are the easiest option for short to medium term storage. Use mason jars or any jar with a tight gasket lid. Fill them most of the way and tighten the lid firmly. Stored in a pantry away from sunlight, dried food in glass jars stays at peak quality for six to twelve months.
Vacuum sealed bags or jars stretch shelf life by removing oxygen, which slows oxidation and color loss. A jar attachment for a vacuum sealer turns a regular mason jar into a long term container. Vacuum sealed dried food typically holds quality for two to four years.
Mylar bags with oxygen absorbers are the gold standard for pantry preppers. Mylar blocks light and oxygen completely. A 300cc oxygen absorber tucked into a quart sized mylar bag essentially stops oxidation in its tracks. Vacuum the air out, seal with an iron or impulse sealer, and the bag will keep dried fruit, vegetables, and grains usable for five to ten years or more.
Freezer storage is a great backup. Dried food in a sealed jar or vacuum bag stored in the freezer can hold quality for many years and is also pest proof. The freezer also kills any insect eggs that might have hitchhiked in on garden produce.
Always label your storage with the food and the date. Rotate from oldest to newest. Even at peak quality, dried food eventually loses color, flavor, and vitamin content over time.
Warning
If you ever open a jar of dried food and see fuzzy mold, slime, or smell something off, throw the entire jar out. Do not try to pick out the bad pieces and save the rest. Mold sends roots deep into dried food and the visible part is just a fraction of the contamination.
Common Problems and How to Fix Them
Most dehydrating problems trace back to one of three things: slice thickness, temperature, or storage moisture. Here are the issues you are most likely to see.
Case hardening
Case hardening happens when the outside of the food dries faster than the inside. The surface forms a hard shell that traps moisture inside. The food looks done but is still wet in the middle.
The fix is lower temperature and longer drying time. If your dehydrator runs at 165 degrees and you are drying fruit, drop it to 135 and let things take longer. Slice thinner and more evenly to give the moisture a shorter path out.
Uneven drying across the trays
Uneven drying is normal in stackable dehydrators because the bottom trays sit closer to the heater and fan. The fix is to rotate the trays every two to three hours. Move the bottom tray to the top, the second tray to the bottom, and so on. Box style dehydrators with horizontal airflow rarely need rotation.
Crowded trays also cause uneven drying. Keep food in a single layer with space around each piece.
Browning or color loss
Most browning in fruit comes from oxidation. The fix is a quick acid dip or syrup blanch before drying. For vegetables, color loss in storage is often an enzyme problem. Blanching first stops the enzymes that cause it.
Storing finished food in dark containers or away from light also helps preserve color over time.
Food sticking to the trays
Sticky fruit and small pieces love to glue themselves to dehydrator trays. Mesh sheets, parchment paper, or fruit leather sheets all solve the problem. Lifting half dried fruit gently with a spatula every couple of hours also helps.
Off flavors in jerky
Off flavors in jerky usually come from too much fat or too little cure. Trim every visible piece of fat off the meat before slicing. Use a marinade with enough salt and acid to penetrate the strips. Pre-cook to 160 degrees Fahrenheit before drying for the safest, most consistent result.
Mold during storage
Mold in stored dried food almost always means the food was not fully dry, the conditioning step was skipped, or the storage container was not sealed well. Re-read the conditioning section above and use it on every batch from now on.
If you find mold, throw the batch out and clean the container thoroughly before using it again.
Rehydrating Dried Foods
Most dried fruit can be eaten as is. Vegetables and meats often go back into recipes after a quick rehydrate.
The simplest method is to cover the dried food with hot water and let it sit for fifteen to thirty minutes. The food soaks up the water and returns close to its original size and texture. Drain the soaking liquid and use it as broth in soups and stews because most of the flavor lives in there.
Cold water rehydrating works too and is gentler on delicate foods like dried herbs and greens. It just takes longer, usually one to four hours in the fridge.
You can also skip rehydrating entirely and toss dried vegetables straight into soups, stews, chili, and pasta sauces. The simmering liquid does the rehydrating for you. This works wonderfully for tomatoes, mushrooms, peppers, onions, beans, and most leafy greens.
For backpacking meals, pre-mix your dried ingredients in a single bag, then add boiling water in camp and seal the bag for fifteen minutes. You will have a hot meal with no cleanup.
Use a one to one ratio of dried food to water for most rehydrating. Adjust by texture as you go. The food is ready when it has the bite you want.
Frequently Asked Questions
Frequently Asked Questions
You can absolutely use your oven. Set it to its lowest temperature, prop the door open with a wooden spoon to let moisture escape, and aim a small fan at the gap to improve airflow. Convection ovens work even better. The downsides are higher energy cost, less precise temperature control, and tying up your oven for hours. For occasional dehydrating, an oven is fine. If you plan to dry food often, a dedicated dehydrator pays for itself quickly.
Pull a piece off the tray, let it cool for a few minutes, and test the texture. Fruit should be leathery and pliable with no wet or sticky spots when you tear it open. Vegetables should be brittle or crisp. Herbs should crumble between your fingers. Jerky should bend and crack without breaking. If you are not sure, condition the batch in a glass jar for a week and watch for any condensation. Condensation means it is not done.
Yes, when done correctly. The USDA recommends pre-cooking jerky meat to 160 degrees Fahrenheit (165 for poultry) before or after drying to kill any bacteria that survive the drying process. Use a salt cure containing sodium nitrite to slow bacterial growth, marinate the meat in the fridge, and dry at 160 degrees Fahrenheit. Skipping these steps is a real food safety risk. When in doubt, follow USDA jerky guidance to the letter.
Properly dried and stored food lasts a long time. In sealed glass jars in a cool dark pantry, expect six to twelve months of peak quality. Vacuum sealed jars or bags stretch that to two to four years. Mylar bags with oxygen absorbers can hold quality for five to ten years or more. Storage temperature, light exposure, and oxygen are the main factors that shorten shelf life.
You can, but only if the foods need similar temperatures and similar drying times. Apples, peaches, and pears work fine together because they all dry at 135 degrees Fahrenheit. Mixing onions with strawberries is a bad idea because the onion smell will travel into the fruit. As a general rule, dry strong flavored foods like onions, garlic, and peppers in their own batches, or at least keep them on separate trays from sweet fruit.
Most vegetables benefit from a quick blanch. Blanching softens tough fibers, stops the enzymes that cause off flavors and color loss in storage, and helps vegetables rehydrate faster later. Carrots, green beans, broccoli, peas, and corn all dry better after blanching. Vegetables you plan to eat dry as chips, like zucchini and kale, do not need to be blanched. Tomatoes are technically a fruit and never need blanching.
Dehydrating uses gentle warm air to evaporate water at low temperatures over many hours. Freeze drying uses extreme cold and a vacuum to turn ice directly into vapor. Freeze dried food rehydrates faster, keeps its original shape and color better, and lasts longer in storage, but freeze dryers are expensive (several thousand dollars) and run for many hours per batch. Home dehydrators are far cheaper and work well for most home preservation.
Some nutrients take a small hit but most survive. Vitamin C and a few other heat sensitive vitamins drop during drying. Minerals, fiber, and most other nutrients survive almost intact. Concentrated dried fruit and vegetables can actually be more nutrient dense by weight than fresh because the water has been removed. Drying at lower temperatures preserves more nutrients than drying at higher temperatures.
Yes. Frozen vegetables are usually already blanched, which saves you a step. Spread them on the trays while still frozen, set the dehydrator to 125 degrees Fahrenheit, and let them dry until brittle. The texture will be slightly softer than fresh dried, but the result is shelf stable and great for soups, stews, and camping meals.
Most home dehydrators use between 300 and 1000 watts, similar to a small space heater. A typical eight hour run on a 600 watt dehydrator uses about 4.8 kilowatt hours. At an average rate of 15 cents per kilowatt hour, that is around 72 cents per batch. Larger box style units use a little more, but the cost per batch is still small compared to the value of the food you are preserving.
Start With One Tray Today
Dehydrating is one of those skills that sounds technical until you actually do it. The first batch is the hardest because everything is new. After that, the rhythm becomes obvious. Slice, arrange, dry, condition, store.
Start small. Pick one apple, one bunch of herbs, or one tray of tomato slices. Set the temperature, walk away for a few hours, and watch what happens. Taste the result. Adjust the next batch based on what you learned.
If you want to keep building your pantry, water bath canning is a natural next step for high acid foods like jams, pickles, and salsas. Pressure canning covers the low acid side, including beans, soups, and meats. Lacto-fermentation gives you fresh probiotic foods in your fridge with almost no equipment. Together, those four skills cover almost anything you can grow or buy in season.
For now, plug in the dehydrator. Slice an apple. You will be eating the result by tonight, and you will have learned something every gardener and homesteader has known for generations. Welcome to dehydrating.

Cole
Founder & Lead Researcher
Cole is the founder of Plan Your Homestead. He works in clinical research and brings a research-first lens to every guide on the site, drawing on a long family line of farmers for grounded, practical perspective.
More in Food Preservation
More articles coming soon. Check back for new food preservation content.