Clean water is the single most important thing your chickens get every day. They will skip a meal long before they skip a drink, and a flock that runs dry on a hot afternoon is a flock in real trouble. The problem is that an open dish of water in a coop turns into a swamp by lunchtime. Hens kick shavings into it. They walk through it. They tip it over. You end up refilling and scrubbing twice a day, and the water is still dirty.
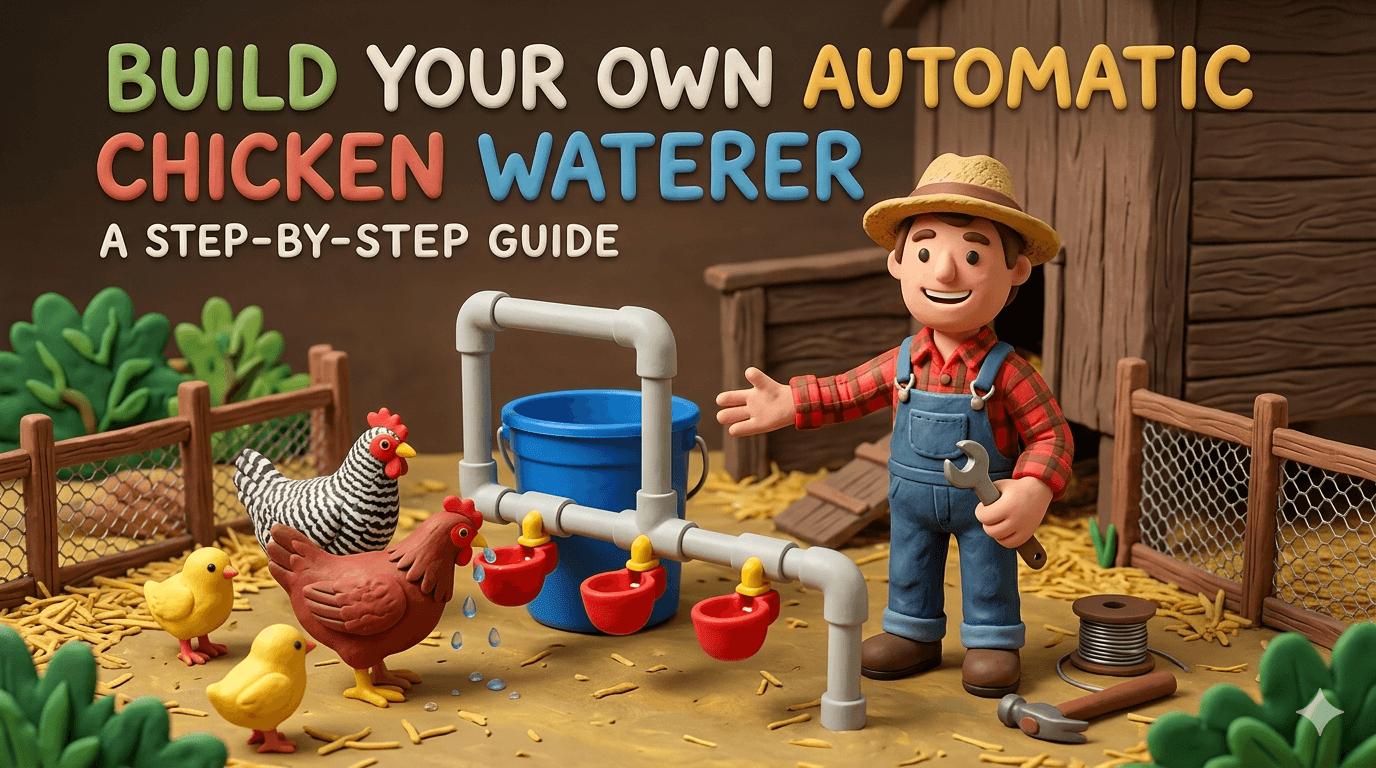
A simple 5 gallon bucket waterer fixes all of that. You drill a few holes, screw in horizontal poultry nipples, fill the bucket, and walk away for a week. The water stays clean because the chickens cannot get inside it. They peck the metal pin, a measured amount of water drops into their beak, and they swallow. No mess. No mosquitoes. No daily scrubbing.
This guide walks you through the whole build in plain language. You will get a clear materials list, the right tools, the exact drill bit size to use, and a step by step build that takes most folks about 30 to 45 minutes. Total cost runs around $25 to $45, even less if you already have a spare bucket in the garage.
If you are still finalizing your coop or run, take a look at our free chicken coop plans and our budget A frame chicken tractor plans too. Otherwise grab your drill and let us get into it.
What Is an Automatic Chicken Waterer?
An automatic chicken waterer is any closed water system that holds several days of drinking water and delivers it to your flock on demand. The chickens trigger the flow themselves. You only refill the reservoir when it runs low.
The version we are building uses a 5 gallon bucket as the reservoir and small brass valves called horizontal poultry nipples as the trigger. The nipples thread into holes drilled near the bottom of the bucket. Inside each nipple is a metal pin. When a chicken pecks the pin, the seal breaks for a split second and a drop of water falls. When the chicken stops pecking, the seal closes and no water leaks.
The whole system is gravity fed. There are no pumps, no electricity, and no plumbing connections. Fill the bucket, set it at the right height, and the system runs itself. A 5 gallon bucket holds enough water for a flock of 6 hens for about a week in mild weather.
There are a few other styles of automatic waterer out there. Cup style waterers use a small float valve to keep a shallow open cup topped up. Vertical nipple systems hang from the bottom of a bucket and drip a little even when not in use. PVC pipe systems run a long horizontal pipe with multiple nipples along its length. They all work, but the bucket and horizontal nipple combination is the simplest, the cheapest, and the most beginner friendly. It is also the system that wastes the least water and stays the cleanest.
For your first build, this is the one to start with.
Why a Bucket Waterer Is Worth Building
A bucket waterer looks almost too simple to bother with. Then you use one for a week and wonder why you ever did anything else. Here is what you actually get out of this build.
- Always clean water. The chickens cannot stand in it, scratch shavings into it, or poop in it. The water inside the bucket stays drinkable for days.
- Three to seven days between refills. A full 5 gallon bucket carries a small flock through a typical week without a top up.
- Lower water bills and less waste. Open dishes spill and evaporate constantly. A sealed bucket loses almost nothing.
- Healthier birds. Clean water cuts crop and digestive issues, and reduces the spread of coccidiosis and other waterborne diseases.
- No daily scrub. You will still rinse the bucket every few weeks, but the daily mess is gone.
- Cheap to build and easy to repair. Every part is sold at any farm store and most hardware stores. A failed nipple unscrews in seconds.
- Scales easily. One bucket handles 6 to 8 hens. Two buckets cover a flock of 16. The same plan repeats forever.
- Works on or off grid. No electricity needed. Pair it with a rainwater catchment barrel and the whole system runs on nothing but the weather.
If you have ever stood in a coop in January with a frozen jug of water in one hand and a broken plastic font in the other, this build is going to feel like a small miracle.
How Many Nipples and How Much Water You Need
Before you start drilling, do a little math. Two numbers matter. The first is how many nipples to install. The second is how big a reservoir you actually need.
How many nipples per flock
The accepted rule of thumb is one horizontal nipple per 3 to 4 hens. A few more never hurts. A few less means thirsty birds at sunrise when everyone wants a drink at the same time.
| Flock size | Minimum nipples | Comfortable nipples |
|---|---|---|
| 4 hens | 2 | 3 |
| 6 hens | 2 | 3 to 4 |
| 8 hens | 3 | 4 |
| 10 hens | 3 | 4 to 5 |
| 12 hens | 4 | 5 to 6 |
| 16 hens | 4 to 5 | 6 |
For a 5 gallon bucket, four nipples is the sweet spot. It covers a flock of up to 12 hens, leaves room for everyone, and looks balanced when you space them evenly around the side. If you keep fewer than 6 birds, two or three nipples is plenty.
How much water your flock drinks
A laying hen drinks roughly 1 pint of water a day in mild weather. In summer heat, that doubles to about 1 quart. Chicks and bantams drink less. Heavy meat birds drink more.
Use this simple table to size your reservoir.
| Flock size | Daily water (mild) | Daily water (hot) | Days a 5 gal bucket lasts (mild) |
|---|---|---|---|
| 4 hens | 0.5 gal | 1 gal | 10 days |
| 6 hens | 0.75 gal | 1.5 gal | 6 to 7 days |
| 8 hens | 1 gal | 2 gal | 5 days |
| 12 hens | 1.5 gal | 3 gal | 3 days |
| 16 hens | 2 gal | 4 gal | 2 to 3 days |
For most backyard flocks, a single 5 gallon bucket gives you a comfortable week between refills in spring and fall, and a few days in the heat of summer. If you keep more than 12 birds, plan to either build two buckets or scale up to a larger reservoir later in this guide.
Tools You Will Need
You can build this with very basic tools. Most folks already own everything on this list.
- Cordless drill
- 11/32 inch drill bit (this is the magic number for horizontal nipples)
- Tape measure
- Permanent marker
- Adjustable wrench or 1/2 inch wrench
- Utility knife or sandpaper for deburring
- Bucket lid pry tool or a flat screwdriver
- Bucket of clean water for the leak test
- Safety glasses
A few optional items that make life easier.
- Cordless drill with a second battery so you do not stop mid build
- Step bit, which produces a cleaner hole than a standard twist bit
- Roll of plumber Teflon tape (the thin white kind)
- Food grade silicone sealant as a backup on slow seeps
- A bucket wrench for stubborn lids
The drill bit size is the one detail that sticks people. Most horizontal poultry nipples sold in the United States use 11/32 inch threads. Not 5/16 inch. Not 3/8 inch. Use 11/32 and the nipples thread in tight and seal cleanly. Use 5/16 and the threads strip. Use 3/8 and the holes are too loose and leak forever. Buy the bit if you do not own one. It costs about $4.
Materials List and Cost Breakdown
Costs are approximate and based on average United States prices in 2026. Used food grade buckets are easy to find for free or a few dollars if you ask around.
| Item | Quantity | Approx. Cost |
|---|---|---|
| 5 gallon food grade bucket with lid | 1 | $5 to $8 |
| Horizontal poultry nipples (brass) | 4 to 6 | $8 to $14 |
| Plumber Teflon tape | 1 roll | $1 |
| Food grade silicone sealant (optional) | 1 tube | $7 |
| Bucket hanger or 2 cinder blocks | 1 set | $5 to $15 |
| Submersible heater or heated base (winter, optional) | 1 | $25 to $45 |
| Basic build total | ~$15 to $30 | |
| Build with winter heater | ~$40 to $75 |
If you skip the silicone, find a free bucket from a bakery or restaurant, and hold off on the heater until winter, you can finish your first waterer for under $20.
Choosing the Right Bucket and Nipples
Two parts matter most in this build. The bucket and the nipples. Get these right and the whole system works for years.
Picking the bucket
Not every 5 gallon bucket is safe to hold drinking water. Many cheap orange and white buckets are made from recycled plastic that can leach chemicals as they age in sunlight.
Look for these features on the bucket you choose.
- Food grade plastic only. Look for the words food grade or food safe stamped on the bottom, or a recycling symbol with the number 2 inside (HDPE) and a knife and fork icon nearby. White restaurant buckets that once held frosting, pickles, or olives are perfect.
- Solid color, ideally dark or opaque. A clear or translucent bucket lets sunlight in and grows algae fast. Black, dark blue, dark green, or a thick opaque white all work. Plain white from a bakery is fine if the bucket sits inside a coop or in shade.
- A snap on lid in good shape. The lid keeps debris and curious chickens out of the reservoir. A cracked lid is fine for a worksite but not for a waterer.
- No chemical smell. If you can smell solvent, paint, or detergent inside the bucket, do not use it. Even after several rinses, residues linger.
- A flat solid bottom. Avoid buckets with deep flex points or thin spots. A full 5 gallon bucket weighs about 42 pounds.
Where to find good buckets for free or cheap.
- Bakeries (frosting buckets are everywhere)
- Restaurants (pickles, olives, mayo)
- Delis and sandwich shops
- Donut shops
- Local breweries (smaller buckets sometimes available)
- Facebook Marketplace and Craigslist (search food grade bucket)
- Hardware stores sell new food safe buckets for about $5
Wash any used bucket several times with hot soapy water before you build, then rinse until the soap is gone. A weak vinegar rinse afterward removes any lingering smell.
Picking the nipples
Horizontal poultry nipples are sold in two main styles. The body style you want is brass with a stainless steel pin and a rubber O ring. Plastic nipples exist but they crack in cold weather and the pins stick. Spend the extra dollar or two and get brass.
Look for these specs.
- Brass body. Brass holds up to freeze and thaw cycles, will not crack, and lasts for many years.
- Stainless steel pin. Stainless will not rust and the pin moves freely for the life of the nipple.
- 11/32 inch thread. This is the standard size for almost every brass horizontal nipple sold in the United States. The drill bit size matches.
- Built in O ring or washer. A rubber gasket on the threads gives you the leak free seal you want.
- Right angle (90 degree) outlet. This is the part the chickens peck. Horizontal nipples point straight out from the bucket, not down. That is what makes them drip free.
Sold in bags of 5, 6, 10, or 25. For a single 5 gallon bucket build, a bag of 5 or 6 is exactly right and leaves you a spare. The cost runs about $1.50 to $2.50 per nipple.
Warning
Do not buy vertical nipples by accident. Vertical nipples hang straight down from the bottom of a bucket and drip almost constantly because gravity pulls on the pin. Horizontal nipples point sideways and only release water when pecked. The two look similar in product photos. Read the listing carefully before you order.
Step by Step Build Instructions
Plan on about 30 to 45 minutes for the whole job. Most of that is waiting for the silicone to set up if you choose to use any. The actual drilling and threading takes about 10 minutes.
Step 1: Clean and Inspect the Bucket
Wash the bucket inside and out with hot water and dish soap. Rinse thoroughly. Sniff the inside. If you can smell anything other than clean plastic, repeat the wash. A weak white vinegar rinse (about a cup of vinegar in a gallon of water) clears most lingering smells.
While the bucket is drying, look it over for any cracks, deep gouges, or thin spots in the bottom and sides. A small scratch is fine. A crack means the bucket will fail under a full water load. Set any damaged bucket aside for garage use.
Pull the lid off and check that the rubber gasket inside the rim is intact. The gasket keeps debris out and slows evaporation. If the gasket is missing or torn, the lid will still work but you may need to weight it down on windy days.
Step 2: Mark the Nipple Locations
Set the dry bucket upright on a workbench. Measure 2 to 3 inches up from the bottom and make a small horizontal pencil line all the way around at that height. This is your nipple line.
Two inches is the minimum. Any lower and the nipples sit so close to the bottom that sediment and small debris can clog the pins. Three inches is the sweet spot for most builds. The chickens still reach the nipples easily even if a quarter inch of grit settles in the bottom.
Now space your nipples evenly around the bucket. For four nipples, that means one every 90 degrees, or roughly 7 inches apart on a standard 5 gallon bucket. For three nipples, one every 120 degrees. For six, one every 60 degrees.
Use the marker to put a clear dot at each spot directly on the nipple line. Double check the height of every dot before you drill. A nipple that sits even half an inch lower than its neighbors looks fine but will dribble more.
Tip
If you are building more than one bucket, make a quick paper template the first time. Wrap a strip of paper around the bucket at nipple height, mark your spacing, then transfer it to every bucket. This guarantees your hole spacing is identical across the whole flock.
Step 3: Drill the 11/32 Inch Holes
Load the 11/32 inch bit into your drill. Set the bucket on its side with the first dot facing up so chips fall away from your face.
Press the bit straight against the dot. Keep the drill perfectly perpendicular to the bucket wall. A tilted hole creates a tilted nipple, which then leaks. Squeeze the trigger and let the bit do the work. Do not push hard. The plastic cuts easily and pushing only flexes the bucket wall.
The bit will pop through the wall in 2 to 3 seconds. Pull the bit out cleanly. Rotate the bucket and repeat for each remaining dot.
Once all the holes are drilled, run a utility knife or a piece of fine sandpaper around the inside and outside of every hole to knock off the plastic burrs. A clean hole gives a clean seal. A burred hole catches the rubber O ring and creates a slow leak.
If you happen to drill a hole slightly off line, do not panic. As long as the hole is round and the right size, the nipple will still seal. The visual gets a little wonky, but the function is fine.
Step 4: Wrap the Nipple Threads with Teflon Tape
Teflon tape is optional on most modern brass nipples because they ship with a built in O ring. That said, two wraps of tape is cheap insurance and almost guarantees a perfect seal.
Pull off about 8 inches of tape. Hold the nipple threads up. Start the tape at the base of the threads and wrap clockwise (looking down the threads from the open end) so the tape tightens as you screw the nipple in. Two full wraps is enough. Trim the loose end with a fingernail or your knife.
Repeat for each nipple. Set the wrapped nipples in a row on your bench so you do not lose any.
Step 5: Hand Thread Each Nipple In
Pick up the first nipple. Push it through the hole from the outside in until the threads catch on the inside of the bucket wall. Twist clockwise by hand. The threads will bite the plastic and start cutting their own seat as the nipple advances.
Do this entirely by hand for the first three or four full turns. If you start with a wrench you risk cross threading the nipple, which means the threads cut at an angle and the nipple will never seal. By hand, you can feel right away if the angle is off and back out before you cause damage.
Once the nipple is finger tight, the rubber O ring should be just touching the outside of the bucket wall. Repeat for every nipple.
Step 6: Snug with the Wrench (Do Not Overtighten)
Now reach for the adjustable wrench. Grip the flats on the nipple body just behind the right angle outlet. Turn clockwise no more than a quarter to a half turn past finger tight. The O ring will compress and form the seal.
Stop the moment the nipple feels solid. Overtightening is the most common mistake on this build. Crank too hard and you crush the O ring, strip the plastic threads, or split the bucket wall. None of those failures show themselves right away. They show up two days later as a slow drip that gets worse every hour.
If you cannot get a perfect seal at finger tight plus a quarter turn, back the nipple out, add one more wrap of Teflon tape, and try again.
Step 7: Leak Test the Whole Bucket
Carry the bucket to a sink or set it inside a larger tub. Fill it with water from a tap or hose. Watch every nipple for at least 10 minutes.
A perfect seal is bone dry on the outside of the bucket around every nipple. A few stray drops within the first minute or two are normal as everything settles. If a nipple is still leaking at the 10 minute mark, mark it with the pen and tighten that nipple by another eighth of a turn. Wait another 5 minutes. If the leak persists, back the nipple all the way out, add Teflon tape, reseat, and retest.
While the bucket is full, walk around it and check the bottom for any sweating or damp spots. A slow leak from a hairline crack will show up here. If you find one, that bucket is not a candidate for a waterer. Set it aside and grab a fresh one.
A bucket that passes the leak test is ready for the coop.
Warning
Never set a leaking waterer in the coop and tell yourself it will seal up. A small leak today turns into a soaked floor and moldy bedding by next week. Damp coop floors lead to respiratory problems and bumblefoot in your flock. Take the time to get a perfect seal before you install the bucket.
Step 8: Mount the Bucket at Chicken Shoulder Height
The single most important detail in setup is the height of the nipples. Each nipple should sit at the height of a standing chicken's eye, or just slightly above. The bird should reach up a little to drink, not down.
Measuring this is easy. Stand a typical full grown hen on a flat surface and watch where her eye lands. For most standard breeds, that height is 8 to 10 inches off the floor. For larger breeds like Brahmas or Jersey Giants, plan on 10 to 12 inches. For bantams, 5 to 7 inches.
Mount the bucket so the lowest nipple sits at that target height. Snap the lid on tight. Now the system is ready to fill.
We will cover specific mounting options in the next section.
Mounting Options
There are four common ways to mount a bucket waterer in a coop or run. Each has its place. Pick the one that fits your setup.
Hung from the ceiling
The cleanest mount of all. A short length of rope or chain runs from a sturdy hook in the coop ceiling down to the bucket handle. The bucket hangs in mid air, well clear of the floor, and never tips.
Pros: no floor contact means no shavings touching the bucket and no rats hiding under it. Easy to lift down for refilling.
Cons: the ceiling needs to be strong enough to hold 45 pounds. Aim the hook into a rafter, not just the wood paneling. Use a heavy duty screw eye rated for at least 75 pounds.
Bracketed to a wall stud
A simple wood or metal bracket screwed into a wall stud holds the bucket vertical and steady. A removable bracket lets you lift the bucket off for cleaning and refilling.
Pros: very stable, easy to refill from above with a hose, and fits in narrow coops.
Cons: needs a stud strong enough to hold the weight. A bucket bracket screwed into thin coop paneling will pull free.
Set on cinder blocks or a stand
The cheapest mount. Stack two standard cinder blocks under the bucket so the lowest nipple sits at the right height.
Pros: free if you have spare blocks, no drilling required, and easy to remove or relocate.
Cons: the bucket sits on the floor, which means shavings can pile up around it and rats can hide underneath. Sweep around the base every week.
Integrated into a covered run
For an outdoor run, mount the bucket under a roof or inside a small lean to so rain cannot fill the lid and so direct sun does not heat the water. A simple shelf at the right height works fine. Add a small wind break on the side facing the prevailing weather to keep dust and leaves out.
Pros: gets clean water out into the run where the chickens spend most of their time.
Cons: outdoor mounts freeze faster in winter and warm faster in summer. Plan accordingly.
For a first build, the hung from the ceiling option is the one that gives most folks the fewest problems. If your coop ceiling is too weak, fall back to a wall bracket inside the coop or a cinder block stack in the run.
Teaching Your Flock to Use It
The first time you put a nipple waterer in front of a flock that has only ever drunk from an open dish, the chickens will ignore it. Your job is to bridge the gap. Most flocks learn in 24 to 48 hours, and a few birds figure it out in minutes.
The first 48 hours
Set the new waterer in place at the right height. Do not remove the old open dish yet. The birds need to know fresh water is still around while they explore the new system.
Walk over to the bucket several times during the day. Tap each nipple firmly with your finger so a drop of water beads on the pin. Most chickens are wildly curious about anything that catches the light, and a hanging drop of water is impossible to ignore. Within an hour or two, at least one bird will peck the drop. Once that bird drinks, every other bird in the flock will follow because chickens are relentless copycats.
If your flock is shy or slow to learn, smear a tiny dab of plain yogurt or a smudge of fruit on each nipple. The birds will peck the food, trigger the nipple, taste the water, and figure out the rest themselves.
Removing the old waterer
After 48 hours, every bird in the flock should have used the bucket at least once. Now move the old open waterer to a less convenient spot inside the coop. After another 24 hours, remove it entirely. The flock will be fully on the new system within a day.
Keep the old waterer clean and ready in the garage. You will want it again the next time you introduce a new bird, host chicks for the first time, or run a worming treatment that requires a separate medicated water station.
Special cases
- Chicks under 4 weeks old. Most chicks need an open shallow dish until they are large enough to reach a horizontal nipple comfortably. Once they are about 3 to 4 weeks old, you can introduce a low mounted nipple alongside the dish.
- New flock additions. Quarantine new birds in a separate enclosure with a familiar open dish for the first two weeks, then introduce them to the bucket once they are integrated.
- Sick or injured birds. A bird recovering from injury or illness may not have the energy to peck a nipple repeatedly. Offer a temporary open dish in the recovery area until the bird is back to full strength.
A nipple waterer is the right call for healthy adult birds. For everyone else, an open dish is still the right tool.
Keeping the Water Clean
The whole point of a sealed bucket waterer is clean water. The birds cannot dirty it from the outside. The only way the inside gets dirty is from light, time, and the occasional pinch of grit that washes off the inside of the bucket. Here is how to keep things fresh.
Pick a dark or opaque bucket
We covered this in the materials section, but it is worth repeating. Sunlight plus standing water plus a clear bucket equals a green wall of algae in about a week. A dark bucket stops algae before it starts. If your bucket is white, set it inside the coop in shade. Outdoor mounts in sun should always use dark buckets or a fitted bucket cover.
Tip
A simple way to shade a white bucket outdoors is to slip an old dark t shirt over it. It looks a little funny but it works perfectly. A roll of black duct tape is even simpler. Three or four wraps around the bucket blocks all the light.
Rinse the bucket every three to four weeks
Even with a perfect setup, fine sediment settles to the bottom over time. Once a month, take the bucket down and dump out any standing water. Rinse the inside with clean water. Use a long handled bottle brush to scrub the bottom and the lower inside walls. Rinse again until the water runs clear.
If you see any green tint to the bucket walls, scrub with a weak vinegar solution (about half a cup of white vinegar per gallon of water), let it sit for 5 minutes, then scrub and rinse.
While the bucket is empty, use a small wire or paper clip to clear any debris that may be stuck inside the nipple bodies. A blocked nipple delivers water slowly, which the chickens will refuse to use.
Add apple cider vinegar (optional)
Many homesteaders add a splash of raw apple cider vinegar to their flock's drinking water once a week. The standard ratio is one tablespoon per gallon of water. Use only raw, unfiltered vinegar with the mother culture intact.
The benefits are mostly anecdotal but there is a long tradition behind the practice. The vinegar slightly acidifies the water, which discourages algae growth and may support gut health in the birds. Skip the vinegar for any week your flock is on antibiotics, since the acid can interfere with absorption.
Do not use vinegar in a galvanized waterer, only in plastic. The acid reacts with zinc and can release small amounts into the water. Plastic is fine.
Flush sediment quarterly
Every three months, do a deep clean. Take the bucket down, empty it, and unscrew at least two nipples. Run a hose through the bucket from the top so water flows out the open nipple holes. This flushes any heavy sediment that settled at the very bottom. Reseat the nipples (add fresh Teflon tape if needed), refill, leak test, and rehang.
A bucket waterer maintained on this schedule lasts indefinitely. The only parts that ever wear out are the nipple O rings, which last about 3 to 5 years before they start to seep. Replacement nipples are cheap, and unscrewing the old one and screwing in a new one takes 30 seconds.
Winter Use and Freezing
Cold weather is the one challenge a basic bucket waterer cannot handle on its own. Below freezing, the water in the nipples turns to ice and the system stops working. Here is how to keep water flowing in winter without losing the simplicity of the bucket system.
Above 25 degrees Fahrenheit
In light frost, you can usually get away with a few simple tricks. Wrap the bucket in a piece of foam pipe insulation or an old wool blanket held in place with bungee cords. Top the bucket up with hot water in the morning. The thermal mass of 5 gallons of warm water will hold off freezing for most of a sunny winter day.
Cover the lid with a square of foam insulation as well. Most heat loss in a bucket happens through the top.
Between 15 and 25 degrees Fahrenheit
A submersible aquarium heater is the easiest fix. The smallest 50 to 100 watt models cost about $15 and drop right into the bucket through the lid. The cord runs out the side and plugs into a coop outlet. The heater holds the water at about 50 degrees Fahrenheit, which is plenty warm to keep the nipples from freezing.
Use a heater rated for safe dry running. Cheap models can crack if the bucket runs low. Better units have a thermostat and an automatic shut off.
A heated base plate (sometimes sold as a chicken waterer heater) is the other option. The base plate sits on the floor under the bucket and gently warms the bottom. Less precise than a submersible heater but easier to install if you do not want to run a cord into the bucket.
Warning
Any electrical equipment in a coop must be on a GFCI outlet. Damp environments and standard outlets are a fire and shock hazard. Never run an extension cord across the floor of a coop where the birds can peck it. Run cords overhead and secure them well clear of any roosting bars.
Below 15 degrees Fahrenheit
In hard cold, the most reliable plan is to bring the bucket inside at night and hang it back up first thing in the morning. Yes, that is a chore. It is also the only way to guarantee water in the morning when temperatures drop into the single digits.
Some folks keep two buckets at this point. One hangs in the coop on a heater during the day. The second sits in the heated mudroom or kitchen overnight. In the morning, the swap takes 30 seconds and the flock starts the day with warm water.
If you live in a climate with months of subfreezing weather, consider building a small insulated water station inside the coop. Wrap a wooden frame in foam panels, drop the bucket and heater inside, and cut openings just for the nipples. The insulated box stretches the safe operating range of a basic heater by another 5 to 10 degrees.
Scaling Up for Larger Flocks
A single 5 gallon bucket covers small to medium backyard flocks. Once you outgrow it, the same plan scales easily. Here are the three most common ways to grow.
Add a second bucket
The simplest upgrade. Build a second identical bucket and hang it on the opposite side of the coop. The flock will spread out between the two stations, which reduces crowding at the nipples and shortens the longest walk to water from any roosting spot.
This is the right move for flocks of 10 to 18 birds.
Switch to a 55 gallon barrel
For 20 plus birds, drill nipples directly into a 55 gallon barrel and skip the bucket entirely. The build is identical. Use the same 11/32 inch drill bit, the same horizontal nipples, the same Teflon tape. The only difference is more nipples (plan on 8 to 12 around the barrel) and a much heavier reservoir that has to live in one fixed spot.
A 55 gallon barrel holds enough water for a flock of 20 hens for two to three weeks in mild weather.
Plumb a bucket from a rainwater source
For a fully off grid setup, you can feed the bucket waterer continuously from a rainwater catchment barrel using a small float valve. The float valve sits inside the bucket and opens when the water level drops, refilling automatically from the rain barrel through a length of hose. The bucket never goes dry as long as the rain barrel has water.
This is a more involved build that adds a float valve, a few feet of food grade hose, and a bulkhead inlet on the side of the bucket. The plumbing is the same approach used in our rainwater barrel guide, just in miniature. If you already have a rainwater system, this upgrade lets the entire flock drink rain water with no electricity, no pumps, and no daily chores.
For a deeper look at off grid water options on the homestead, see our guide on collecting and storing rainwater and our broader off grid living overview.
Common Mistakes to Avoid
A few traps to watch for, especially on your first build.
- Wrong drill bit size. Use 11/32 inch. Not 5/16. Not 3/8. The wrong size means a stripped thread or a permanent leak. There is no fix for a bucket drilled at the wrong size other than throwing it away.
- Drilling too low. Sediment settles in the bottom inch of the bucket. Nipples installed less than 2 inches up will clog within a month. Three inches is the sweet spot.
- Skipping the leak test. A leak that looks tiny in the workshop becomes a soaked coop floor in three days. Test for at least 10 minutes before you mount the bucket.
- Overtightening the nipples. A quarter turn past finger tight is plenty. Cranking the wrench strips threads, crushes O rings, and cracks the bucket wall.
- Using a bucket that is not food grade. Old paint buckets, drywall mud buckets, and unmarked recycling buckets are not safe for drinking water. Stick to bakery, restaurant, or new hardware store buckets.
- Mounting at the wrong height. Too low and the chickens have to crouch. Too high and they cannot reach. Match the lowest nipple to standing eye height for your breed.
- Letting algae take hold. A clear or sun lit bucket will be green inside in a week. Use a dark bucket or shade a light one.
- Ignoring winter prep. A frozen bucket the first morning of December is a flock without water. Put your winter plan in place before the first freeze, not after.
- Using vertical nipples instead of horizontal. Vertical nipples drip constantly. Horizontal nipples do not. Read the listing twice before you buy.
- Forgetting the lid. An open top bucket fills with shavings, leaves, and the occasional curious hen. Snap the lid on every time.
Avoid these and your bucket waterer will run for years with almost no fuss.
Frequently Asked Questions
Frequently Asked Questions
A 5 gallon bucket with four horizontal nipples comfortably supports a flock of up to 12 hens. The reservoir holds about a week of water for a flock of 6 in mild weather, and about 3 days for a flock of 12. For larger flocks, build a second bucket or scale up to a 55 gallon barrel using the same plan.
Most chicks under 3 to 4 weeks old are too small to comfortably use horizontal nipples. Use a shallow open dish or a chick specific waterer until they are big enough. Once the chicks are about 4 weeks old, mount a low nipple bucket alongside the open dish. The chicks will learn quickly by watching each other peck.
Yes, with two important rules. First, use a dark or fully opaque bucket so sunlight cannot trigger algae growth. Second, set the bucket in shade if possible. A bucket in direct sun will heat the water above 90 degrees Fahrenheit by midday, which the chickens will refuse to drink. A small roof or a shade cloth above the bucket is an easy fix.
Refill timing depends on flock size and weather. A flock of 6 hens drinks roughly 3.5 quarts a day in mild weather, so a 5 gallon bucket lasts about 6 to 7 days. In summer heat, that drops to 3 to 4 days. Check the water level once a week minimum, and more often during heat waves. Most folks settle into a Sunday refill habit and that works well year round.
Not as a primary water source. Ducks need open water deep enough to dip their entire bill and clean out their nostrils. A nipple system can supplement open water in a duck pen but cannot replace it. If you keep both ducks and chickens, plan for a separate open water station for the ducks plus a bucket nipple waterer for the chickens.
Mount the bucket so the lowest nipple sits at the chickens standing eye height, or just slightly above. For most standard breeds, that is 8 to 10 inches off the coop floor. Larger breeds need 10 to 12 inches and bantams need 5 to 7 inches. The chickens should reach up a little to drink, never down. A nipple set too low will not be used.
Use a dark or opaque bucket and keep it out of direct sunlight. Rinse the bucket once a month with a weak vinegar solution. A teaspoon of food grade hydrogen peroxide added to the water once a week is also an effective preventative. Adding raw apple cider vinegar at one tablespoon per gallon helps too. The best fix is the easiest one: a dark bucket in shade rarely needs treatment at all.
Most modern horizontal nipples are designed to allow air to bleed back into the bucket as water leaves, so a vent hole is usually not needed. If you notice the nipples slowing way down once the bucket is half empty, drill one small hole (about 1/8 inch) in the top of the lid. This vent equalizes pressure and keeps the flow strong all the way to the last drop. Cover the vent with a small piece of fine mesh screen if mosquitoes are a concern.
Ready to Build Your Automatic Chicken Waterer?
That is the whole build. About an hour of work, less than $30 in parts, and a system that delivers clean water for years with almost no daily effort. Once you fill your first bucket and watch the flock figure out the nipples, you will wonder how you ever kept up with open dishes and daily refills.
When your waterer is in place and your flock is thriving, take the next step on your homestead build out. Browse our free chicken coop plans for a coop that matches your flock size, or grab the budget A frame chicken tractor plans if you want a movable run for fresh pasture every week. To take your water system fully off grid, plumb a rainwater catchment barrel and feed the bucket waterer from the rain.
For more weekend projects, browse the full DIY hub. For everything chicken, head over to our animals hub.
Happy building, and happy keeping.

Cole
Founder & Lead Researcher
Cole is the founder of Plan Your Homestead. He works in clinical research and brings a research-first lens to every guide on the site, drawing on a long family line of farmers for grounded, practical perspective.
More in DIY
More articles coming soon. Check back for new diy content.