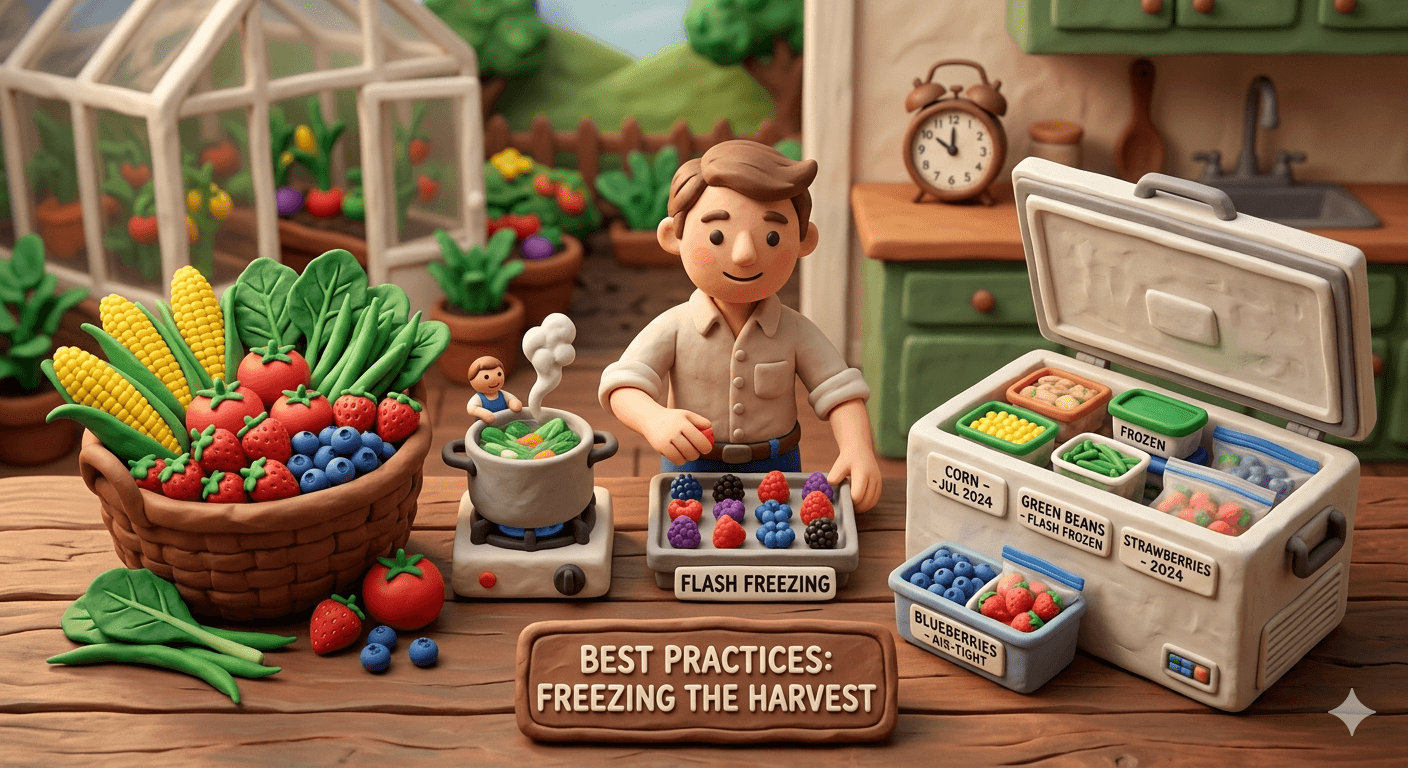
Freezing is the easiest way to preserve almost anything you grow, raise, or buy in season. You do not need a pressure canner. You do not need to learn altitude charts. You do not need to babysit a fermentation crock for a week. You just need fresh food, the right packaging, and a freezer that holds zero degrees Fahrenheit.
This guide walks you through the whole process. By the end, you will know how to freeze garden produce, meat, dairy, baked goods, and full prepared meals so they taste fresh months later. You will know which vegetables need a quick blanch first, how to keep freezer burn off your food, and how to thaw safely.
You can absolutely do this on your first try. Freezing is forgiving. Most mistakes show up as texture changes, not safety issues. Once you fill your freezer with neatly labeled bags of summer berries, blanched green beans, and ready to heat soups, you will start looking at every harvest and grocery sale a little differently.
How Freezing Preserves Food
Spoilage needs activity. Bacteria need warmth and moisture to grow. Enzymes inside the food itself need warmth to break down flavor, color, and texture. Drop the temperature far enough and almost everything slows to a crawl.
At zero degrees Fahrenheit, bacterial growth essentially stops. Your food becomes safe to eat for many months as long as the freezer stays cold. Freezing does not kill bacteria the way heat does. It just puts them on pause. Anything that was on the food when you froze it will wake back up when it thaws.
Enzymes are the sneakier problem. They keep working slowly even at freezer temperatures. That is why a bag of unblanched green beans turns dull and grassy after three months while a blanched bag stays bright and fresh. Blanching deactivates those enzymes before the food ever hits the freezer.
The other enemy is air. Oxygen and dry freezer air pull moisture out of frozen food and leave behind those dry gray patches we call freezer burn. Freezer burn is not unsafe. It just tastes terrible. Good packaging is the entire defense.
Three things have to be working at the same time. The freezer needs to stay at zero degrees or below. Enzyme heavy vegetables need a quick blanch before packing. Every package needs to keep air away from the food. Get those three right and freezing works every time.
Note
Freezing is one of the youngest food preservation methods. Home freezers only became common after World War II. Before that, people relied on root cellars, salt curing, drying, and fermentation. Today freezing carries more of the home harvest in this country than any other method.
Why Freeze Your Harvest
Freezing is the fastest preservation method you can learn. A bag of blanched broccoli takes ten minutes from sink to freezer. A flash frozen tray of strawberries takes even less hands on time. Compared to canning, which can fill a Saturday, freezing fits into a weeknight.
The flavor stays close to fresh. Properly frozen peas in February taste almost identical to peas in July. Frozen blueberries hold their color, their juice, and their sweetness. Tomato sauce frozen in summer tastes like tomato sauce in winter. Few other methods get that close to the original.
Freezing is forgiving for beginners. There is no botulism risk. There is no fermentation timing to manage. There is no perfect humidity to maintain. If you keep the freezer cold and the air out of the bag, you are doing the job right.
Cost is low to start. A few boxes of freezer bags, a Sharpie, and the freezer you already own will cover almost every project. Upgrades like a vacuum sealer or a dedicated chest freezer pay for themselves quickly if you use them often.
Freezing also pairs beautifully with the rest of your preservation toolkit. Use water bath canning for shelf stable jams, salsas, and pickles. Use pressure canning for low acid foods like beans, meat, and soup that need a place outside the freezer. Use dehydrating for snacks and pantry staples. Use lacto-fermentation for probiotic vegetables in the fridge. Freezing fits in as the everyday default for almost everything else.
Equipment You Need
You can start freezing with almost nothing. A few smart upgrades make the process faster, cleaner, and longer lasting.
A reliable freezer
Your kitchen freezer can absolutely handle a small homestead worth of food. The combo fridge freezer compartment is the most common starting point. It works for everything as long as it can hold zero degrees Fahrenheit consistently.
A dedicated chest freezer is the upgrade most homesteaders fall in love with. Chest freezers hold temperature better, recover faster after you open the lid, and offer the most storage per dollar. They also keep food longer during a power outage because cold air sinks and stays put when the lid is closed.
An upright standalone freezer costs more than a chest model of the same capacity. The trade off is convenience. Shelves and door bins make it easier to see what you have and grab it without rearranging.
Whatever you use, keep a freezer thermometer inside. Most built in dials are unreliable. A five dollar thermometer tells you the truth.
Bags, containers, and wrap
Freezer bags are the workhorse. Look for bags labeled "freezer" rather than "storage." Freezer bags are thicker and block air much better. Quart and gallon sizes cover almost everything.
Rigid plastic containers are great for soups, stews, and anything you do not want crushed. Leave at least one inch of headspace at the top because liquids expand as they freeze.
Glass mason jars work too with a few caveats. Use straight sided jars rather than shouldered ones, leave a full inch of headspace, freeze the contents uncovered until solid, and then add the lid. Tapered shoulders and tight lids on a jar full of expanding liquid are how jars crack.
Heavy duty aluminum foil and freezer paper give you another layer of defense for meat, fish, and baked goods. Wrap tightly, then bag.
A vacuum sealer is the single biggest upgrade for serious freezer users. Vacuum sealed meat and fish stay at peak quality two to three times longer than bagged equivalents. The bags cost more, but the food savings make up for it fast.
Sheet pans for tray freezing
A rimmed sheet pan lined with parchment paper is the secret to loose, individually frozen berries, peas, and meatballs. You spread the food in a single layer, freeze until solid, then bag. The pieces stay separate so you can scoop out exactly what you need.
Labels and a permanent marker
Every package needs the food name and the date. A roll of freezer tape and a Sharpie cost almost nothing. Future you will thank present you every single time.
Tip
For your first freezer setup, a basic freezer thermometer, a box of gallon freezer bags, a sleeve of quart bags, a few rigid containers, and a Sharpie will handle ninety percent of what you freeze. Add a vacuum sealer and a chest freezer once you know how much you actually preserve in a year.
The Four Stages of Freezing the Harvest
Almost every freezing project moves through the same four stages. Knowing them ahead of time makes the rest of this guide easier to follow.
The first stage is prep. You wash, trim, peel if needed, and cut the food into the size you want to use later. Uniform pieces freeze evenly and thaw evenly.
The second stage is blanch for vegetables that need it. A quick dip in boiling water followed by an ice bath stops enzyme activity in its tracks. Most vegetables need this step. Most fruits do not.
The third stage is pack. You squeeze out as much air as possible, leave the right amount of headspace for liquids, and seal everything in containers built for the freezer. This is where freezer burn is won or lost.
The fourth stage is freeze fast. Spread packages in a single layer against the freezer walls or floor for the first day. Faster freezing creates smaller ice crystals, which means better texture when the food thaws.
Walk through these four stages every time and you will get reliable results, even with foods you have never frozen before.
Step by Step: Your First Bag of Frozen Green Beans
Green beans are the perfect first project. They are forgiving, they freeze well, and they taste almost identical to fresh after months in the freezer. Once you have done one batch, you can adapt the same method to almost any vegetable.
Step one: pick fresh beans
Choose firm, bright beans with no rust spots or limp ends. The fresher the beans, the better the frozen result. Beans you pick in the morning and freeze that afternoon will outshine beans that sat in the fridge for a week.
Step two: wash and trim
Rinse the beans under cool running water. Snap off the stem ends. Leave the tails on or trim them off, your choice. Cut the beans into one to two inch pieces or leave them whole. Whole beans freeze a little better. Cut beans pack tighter.
Step three: bring water to a rolling boil
Fill a large pot with water and set it over high heat. Use enough water that adding the beans will not stop the boil for long. About a gallon of water per pound of beans is a good rule.
Step four: prepare an ice bath
Fill a large bowl with cold water and a generous handful of ice. The ice bath stops the cooking the moment the beans come out of the boiling water. Skipping this step gives you mushy frozen beans every time.
Step five: blanch for three minutes
Drop the beans into the boiling water. Start the timer when the water returns to a boil. Three minutes is the sweet spot for green beans. Less than that and the enzymes survive. More than that and the beans start to cook through.
Step six: shock in the ice bath
Lift the beans out with a spider or slotted spoon and plunge them straight into the ice bath. Stir gently. Leave them in the cold water for the same length of time you blanched them. About three minutes for green beans.
Step seven: drain and dry
Drain the beans in a colander. Spread them on a clean towel and pat the surface water off. Wet beans freeze into a single icy clump that is hard to use later.
Step eight: pack and freeze
For loose individual beans, spread them in a single layer on a parchment lined sheet pan and freeze until solid, about two hours. Then transfer to a freezer bag. Squeeze out the air, seal, label with the date, and stack flat in the freezer.
For a faster method, skip the tray freeze and pack the cooled beans straight into a freezer bag. The beans will freeze in a slab, but you can break off chunks easily as long as you bag them before they get warm.
The same eight steps work for broccoli, cauliflower, carrots, peas, corn, asparagus, and brussels sprouts. The blanching time is the only thing that changes.
Blanching Times Reference
The numbers below are starting points. A pound or two of vegetables in a gallon of boiling water hits these times reliably. Larger batches need a few extra seconds.
| Vegetable | Prep | Blanch time | Notes |
|---|---|---|---|
| Green beans | Trim, cut or leave whole | 3 minutes | Shock immediately in ice water |
| Broccoli | Cut into florets | 3 minutes | Salt the blanching water to keep color |
| Cauliflower | Cut into florets | 3 minutes | Add a splash of lemon juice to keep white |
| Carrots, sliced | Peel, slice 1/4 inch | 2 minutes | Whole baby carrots need 5 minutes |
| Carrots, diced | Peel, dice small | 2 minutes | Drain very well |
| Corn, kernels | Cut off cob | 4 minutes for cob, then cut | Blanch the whole cob first |
| Corn on the cob | Husk and silk | 7 to 11 minutes by ear size | Cool fully before bagging |
| Peas, shelled | Shell | 1.5 minutes | Tray freeze for loose peas |
| Spinach and greens | Wash thoroughly | 2 minutes | Squeeze water out before bagging |
| Summer squash and zucchini | Slice 1/2 inch | 3 minutes | Pat dry well, expect softer texture |
| Asparagus | Trim woody ends | 2 to 4 minutes by thickness | Tray freeze for loose spears |
| Brussels sprouts | Trim, halve large ones | 3 to 5 minutes by size | Cool fully, pat dry |
| Bell peppers | Slice or chop | No blanching needed | Tray freeze for loose pieces |
| Hot peppers | Whole or chopped | No blanching needed | Pack tight, label clearly |
| Onions, chopped | Peel, dice | No blanching needed | Double bag to keep smell contained |
| Tomatoes, whole | Wash | No blanching needed | Skins slip off after thawing |
The vegetables marked "no blanching needed" hold up because they have lower enzyme activity or because the texture change after thawing is acceptable for cooking use. You can always blanch them if you want, but you do not have to.
Freezing Fruit
Fruit is even easier than vegetables because almost no fruit needs blanching. The natural acids slow enzyme activity well enough on their own.
The simplest method is the dry pack. Wash the fruit, dry it well, spread it in a single layer on a parchment lined sheet pan, and freeze until solid. Transfer to freezer bags, squeeze out the air, label, and store. The pieces stay loose so you can grab a handful for smoothies, oatmeal, or baking.
A sugar pack uses about half a cup of sugar tossed with each quart of prepared fruit. The sugar pulls juice out of the fruit and creates a light syrup that protects color and flavor. This works beautifully for sliced peaches, strawberries, and rhubarb.
A syrup pack covers the fruit with a light or medium sugar syrup before freezing. This is the gentlest option for delicate fruits like sliced apricots and figs. Mix four cups of sugar into four cups of water for a medium syrup, simmer until clear, and cool before pouring over fruit packed in rigid containers. Leave one inch of headspace.
| Fruit | Prep | Best method | Notes |
|---|---|---|---|
| Strawberries | Hull, slice or leave whole | Dry pack or sugar pack | Tray freeze for loose berries |
| Blueberries | Wash, dry well | Dry pack | Wash just before using to keep skins firm |
| Raspberries and blackberries | Do not wash, very gently dry | Dry pack | Tray freeze, fragile berries |
| Peaches and nectarines | Peel, pit, slice | Sugar pack or syrup pack | Acid dip to prevent browning |
| Cherries | Wash, pit | Dry pack or sugar pack | Pit before freezing for easy use |
| Apples | Peel, core, slice | Dry pack with acid dip | Soak slices in lemon water first |
| Bananas | Peel, slice or leave whole | Dry pack | Great for smoothies, ignore the brown spots |
| Grapes | Wash, dry, leave whole | Dry pack | Frozen grapes are also a fantastic snack |
| Mango and pineapple | Peel, cube | Dry pack | Tray freeze for loose chunks |
A quick acid dip prevents browning in light fleshed fruits. Mix three tablespoons of bottled lemon juice into a quart of water, soak the cut fruit for three minutes, and drain before freezing.
Freezing Meat, Poultry, and Fish
Meat and fish freeze beautifully when you pack them right. Sloppy packaging is the only reason home frozen meat ever turns out badly.
Portion the meat the way you will actually cook it. A pound of ground beef per bag matches most recipes. Two chicken breasts per bag matches a dinner for two. Steaks freeze best individually wrapped, then bagged as a group.
Wrap tightly to keep air off every surface. The best method is a double layer. Press the meat into freezer paper, plastic wrap, or heavy foil first, then slide the wrapped piece into a freezer bag. Squeeze every bit of air out before sealing.
A vacuum sealer is the gold standard for meat. Vacuum sealed steaks, roasts, and fish stay at peak quality two to three times longer than bagged equivalents. If you process your own animals or buy in bulk, a sealer pays for itself in one season.
Always label with the cut, the weight, and the date. "Beef" written on a frozen brick is useless six months later. "1 lb ground beef, May 7" tells you exactly what you have.
| Cut | Best storage at 0 F | Notes |
|---|---|---|
| Ground beef, pork, turkey | 3 to 4 months | Press flat in the bag for fast thawing |
| Steaks and roasts | 6 to 12 months | Vacuum seal for the longer end |
| Pork chops and ribs | 4 to 6 months | Wrap tight, fat goes rancid first |
| Whole chicken | 12 months | Leave in original packaging plus an outer bag |
| Chicken pieces | 9 months | Portion before freezing |
| Bacon and sausage links | 1 to 2 months | Cured meats hold less time, fat goes rancid |
| Lean fish (cod, tilapia) | 6 months | Vacuum seal or freeze in water |
| Fatty fish (salmon, mackerel) | 2 to 3 months | Fat oxidation shortens shelf life |
| Shrimp, scallops | 3 to 6 months | Tray freeze, then bag |
Refreezing thawed meat is safe as long as the meat thawed in the refrigerator and never warmed above forty degrees Fahrenheit. The texture takes a hit because the second freeze creates more ice crystals, but the food is safe to eat. Cooked meat that you froze, thawed, and want to refreeze should also be fine.
Freezing Dairy, Eggs, Baked Goods, and Prepared Meals
Most kitchens have far more freezer friendly food than people realize. Here is what works and what does not.
What freezes well
Butter freezes for up to a year. Wrap the original package in foil or a freezer bag. Salted butter holds slightly longer than unsalted.
Hard cheese freezes for six months. Shredded cheese works better than blocks because it goes straight into recipes without thawing. Pre shredded bagged cheese freezes especially well.
Whole milk and heavy cream freeze for three months. Pour off about an inch from a full jug to leave headspace. Expect some separation after thawing. Shake well and use in cooking, baking, or smoothies. The texture will not be ideal for drinking straight.
Eggs freeze if you crack them first. Whisk gently, pour into ice cube trays or muffin tins, freeze solid, then transfer to a bag. One large egg equals about three tablespoons of beaten egg. Add a pinch of salt for savory uses or a teaspoon of sugar per cup for sweet uses to prevent gelling.
Bread, rolls, and bagels freeze for three months. Slice loaves before freezing so you can pull out single pieces. Toast straight from the freezer.
Cookie dough freezes for three months as scooped balls on a tray. Once solid, transfer to a bag and bake straight from frozen, adding a couple of minutes to the recipe.
Soups, stews, chili, and pasta sauces freeze for three months. Cool fully before packing. Use rigid containers or freezer bags laid flat for stackable storage.
Casseroles freeze in their baking dish or in a foil pan. Wrap tightly. Thaw in the fridge overnight and bake covered until heated through.
Pesto and herb pastes freeze for a year in ice cube trays. One cube equals about two tablespoons.
Stock and broth freeze for six months. Freeze in two cup portions for easy recipe use.
What does not freeze well
Sour cream, yogurt, mayonnaise, and cream based salad dressings break and turn grainy. They are technically safe but unpleasant.
Raw lettuce, cucumbers, celery, and watermelon turn limp and watery because of their high water content.
Cooked plain potatoes turn mealy and gray. Mashed potatoes with enough fat and dairy hold up better.
Boiled eggs in the shell turn rubbery. Pasta and rice turn mushy. Custards and gelatin desserts separate.
Skip these foods when you are filling the freezer. Use other preservation methods or eat them fresh.
Packaging and Avoiding Freezer Burn
Freezer burn comes from one thing. Air touches the surface of frozen food, pulls moisture out, and leaves behind dry gray patches. The food is still safe. It just tastes flat and dry.
The whole game is keeping air away from the food.
For freezer bags, lay the bag flat on the counter and press the food into a thin even layer. Roll the bag up from the bottom to push air out, then seal. A drinking straw inserted in a small gap also works for sucking out the last of the air. Pull it out, pinch, and seal.
For rigid containers, pack the food tightly and press a piece of plastic wrap or wax paper directly onto the surface before snapping the lid on. Leave one inch of headspace for liquids that will expand as they freeze.
For meat, double wrap. Wrap once tightly in plastic, foil, or freezer paper. Then slide into a freezer bag and squeeze the air out.
For mason jars, use straight sided jars only, leave a full inch of headspace, and freeze with the lid loose or off. Add the lid only after the contents are fully solid. Skip this rule and the jar will crack.
A vacuum sealer makes all of this easier. Vacuum sealed packages have almost no air left inside, which is why they keep food at peak quality for two to three times as long.
Freezer Organization and Inventory
A messy freezer wastes more food than a bad freezer. You forget what is in there. Old packages get pushed to the back. By the time you find the bag of last summer's peaches, they have freezer burn.
A simple inventory fixes this. Tape a sheet of paper to the freezer door. Add a line for every package that goes in. Cross it off when you take it out. Once a month, glance at the list and plan a meal around something old.
Group similar foods together. Meats in one section. Vegetables in another. Fruit in another. Prepared meals in another. Bread and baked goods together. You will spend less time digging.
Use the first in first out rule. New packages go to the back or bottom. Older packages move forward or to the top. This single habit will keep your freezer rotating instead of stockpiling.
Keep your freezer at zero degrees Fahrenheit or below. A freezer thermometer takes the guesswork out. Higher temperatures shorten storage time and can let enzymes keep working.
A full freezer runs more efficiently than an empty one. Frozen food acts as thermal mass and helps the freezer recover quickly when you open the door. If you have empty space, fill it with jugs of water or bags of ice.
Power Outage Protocol
A full freezer holds safe temperature for about forty eight hours after the power goes out. A half full freezer holds for about twenty four hours. Both of those numbers assume the door stays closed.
Do not open the freezer to check on the food. Every peek lets cold air spill out and cuts your safety window.
If the power comes back on before the food fully thaws, you are fine. The food can keep freezing where it sits.
If the power stays off longer, evaluate each package as you find it. Anything that still has visible ice crystals can be safely refrozen. The texture will suffer, but the food is safe. Anything that thawed completely and is still cold (forty degrees Fahrenheit or below) should be cooked or eaten right away. Anything that warmed above forty degrees should be tossed.
Meat, poultry, fish, dairy, and prepared meals are the most time sensitive. Bread, butter, and many fruits are more forgiving.
Block ice in the freezer extends your safety window. A few jugs of frozen water act as backup cold mass during an outage.
Thawing Safely
Most freezer wins or losses happen during thawing. Slow and cold is the safe path. Warm and fast is the risky one.
The refrigerator is the safest place to thaw anything. Move the package from the freezer to the fridge a day before you need it. Large roasts and whole birds may need two or three days. Once thawed, food keeps in the fridge for one to two days before cooking.
Cold water thawing is faster. Put the food in a leakproof bag and submerge in cold tap water. Change the water every thirty minutes to keep it cold. A pound of meat thaws in about an hour. Cook immediately after thawing.
Microwave thawing works for foods you will cook right away. Use the defrost setting and watch closely so the edges do not start to cook while the center is still frozen. Cook immediately.
Cooking from frozen works for many foods and is sometimes the best option. Bread toasts straight from the freezer. Soup reheats from frozen in a covered pot over low heat. Cookie dough bakes from frozen with a couple of extra minutes. Lean fish fillets cook from frozen with a longer baking time. Vegetables go straight into stir fries, soups, and casseroles.
Never thaw on the counter at room temperature. The outside warms into the bacteria growth danger zone hours before the center thaws. Counter thawing is how home cooks make themselves sick.
Storage Times Reference
Frozen food kept at zero degrees Fahrenheit stays safe almost indefinitely. The numbers below are about peak quality, not safety. Past these windows the food is still safe but flavor and texture start to fade.
| Food | Peak quality at 0 F |
|---|---|
| Blanched vegetables | 8 to 12 months |
| Unblanched vegetables | 1 to 3 months |
| Tray frozen fruit | 8 to 12 months |
| Sugar or syrup packed fruit | 12 months |
| Ground meat | 3 to 4 months |
| Steaks, chops, roasts | 4 to 12 months |
| Whole poultry | 12 months |
| Poultry parts | 9 months |
| Bacon and cured meats | 1 to 2 months |
| Lean fish | 6 months |
| Fatty fish | 2 to 3 months |
| Shellfish | 3 to 6 months |
| Butter | 9 to 12 months |
| Hard cheese | 6 months |
| Milk and cream | 3 months |
| Eggs (cracked, packed) | 12 months |
| Bread and baked goods | 3 months |
| Cookie dough | 3 months |
| Soups, stews, sauces | 2 to 3 months |
| Casseroles | 2 to 3 months |
| Stock and broth | 6 months |
| Pesto and herb pastes | 12 months |
Always label with the date so you know when each package went in. Rotate from oldest to newest. Even the longest holding foods slowly lose quality over time.
Warning
If a package thaws and rises above forty degrees Fahrenheit for more than two hours, throw it out. Food poisoning is not worth saving a few dollars of meat. When in doubt, throw it out.
Common Problems and Fixes
Most freezing problems trace back to packaging, blanching, or temperature. Here are the issues you are most likely to see.
Freezer burn
Freezer burn shows up as dry gray or white patches on the surface of frozen food. The food is still safe to eat. The texture and flavor are simply ruined in those spots.
The fix is better packaging. Use freezer bags rather than storage bags. Squeeze every bit of air out before sealing. Double wrap meat in plastic plus a bag. Vacuum seal anything you plan to store longer than three months.
You can cut freezer burn off and use the rest of the food. Trim the burned edges, cook the rest right away, and consider it a lesson in packaging for next time.
Mushy thawed vegetables
Mushy vegetables almost always trace back to skipped or sloppy blanching. Without that quick boil, enzymes keep working in the freezer. After a few months the cell walls weaken and the vegetable turns to mush as soon as it thaws.
The fix is to blanch every vegetable that calls for it. Use a hard rolling boil. Time carefully. Shock in ice water immediately. Drain and dry before packing.
Off flavors after a few months
Off flavors come from oxidation, fat going rancid, or strong smelling foods sharing space with mild foods.
Use vacuum sealing or double bagging to reduce oxidation. Use cured meats and fatty fish within their shorter windows. Keep onions, garlic, and seafood double bagged so the smells stay contained.
Ice in the bag
Ice crystals inside the bag mean moisture is leaking out of the food. Some of that is normal. Heavy ice means the food was packed wet, the temperature is fluctuating, or the bag is not sealed well.
Pat foods dry before bagging. Keep the freezer at a steady zero degrees. Reseal any bags that look loose.
Cracked mason jars
Cracked jars mean the contents expanded with no room to go. The fix is straight sided jars only, a full inch of headspace for liquids, and freezing with the lid off until the contents are solid.
Curved shoulders trap expanding ice and snap the glass. Tight lids on a jar full of warm liquid have nowhere to vent.
Frequently Asked Questions
Frequently Asked Questions
For most vegetables, yes. Blanching deactivates the enzymes that cause flavor loss, color loss, and mushy texture during long term storage. A bag of unblanched green beans will be safe to eat after six months but will taste flat and feel mushy. A bag of properly blanched green beans will taste almost fresh. The exceptions are bell peppers, hot peppers, onions, and tomatoes. Their enzyme activity is low enough or their normal cooking use forgiving enough that you can skip the blanch.
Yes, with a few rules. Use straight sided jars only because tapered shoulders crack when ice expands. Leave a full inch of headspace at the top of the jar. Freeze the contents with the lid off or loose until completely solid, then add the lid. Skip these rules and you will lose jars to cracks. Plastic freezer bags or rigid containers are easier and safer for most freezer projects.
Food kept at a steady zero degrees Fahrenheit stays safe almost forever. Quality is the real limit. Most blanched vegetables and tray frozen fruit hold peak quality for eight to twelve months. Most meat holds quality for four to twelve months depending on the cut. Fatty foods and cured meats hold the shortest because fat goes rancid even at freezer temperatures. Use the storage times table in this guide as your starting point and trust your senses when you open a package.
Yes, as long as the meat thawed in the refrigerator and stayed at forty degrees Fahrenheit or below the entire time. The texture will suffer because the second freeze creates more ice crystals, but the food is safe. Meat that thawed on the counter or warmed above forty degrees should be cooked right away or thrown out. You can also cook thawed meat first, then freeze the cooked dish for later. That second freeze of cooked food is no problem at all.
Freezer smells almost always come from poorly sealed packages of strong foods like onions, garlic, fish, or seafood. The smell molecules escape the bag and stick to the freezer walls and other food. The fix is double bagging or vacuum sealing strong foods. To clear an existing smell, empty the freezer, wipe everything down with a vinegar and water solution, and place an open box of baking soda inside. Repack with better sealed bags.
Zero degrees Fahrenheit (minus eighteen Celsius) or below. At that temperature bacterial growth essentially stops and quality holds for the storage windows in this guide. Warmer freezers cut storage time and can let enzymes keep working slowly. The built in dial on most freezers is unreliable. Spend a few dollars on a freezer thermometer and check it every few weeks.
Sometimes. Newer combo fridge freezers usually hit zero degrees Fahrenheit with no problem. Older models, top freezer fridges, and freezers that get opened many times a day often run warmer. Use a thermometer to confirm. If your compartment runs at five or ten degrees Fahrenheit, treat your storage windows as half of what the table suggests and use frozen food faster.
Plenty of options work. Use heavy duty freezer bags rather than storage bags. Press the air out by hand by laying the bag flat and rolling it up from the bottom. Use the straw trick by inserting a drinking straw in a small gap, sucking the air out, then pinching and sealing. Submerge a bagged item in a bowl of water with the open end above the surface. Water pressure pushes the air out and you seal as the last bit of air leaves. Double wrap meat in plastic or foil before bagging. None of these match a vacuum sealer for long term storage, but they are plenty good for foods you will use within a few months.
No. Whole eggs in the shell will crack as the contents expand and the egg will be ruined. Crack the eggs first, whisk gently, and pour into ice cube trays or muffin tins. Freeze solid, transfer to a bag, and use one cube as roughly one egg. Add a pinch of salt or a teaspoon of sugar per cup of beaten egg to prevent the yolks from gelling during storage.
A modern Energy Star chest freezer uses about two hundred to three hundred kilowatt hours per year. At an average rate of fifteen cents per kilowatt hour, that is around thirty to forty five dollars a year. An upright freezer of the same size uses a little more. The cost is small compared to the value of the food you preserve. A full freezer also runs more efficiently than an empty one because the frozen food acts as thermal mass.
Start With One Bag Today
Freezing is one of those skills that sounds technical until you actually do it. The first batch is the hardest because everything is new. After that, the rhythm becomes obvious. Wash, blanch if needed, pack out the air, freeze fast, label.
Start small. Pick one pound of green beans, one tray of strawberries, or one batch of soup. Walk through the four stages. Watch how it stores. Cook with it next month.
If you want to keep building your pantry, water bath canning is a natural next step for high acid foods like jams, salsas, and pickles. Pressure canning covers low acid foods like beans, soups, and meat. Dehydrating turns the harvest into shelf stable snacks. Lacto-fermentation gives you fresh probiotic foods in your fridge with almost no equipment. Together those skills cover almost anything you can grow or buy in season.
For now, plug in the freezer thermometer. Wash a pound of beans. You will be eating the result in February, and you will have learned something every gardener and homesteader leans on every year. Welcome to freezing.

Cole
Founder & Lead Researcher
Cole is the founder of Plan Your Homestead. He works in clinical research and brings a research-first lens to every guide on the site, drawing on a long family line of farmers for grounded, practical perspective.
More in Food Preservation
More articles coming soon. Check back for new food preservation content.