A hoop house is the cheapest upgrade you can make to your garden. For under a hundred dollars and an afternoon of work, you can add two extra months to your growing season on each end of the year. That is fresh spinach in February. Crisp lettuce in November. Tender greens long after the neighbors have given up and put the garden to bed.
If you have never built one, the whole thing can look intimidating. It is not. A hoop house is just bent pipes, plastic sheeting, and a few stakes in the ground. You do not need power tools. You do not need carpentry skills. You do not even need a flat yard.
This guide walks you through every step. You will learn what a hoop house is, how big to build yours, exactly what materials to buy, and how to put it all together in a single weekend. By the time you are done, you will have a season extension structure that pays for itself in one harvest.
Let us get into it.
What Is a Hoop House?
A hoop house is a simple unheated greenhouse made from bent pipes covered with clear plastic. The shape looks like a quonset hut or a long tunnel. The pipes form arches, the plastic stretches over the top, and the whole thing creates a warm pocket of air that protects your plants from frost, wind, and cold nights.
People sometimes call smaller versions low tunnels or caterpillar tunnels. Bigger walk in versions are called high tunnels. The principle is the same at every size. You trap solar heat during the day and slow the cooling off at night. That small temperature boost is enough to keep cold hardy crops alive when everything outside is frozen solid.
A hoop house is not the same as a glass greenhouse. Greenhouses cost thousands of dollars and need permits in most places. A hoop house costs less than dinner for four. You can build one yourself, take it down in spring, and store it in the garage.
It is also different from a cold frame. A cold frame is a small box on the ground covered with glass or plastic. It works great for hardening off seedlings but does not give you enough room to grow full crops. A hoop house gives you a real growing space you can walk into.
Why Build a Hoop House on Your Homestead
A hoop house adds six to eight weeks to each end of your growing season. That means you can start lettuce, spinach, and kale a full two months before your last frost in spring. It also means you can keep harvesting those same crops well into December and even January in most of the country.
The bigger payoff is winter food. With a hoop house, hardy greens like spinach, mache, kale, and tatsoi can survive single digit nights and keep producing fresh leaves all winter long. You walk out in your boots on a January morning, push the snow off the roof, and pick a salad. That is real food independence in the dead of winter.
Hoop houses also protect against more than just cold. They keep deer and rabbits out. They block hail and heavy rain that can shred tender seedlings. They cut wind, which dries out plants faster than any drought. And they reduce pest pressure because most insects never make it inside.
The math is easy to like. A hundred dollars in materials. Two hundred dollars worth of greens every winter for years. The hoop house pays for itself before the first season is over.
Tip
How Big Should Your Hoop House Be?
The right size depends on what you want to grow inside and how much space you have.
For most beginners, a hoop house that covers a single raised bed is the perfect starting point. A 4 foot by 8 foot or 4 foot by 12 foot tunnel uses cheap materials, goes up in an hour, and protects more food than you would think.
If you have more space and want to walk inside, go bigger. A 6 foot by 10 foot hoop house gives you headroom to stand and tend the beds. An 8 foot by 12 foot version is large enough for two rows of in ground crops with a path between them.
Here are three common starter sizes.
| Size | Best For | PVC Pipe Length | Number of Hoops |
|---|---|---|---|
| 4 by 8 feet | One raised bed | 10 foot | 4 |
| 6 by 10 feet | Walk in size, small | 12 foot | 5 |
| 8 by 12 feet | In ground beds with a path | 14 foot | 6 |
Whatever size you choose, plan to space your hoops 24 to 30 inches apart along the length of the structure. Closer spacing means more strength for snow load. Wider spacing saves money but cannot handle heavy storms as well.
Materials You Will Need
Here is the full materials list for a basic 4 by 8 hoop house over a single raised bed. Scale the quantities up if you go bigger.
Frame
- Four 10 foot lengths of ½ inch or ¾ inch PVC pipe (Schedule 40)
- Eight pieces of ½ inch rebar, each 18 to 24 inches long
- One 8 foot length of ½ inch PVC pipe for a ridge pole (optional but recommended)
- Zip ties or PVC tee fittings to attach the ridge pole
Cover
- One roll of 6 mil clear greenhouse plastic, at least 10 feet by 20 feet
- Ten to twelve snap clamps sized to your PVC, or heavy duty binder clips as a budget option
- Roll of greenhouse poly tape for any small tears
Anchoring and end walls
- Existing raised bed frame, or four 2 by 6 boards screwed into a rectangle to anchor the base
- Scrap lumber or extra plastic for end walls and a door flap
- A few bricks, sandbags, or rocks to weigh down the bottom edge of the plastic
A few notes on quality. Buy real 6 mil greenhouse plastic, not painter's plastic from the hardware store. The cheap stuff turns brittle and falls apart in one season. The proper greenhouse film is UV stabilized and lasts four to six years. It costs maybe twenty dollars more and saves you a full rebuild every spring.
The ½ inch PVC is fine for a 4 foot wide hoop house. If you go wider than 6 feet, step up to ¾ inch PVC or use metal electrical conduit (EMT) for more strength. EMT requires a hoop bender, but the bent shape is far stronger in snow and wind.
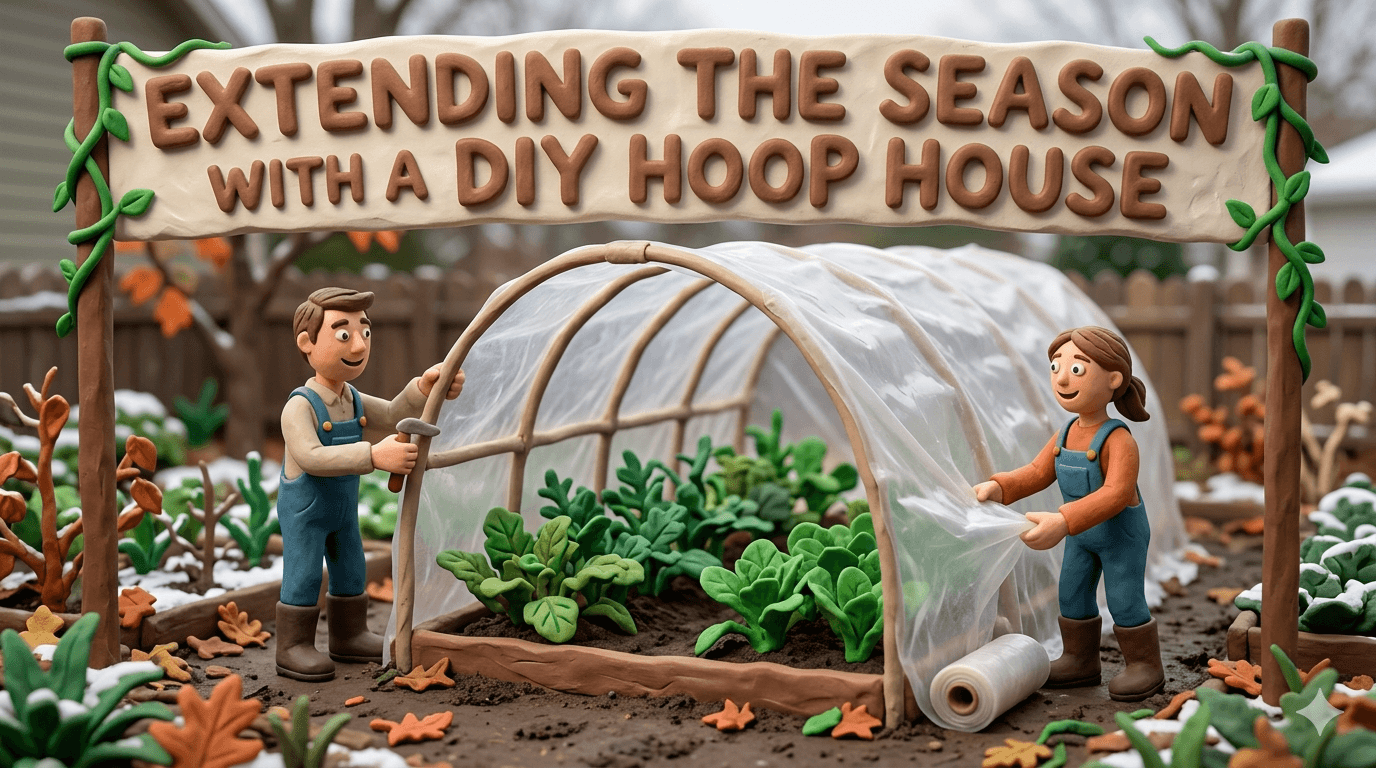
Step by Step: How to Build a DIY Hoop House
This is the easy part. You can have the whole thing standing in two hours or less.
Step 1: Choose and Prep the Site
Pick a spot that gets at least six hours of direct sun in winter. A south facing location is best because the low winter sun will hit the long side of the tunnel and warm the inside fastest.
Avoid spots under trees, near downspouts, or in low areas where cold air settles. The ground should be reasonably level. If you are building over an existing raised bed, you are already set.
Step 2: Drive the Rebar Anchors
Mark the corners and the hoop spacing along both long sides of your bed. For a 4 by 8 tunnel with four hoops, that is two stakes on each long side, spaced about 30 inches apart, plus one at each end.
Drive each piece of rebar straight down into the ground until 8 to 10 inches stick up. Use a hammer or a small sledge. Make sure each pair of rebar pieces lines up directly across from each other. Crooked rebar means crooked hoops.
Step 3: Bend and Seat the PVC Hoops
Take one 10 foot length of PVC. Slide one end down over the first piece of rebar until the pipe rests on the ground. Walk the other end across the bed and bend it down over the matching rebar stake on the other side. The pipe will flex into a perfect arch.
Repeat for each hoop. You should now have a row of evenly spaced arches running the length of your bed. The peak of each hoop should be about 4 to 5 feet off the ground.
Step 4: Add a Ridge Pole for Stability
Run the extra 8 foot PVC pipe along the very top of all the hoops, right at the peak. Attach it to each hoop with two zip ties pulled tight, or with PVC tee fittings if you want a cleaner look.
This ridge pole locks all the hoops together and stops them from shifting in the wind. Skip it on the smallest tunnels if you must, but you will regret it the first time a storm rolls through.
Step 5: Drape the Greenhouse Plastic
Pick a calm day for this step. Plastic in the wind is a wrestling match nobody wins.
Unroll the plastic alongside the hoop house. With a helper, lift one end and pull the plastic up and over the top of the hoops. Center it so you have equal overhang on each side and on each end.
Smooth out any wrinkles. Pull the plastic taut but not stretched to its limit.
Step 6: Secure the Plastic with Snap Clamps
Starting in the middle hoop, clip a snap clamp over the pipe and the plastic together. Work your way down each hoop. Use three to four clamps per hoop, evenly spaced from peak to base on both sides.
If you cannot find snap clamps, heavy duty binder clips from an office supply store work for a season or two. They are not as strong, but they get the job done at a quarter of the cost.
Step 7: Build the End Walls and Door Flap
The ends are the weak point of any hoop house. Wind tries to push through them. Heat escapes from them. Plants near the ends get the coldest.
The simplest end wall is a panel of plastic stretched tight from the ground to the peak of the end hoop and held in place with batten boards. On one end, leave the plastic loose so you can roll it up to create a door. Weigh the bottom edge with a board or a few bricks so it does not flap in the wind.
For a sturdier setup, frame the end walls with 2 by 4s, cut a hinged door, and staple plastic over the frame. This adds an hour to the build but gives you a proper walk in door.
Step 8: Final Check Before Winter
Walk around the hoop house and look at every connection. Push gently on the sides to feel the give. Tighten any loose clamps. Bury or weigh down the bottom edge of the plastic with bricks, soil, or sandbags so wind cannot get under it.
Throw a soil thermometer inside. You want to know what the air temperature is doing in there. That single piece of information will guide every decision you make all winter.
Warning
What to Plant Inside a Hoop House
The hoop house is not a tropical greenhouse. Tomatoes and peppers will not survive a hard freeze inside one, even with the cover. What a hoop house does brilliantly is keep cold hardy greens and roots alive when the ground outside is frozen.
These are the crops that thrive.
| Crop | Cold Tolerance | Days to Maturity |
|---|---|---|
| Spinach | 10°F | 40 to 50 |
| Kale | 10°F | 50 to 65 |
| Mache | 5°F | 50 |
| Lettuce | 20°F | 30 to 60 |
| Arugula | 15°F | 25 to 40 |
| Tatsoi | 15°F | 40 |
| Swiss chard | 20°F | 50 to 60 |
| Scallions | 10°F | 60 to 70 |
| Carrots | 20°F (in ground) | 65 to 80 |
| Beets | 20°F (in ground) | 50 to 65 |
The trick with winter hoop house growing is timing. Plant your fall crops six to eight weeks before your first frost. They need to reach near full size before the short days of December shut down most plant growth. Once the days get below ten hours of daylight, plants essentially pause until late January.
You are not really growing food in deep winter. You are storing it on the plant. Pick what you need, leave the rest, and the plants will hold for months.
If you are not sure when to start your seeds for fall planting, check the planting calendar.
Planting Calendar Tool
Enter your zip code to get a personalized planting schedule based on your USDA zone.
Try it free →How to Manage Temperature and Ventilation
A hoop house is a tool, not a magic box. You will need to check on it regularly through the seasons.
Hang a max min thermometer inside and check it every few days. The goal is to keep the inside above 25°F on the coldest nights and below 80°F on the sunniest days.
On any day above 50°F, open the door or roll up an end to let heat escape. On the coldest nights, add a layer of frost cloth or an old bedsheet draped directly over the plants for extra protection. This double layer trick can extend your harvest by another two or three weeks.
Water less than you think you need to. The plastic cover holds moisture in. Most winter crops only need water once every two to three weeks. Overwatering in cold weather invites mold and rot.
Brush snow off the roof after any storm of four inches or more. Wet snow gets heavy fast and a loaded roof can collapse a PVC hoop house overnight. A long broom or a soft rake handle works well for this.
Common Hoop House Mistakes to Avoid
A few small mistakes can shorten the life of your hoop house or kill your crops. Watch for these.
Going too small. A 3 foot wide hoop house is hard to work in and runs out of growing space fast. Start with at least 4 feet wide. You will be glad you did.
Using painter's plastic instead of greenhouse film. The hardware store stuff turns yellow, gets brittle, and falls apart in one season. Real greenhouse plastic costs only a little more and lasts five times longer.
Forgetting to vent. Sealed hoop houses cook plants on warm days, even in winter. Always open an end or a door when the sun is out and air temperatures are above 50°F.
Planting too late. Fall and winter crops need to reach mature size before the days get short. Plant them by early September in most climates. Late plantings just sit there until spring.
Skipping the ridge pole. Loose hoops twist and shift in storms. The ridge pole costs three dollars and adds enormous strength to the structure.
Letting snow pile up. Heavy snow loads have crushed countless hoop houses overnight. Clear the roof after every significant storm.
Frequently Asked Questions
Frequently Asked Questions
A 4 by 8 foot DIY hoop house costs between 60 and 100 dollars in materials. The biggest expenses are the greenhouse plastic and the PVC. Going bigger or using metal conduit instead of PVC raises the cost to around 200 to 400 dollars for a 10 by 20 foot tunnel.
The plastic cover on a hoop house lasts four to six years if you use proper 6 mil UV stabilized greenhouse film. The PVC or metal frame can last ten years or more. Painter's plastic will only last a single season, so spend the extra money on real greenhouse plastic.
A greenhouse is a permanent glass or polycarbonate structure that often has heating, electricity, and a foundation. A hoop house is a simple unheated structure made from bent pipes and plastic sheeting. Greenhouses cost thousands. Hoop houses cost less than a hundred dollars and can be built in an afternoon.
Yes. Cold hardy crops like spinach, kale, mache, lettuce, and Swiss chard will survive and produce inside a hoop house all winter in most of the United States. The plants essentially go dormant during the shortest days of December and January but stay alive and ready to harvest. You are not growing new food then. You are storing it on the plant until you need it.
Yes. Even in winter, sunny days can heat the inside of a hoop house 30 to 40 degrees above the outside air. On any day above 50°F, open a door or roll up an end to let the hot air out. Without ventilation, your crops will wilt or cook even when there is snow on the ground.
In most places, no. Hoop houses are usually classified as temporary agricultural structures and do not require a building permit, especially if they are under a certain size and not on a permanent foundation. Rules vary by city and county, so check with your local zoning office before building a large structure.
Start Small and Grow Into It
You do not need to build the perfect hoop house on your first try. Start with the simplest version over your best raised bed. Use it for a season. Learn how the heat behaves, when to vent, what crops thrive, and what you wish you had done differently.
Most homesteaders end up building a second hoop house within a year. Some go on to build full sized high tunnels with metal frames and roll up sides. It all starts with the same basic shape and the same basic skills.
A hoop house is one of those rare projects that gives back far more than you put in. Spend a hundred dollars and an afternoon now. Harvest fresh greens through December, January, and February for the next five years.
If you want to pair your hoop house with the right crops to grow inside, check out the easiest vegetables to grow for beginners. For the herbs that handle the cold the best, take a look at the essential culinary herbs guide.
Grab the materials this weekend. You will be eating salad from the snow by Christmas.

Cole
Founder & Lead Researcher
Cole is the founder of Plan Your Homestead. He works in clinical research and brings a research-first lens to every guide on the site, drawing on a long family line of farmers for grounded, practical perspective.
More in Gardening
More articles coming soon. Check back for new gardening content.