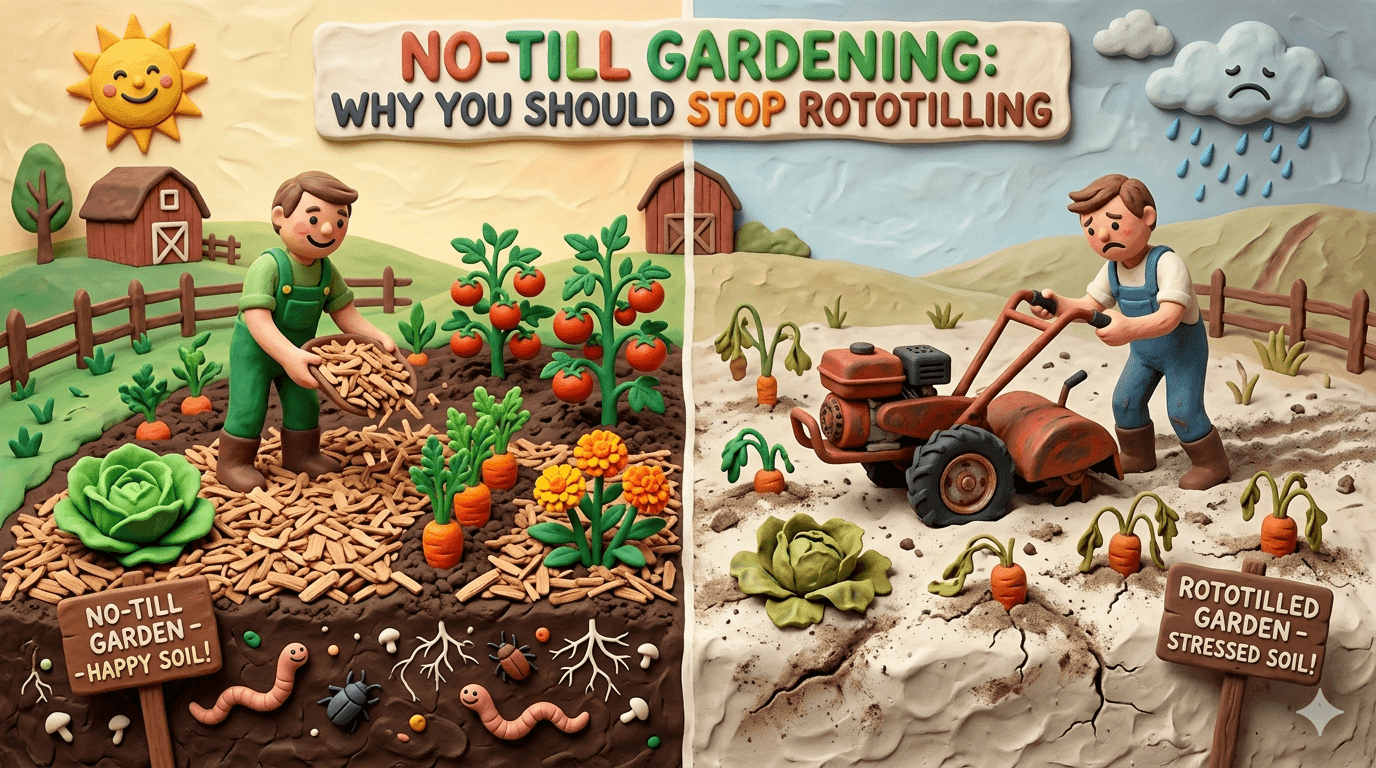
Every spring, millions of gardeners fire up a rototiller and chew their garden beds into fluffy brown powder. It feels productive. It looks like progress. The soil ends up soft, smooth, and ready for seeds.
Here is the problem. That fluffy soil is dying.
Tilling destroys the very thing that makes plants grow. It shreds fungal networks, exposes bacteria to sun, breaks soil structure, and brings buried weed seeds up to the surface. The garden may look great in May, but by August it is compacted, weedy, and dry.
No till gardening flips the whole approach on its head. Instead of working the soil, you protect it. Instead of mixing compost in, you lay it on top. Instead of fighting weeds with a tiller, you smother them with mulch. The result is soil that gets better every single year, with less work and bigger harvests.
This guide will walk you through everything you need to know to stop rototilling and start gardening with nature. We will cover what no till gardening is, why tilling is so harmful, how to transition your existing beds, and how to keep a no till garden thriving for decades.
Let us dig in. Or rather, let us stop digging.
What Is No-Till Gardening?
No till gardening is exactly what it sounds like. You stop turning over the soil. Instead, you build your garden by adding organic matter to the surface and letting nature do the mixing for you.
Worms, fungi, bacteria, and insects pull that material down into the soil. They build a living, layered structure that holds water, releases nutrients slowly, and stays loose without any digging on your part. The garden becomes a self maintaining system.
You will sometimes hear this called regenerative gardening, lasagna gardening, sheet mulching, or the back to Eden method. The names vary. The core idea is the same. Feed the soil from the top. Cover it always. Disturb it as little as possible.
A mature no till bed looks nothing like a tilled one. The surface is covered with mulch, leaves, or compost. Underneath, the soil is dark, soft, and full of worms. You can push your hand into it without a shovel. That softness is the work of biology, not machinery.
Why You Should Stop Rototilling
Tilling looks helpful because the soil ends up loose for a few weeks. The damage is invisible until later in the season. Here is what is actually happening under the hood.
Soil structure collapses
Healthy soil is full of tiny clumps called aggregates. Fungal threads and plant roots glue particles together into these clumps, which create air pockets, water channels, and pathways for roots to grow.
A rototiller smashes those aggregates into dust. The soil looks fluffy at first, but within a few rains it compacts into a hard pan. Water runs off instead of soaking in. Roots cannot push through. The garden goes from soft to brick like in a single season.
Mycorrhizal networks are destroyed
Most garden plants form a partnership with mycorrhizal fungi. These fungi extend the reach of plant roots by hundreds of times, pulling in water and minerals the plant could never access alone. In exchange, the plant feeds the fungi sugars.
Tilling slices these fungal networks to ribbons. Every pass of the tiller resets the partnership back to zero. Your plants spend the first half of the season trying to rebuild what you just destroyed, instead of growing food.
Weed seeds get a wake up call
Your soil is full of dormant weed seeds. Some have been waiting decades for the right conditions to sprout. Those conditions are simple. Light and disturbance.
A tiller delivers both at the same time. It pulls buried seeds up to the surface and exposes them to sunlight. The result is the weed explosion every tiller user knows by July. The harder you till, the worse the weeds get the next year.
Water and topsoil wash away
Bare, tilled soil is the most erodible surface on a farm. A single hard rain on a freshly tilled bed can wash off the top half inch of soil. Over years, that adds up to inches of lost topsoil and lost organic matter.
Tilling also dries the soil. Every pass of the blades exposes moist soil to air and evaporates the water inside it. You will need to water more, weed more, and amend more just to keep up.
You burn time, fuel, and money
A rototiller costs hundreds of dollars to buy or rent. It burns gas. It needs maintenance. It is loud, heavy, and exhausting to wrestle around a garden. Every spring, you spend a weekend tilling. Then you spend another weekend amending and raking out the lumps.
A no till garden requires none of this. You walk out with a wheelbarrow of compost, spread it on top, and you are done.
Tilling vs No-Till at a Glance
Here is how the two approaches compare side by side over the long run.
| Factor | Tilled garden | No till garden |
|---|---|---|
| Soil structure | Fluffy then compacted within weeks | Loose and crumbly, improves yearly |
| Weed pressure | High and rising every year | Low and dropping every year |
| Water retention | Poor, dries out fast | Excellent, holds moisture for days |
| Soil biology | Disrupted every spring | Thriving and undisturbed |
| Fertility input | Synthetic fertilizer or heavy compost mixing | Light top dressing of compost |
| Time per season | Tilling, raking, weeding constantly | Mulching once or twice, light weeding |
| Equipment | Rototiller, fuel, maintenance | Wheelbarrow, garden fork, mulch |
| First year yield | Decent if soil is reasonable | Slightly slower while soil wakes up |
| Long term yield | Declines as soil degrades | Climbs every year as soil improves |
The first year is usually a tie. By year three, no till pulls ahead and never looks back.
The Science Behind No-Till
The reason no till works is not magic. It is biology.
Healthy soil is alive. A single teaspoon of garden soil contains billions of bacteria, miles of fungal threads, and thousands of larger organisms like protozoa, nematodes, and microarthropods. Together, this community is called the soil food web.
This food web is what releases nutrients from organic matter and delivers them to plant roots. Plants feed sugars to bacteria and fungi. Those microbes feed nutrients back to the plants. Larger organisms eat the smaller ones and release nitrogen and phosphorus in plant available forms.
The whole system depends on physical structure. Bacteria live in the wet zones around soil particles. Fungi thread their hyphae through air pockets. Roots follow old root channels. Tilling collapses all of these spaces at once. It is like running a bulldozer through a city.
No till preserves the structure. The biology stays intact. Year by year, the soil builds itself into a deeper, richer, more resilient ecosystem. Carbon stays in the ground instead of off gassing into the air. Worms multiply. Fungal networks expand. The garden grows itself.
If you want to dig deeper into building this soil biology, our composting 101 guide walks through how decomposing organic matter feeds the food web.
The Benefits of Switching to No-Till
Here is what you can expect once you commit to no till gardening.
Less work over time. After the initial setup, you stop tilling, stop heavy weeding, and stop fighting compaction. You spread mulch once or twice a year and pull the occasional weed. That is it.
Better water retention. No till soil acts like a sponge. The mulch layer keeps the surface cool and moist. The structure underneath holds water in pore spaces. You will water far less often, even in dry summers.
Fewer weeds every year. Without tilling, you stop bringing new weed seeds to the surface. Mulch blocks light from the seeds that are already there. After two or three seasons, weed pressure drops to almost nothing.
Healthier, more productive plants. Plants in living soil grow stronger. They access more nutrients, resist disease better, and produce bigger harvests. The flavor of vegetables grown in no till soil is noticeably better.
Carbon stays in the ground. Tilling releases stored carbon into the atmosphere. No till keeps that carbon locked in the soil, where it feeds biology and builds humus. You are gardening for the climate without doing anything extra.
Lower costs. No tiller. No fuel. Less fertilizer. Less water. A no till garden runs on compost, mulch, and time.
How to Transition Existing Tilled Beds to No-Till
If you already have a tilled garden, the transition is simple. You can do it this fall or next spring. Either way, the goal is the same. Stop turning the soil and start feeding it from the top.
Option 1: Sheet mulching (the lasagna method)
This is the gold standard for transitioning a tilled bed. It works on top of existing soil, weeds, or even lawn.
Step 1. Mow or chop down any existing growth as low as you can. Leave the clippings in place. They will compost down.
Step 2. Water the area thoroughly. This kickstarts decomposition under the layers you are about to add.
Step 3. Lay down a thick layer of cardboard or six to eight sheets of overlapping newspaper. Cover every square inch. Overlap the edges generously so no light gets through.
Step 4. Soak the cardboard until it is fully saturated. This helps it start breaking down immediately.
Step 5. Spread two to four inches of compost or aged manure on top of the cardboard.
Step 6. Top the compost with four to six inches of mulch. Straw, wood chips, shredded leaves, or pine needles all work well.
By the time you plant, the cardboard will be soft enough to plant through, and the layers below will be teeming with worms.
Option 2: Direct top dressing
If your soil is already in reasonable shape and you just want to stop tilling, the simplest transition is to do nothing except add organic matter.
Spread two inches of compost across the entire bed in fall. Cover it with three to four inches of mulch. Plant directly into the compost layer next spring. Repeat every fall. After two or three years, the entire bed will have transformed into rich, loose, no till soil.
Tip
The single most important rule in no till gardening is to keep your soil covered at all times. Bare soil bakes in the sun, compacts in the rain, and feeds weeds. Whether it is mulch, compost, a living cover crop, or growing vegetables, something should always be sitting on the surface. If you remember nothing else from this guide, remember that.
Starting a No-Till Bed from Scratch
If you do not have a garden yet, no till is the easiest way to start one. You do not even need to dig.
Pick a sunny spot. Mark out the bed shape with a hose or a string. The classic size is four feet wide by any length you want, which keeps the center reachable from either side without ever stepping on the bed.
Follow the sheet mulching steps above directly on top of the lawn or weeds. The cardboard kills whatever is underneath. The compost and mulch on top become your planting medium.
Wait three to four weeks if possible. The bed will be ready to plant once the cardboard has softened. For seeds, pull back the mulch and plant into the compost layer. For transplants, cut a small hole through the cardboard and tuck the root ball into the soil below.
Our starting a homestead garden from scratch guide covers bed layout, sizing, and crop selection in more detail.
If you want a raised version of the same idea, see our budget raised beds guide. Sheet mulching inside a raised bed frame is one of the cheapest, fastest ways to build a productive growing space.
Ongoing Care for a No-Till Garden
A mature no till garden runs itself. Here is the seasonal rhythm to keep it that way.
Spring
Pull back any remaining mulch from where you want to plant. Spread a thin layer of fresh compost on the planting rows. Plant seeds or transplants directly into the compost. Push the mulch back around the seedlings once they are a few inches tall.
Do not till. Not even a little. Not even with a hoe. If the soil seems compacted in spots, use a broadfork to loosen it without flipping it.
Summer
Top up mulch as it breaks down. Aim for a consistent two to four inch layer at all times. Pull weeds by hand when they appear. There will be fewer every year.
Chop and drop any spent plants or weeds in place. Lay them on the soil as living mulch. The microbes will pull them in.
Fall
This is the most important season for a no till gardener. After your last harvest, cover every inch of the bed.
Spread two inches of compost on top. Then cover it with four to six inches of leaves, straw, or other mulch. Let the bed rest under that blanket through winter. Worms will pull the material down. Microbes will break it apart. By spring, the surface will be soft, dark, and ready to plant.
You can also plant a cover crop in fall. Crimson clover, winter rye, oats, or hairy vetch all work well. Cover crops feed the soil, fix nitrogen, suppress weeds, and prevent erosion. In spring, cut them down at the base, leave the roots in the ground, and lay the tops on the surface as mulch.
Winter
Do nothing. The mulch protects the soil from freeze thaw cycles. The cover crop, if you planted one, holds everything in place. The biology underneath stays active even in cold weather. Rest, plan, and order seeds.
Common No-Till Mistakes to Avoid
Even with the simplest method on the planet, there are a few places where new no till gardeners go wrong.
Tilling one more time. It is tempting to till once at the start, just to break up the compaction. Resist this. The whole point is to let the worms and roots do the loosening for you. Tilling resets the clock.
Skimping on mulch. Two inches is the minimum. Four to six is better. A thin mulch layer dries out, blows away, and lets weeds through. Pile it on thick.
Walking on the beds. Foot traffic compacts soil more than anything else. Design your garden with permanent walking paths and never step on the growing beds. Use boards if you must reach the center.
Adding the wrong kind of mulch. Avoid fresh grass clippings in thick piles, since they mat and go anaerobic. Avoid colored or treated wood chips. Stick to straw, leaves, aged wood chips, pine needles, or compost.
Neglecting fertility. No till is low input, not no input. You still need to add organic matter every year. A two inch top dressing of compost in spring or fall keeps the system fed.
Tilling because of weeds. If weeds get bad, the answer is more mulch, not a tiller. Lay cardboard over the weediest patches and bury them under fresh mulch. They will be gone in a season.
Tools That Replace the Tiller
You do not need much hardware for a no till garden. Here is the short list.
Broadfork. A broadfork is a wide, U shaped tool with several long tines. You step on the crossbar to drive the tines into the soil, then rock it back to lift and loosen without flipping. Perfect for opening up compacted areas before planting.
Garden fork. A standard digging fork is useful for loosening the top few inches of a planting row without inverting the soil.
Hori hori knife. A Japanese garden knife with a sharp serrated blade. Great for planting seedlings through mulch, slicing weeds at the root, and dividing perennials.
Stirrup hoe. Also called a hula hoe. The thin blade slides just under the soil surface and cuts annual weeds off at the root with almost no soil disturbance.
Hand weeder. A simple narrow blade for pulling stubborn weeds without digging up the bed around them.
Wheelbarrow. You will move a lot of mulch and compost. A good wheelbarrow is the one tool you will use constantly.
That is the whole kit. No engine. No fuel. No tune ups. A single set of tools will last decades.
What to Do This Weekend
You do not need to commit to a full no till conversion all at once. Start with one bed.
Pick the bed that gives you the most trouble. The one that compacts every year. The one that fills with weeds by July. The one you dread tilling.
Mow it short. Soak it. Lay cardboard over the whole surface. Spread two inches of compost on top of the cardboard. Cover the compost with four inches of straw or shredded leaves.
That is it. You have just started your first no till bed.
Plant directly into the compost next spring, or cover crop it through the season and plant in fall. By next summer, you will see the difference. By the year after that, you will be converting every other bed in your garden.
If you are planning a wider homestead garden or food forest, our fruit tree guilds guide explains how no till and perennial plantings work together to create a self maintaining ecosystem. Our planting calendar gives you personalized planting dates for your zone once you are ready to seed your first no till bed.
The tiller can stay in the shed. Better yet, sell it. Your soil, your back, and your harvest will thank you for years to come.
Frequently Asked Questions
No till gardening is a method that builds soil from the top down without ever turning it over. You add compost and mulch to the surface and let worms, fungi, and microbes do the mixing for you. This protects soil structure, preserves beneficial fungal networks, suppresses weeds, and produces healthier, more productive plants over time.
Yes. No till is actually one of the best ways to fix clay soil. Tilling clay shatters its structure and creates a hard, brick like pan once it dries. Adding compost and mulch on top, and letting worms work it in, slowly transforms clay into loose, crumbly, productive soil over two to three seasons. A broadfork can speed the process by gently loosening compacted layers without flipping them.
Most gardens reach full no till performance in two to three years. The first season is usually a wash as the soil biology rebuilds and the mulch layer establishes. By year two, you will see better water retention and fewer weeds. By year three, the soil is dramatically improved and your harvests start climbing year over year.
No. Once you commit to no till, you do not till again. If a bed becomes badly compacted, use a broadfork to loosen it without inverting the soil. If you have a heavy weed problem, lay cardboard and fresh mulch on top instead of tilling. Every pass with a tiller resets the biology you are trying to build.
Straw, shredded leaves, aged wood chips, pine needles, and finished compost all work well. Straw breaks down quickly and is easy to plant through. Shredded leaves are free in fall and add fungal food to the soil. Aged wood chips are excellent on permanent paths and around perennials. Avoid fresh grass clippings in thick layers and any wood mulch that has been dyed or chemically treated.
Mulch is your primary weed control tool. A thick layer of straw, leaves, or wood chips blocks light and prevents weed seeds from germinating. Hand pull any weeds that do break through, ideally before they go to seed. Over two to three seasons, the weed seed bank in your soil depletes and weed pressure drops dramatically. The longer you garden no till, the fewer weeds you see.
Yes whenever possible. Cover crops like crimson clover, winter rye, oats, and hairy vetch feed the soil, suppress weeds, fix nitrogen, and prevent erosion. In a no till system, you cut them down at the base instead of tilling them in. Leave the roots in place to decompose and feed the soil food web. Lay the tops on the surface as mulch.
A broadfork loosens soil without flipping it. You drive the tines down, rock the handle back, and lift the soil gently to open up air pockets. A rototiller chops, mixes, and inverts the soil with spinning blades. The broadfork preserves soil structure and biology. The rototiller destroys both. For a no till garden, the broadfork is the only soil loosening tool you need.

Cole
Founder & Lead Researcher
Cole is the founder of Plan Your Homestead. He works in clinical research and brings a research-first lens to every guide on the site, drawing on a long family line of farmers for grounded, practical perspective.
More in Gardening
More articles coming soon. Check back for new gardening content.