The smell of bacon curing over a slow wood fire is one of the best on a homestead. Hams, sausage, fish, and even cheese all turn into something special once they spend a day in the smoke. Store bought smoked meat costs a fortune, and most of it never touched real wood at all. Build your own smokehouse and you can put up a season of cured meat for a fraction of the price, with flavor you simply cannot buy.
This guide walks you through the whole job in plain language. You will learn what a smokehouse does, how hot smoking and cold smoking differ, the main smokehouse types and how they compare, and how to build a sturdy wood frame walk-in smokehouse with an offset firebox step by step. We will cover siting, materials, tools, a full cost breakdown, and the mistakes that trip up first time builders. Grab a coffee and let us get into it.
What a Smokehouse Does
A smokehouse is a small enclosed building that holds your meat in a steady bath of wood smoke. It does two jobs at once.
It flavors food. Slow smoke from hardwood gives bacon, ham, sausage, and fish that deep, rich taste that no spice rub can match. It preserves food. Smoke dries the surface and lays down natural compounds that slow spoilage, which is how folks kept meat through the winter long before refrigerators. Paired with a proper salt cure, smoking lets you store meat for months.
The right smokehouse depends on what you want to make and how much. A small barrel rig handles a few slabs of bacon. A walk-in smokehouse cures a whole hog, hangs rows of sausage, and smokes cheese and fish all at once. So the first question is always the same. What will you actually smoke, and how much? Answer that and the rest of the choices fall into place.
Hot Smoking vs Cold Smoking
Before you build anything, you need to understand the two ways to smoke food. The difference comes down to temperature, and it changes how you design the smokehouse.
Hot smoking runs the chamber between about 165 and 250 degrees. The heat cooks the food while the smoke flavors it. Think smoked chicken, ribs, pulled pork, and hot smoked salmon. The food comes out fully cooked and ready to eat. The fire sits inside or just below the chamber so the heat rises into the meat.
Cold smoking keeps the chamber below about 90 degrees. The smoke flavors and helps preserve the food without cooking it. This is how you make traditional bacon, country ham, cold smoked salmon, hard sausage, and smoked cheese. Because the chamber stays cool, the fire has to sit well away from the food in a separate firebox, with the smoke piped in through a duct so it cools on the way.
Warning
Cold smoking does not cook your food, so it does not kill bacteria on its own. Any meat or fish you cold smoke must be properly cured with salt first, following a tested recipe. Skipping the cure or guessing at salt levels is how people get sick. Botulism is a real risk with home cured meat. Always follow a trusted cure recipe and weigh your salt. See our smoking and curing meat guide before you start.
The smokehouse we build below uses a separate offset firebox connected by a buried duct. That design does cold smoking beautifully, and you can still hot smoke by burning a hotter fire or moving a small fire pan closer to the chamber. It is the most flexible setup for a homestead.
Smokehouse Types Compared
There is no single best smokehouse. The right one depends on your space, your budget, how much you want to smoke, and whether you care about cold smoking. Here are the four types most homesteaders choose from.
Barrel or Drum
A 55 gallon steel drum or a stacked pair of barrels makes a quick, cheap smoker. You add a fire pan or a small offset firebox and hang food from a rod across the top.
- Pros. Cheapest and fastest to build. Small footprint. Easy to move.
- Cons. Limited capacity. Thin steel holds heat poorly and can rust. Hard to hold a low cold smoke temperature without an offset box.
- Best for. Beginners, small batches, and anyone testing the waters before a bigger build.
Concrete Block or Brick
A masonry smokehouse is stacked from cinder block or brick, just like the one in the photo above. It is permanent, fireproof, and built to last for decades.
- Pros. Fireproof and extremely durable. Heavy walls hold a steady temperature. Looks great and never rots.
- Cons. The most material and the heaviest work. Needs a solid footing. Hard to move once it is up.
- Best for. A permanent homestead fixture where you want a lifetime smokehouse and do not mind the masonry work.
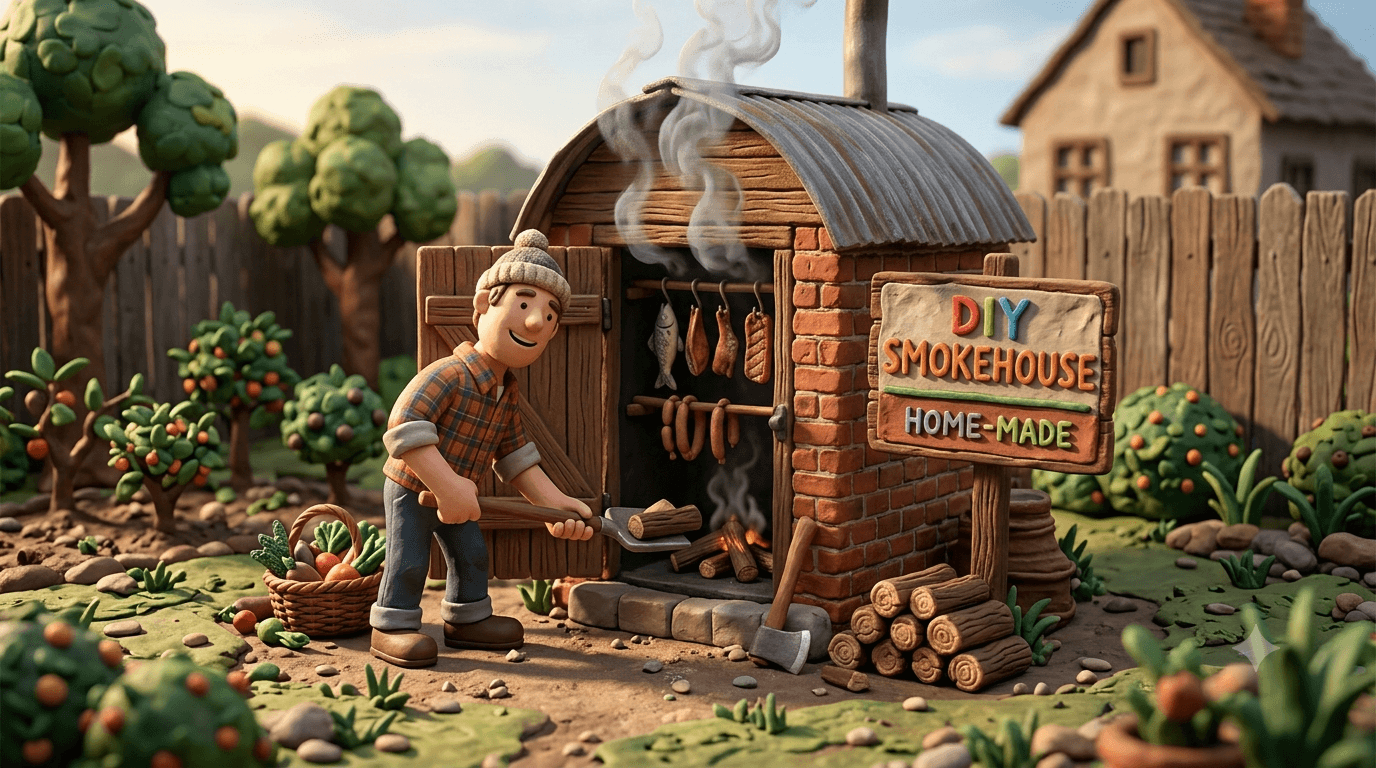
Wood Frame Walk-In
A framed shed-style smokehouse built from untreated lumber and board siding, with a door you can walk through and an offset firebox feeding smoke from outside. This is the classic American smokehouse.
- Pros. Plenty of room to hang a big batch. Wood breathes and holds smoke well. Friendly to anyone with basic carpentry skills. Easy to add a cold smoke firebox.
- Cons. Must use untreated, food-safe wood. Takes more time than a barrel. Wood needs upkeep to last.
- Best for. Homesteaders who want real capacity, true cold smoking, and a project they can build with common tools. This is the build we walk through below.
Repurposed Cabinet or Shed
An old refrigerator, a metal locker, or a small wooden shed converted into a smokehouse. You strip out anything plastic or insulated with foam, add racks, and pipe in smoke from a firebox.
- Pros. Cheap or free if you have the cabinet. Fast to convert. Decent capacity from an old fridge.
- Cons. You must remove all plastic, foam, and coolant lines first. Quality varies with what you start from.
- Best for. Thrifty builders with a sound metal cabinet or shed already on hand.
Tip
If you want a smokehouse that does everything and teaches you the whole craft, build a wood frame walk-in with a separate offset firebox. You get room to smoke a real harvest, the cool smoke you need for bacon and cheese, and the option to hot smoke when you want. That is the build we walk through below, and the skills carry over to every other design on this list.
Planning Your Smokehouse
A little planning up front saves you a lot of grief later. Spend an afternoon on these steps before you cut a single board.
- Pick the right spot. Set the smokehouse on high, well drained ground away from your house, barn, and anything that can catch fire. Smoke and stray sparks need clear air around them.
- Mind the wind. Place the firebox so the prevailing wind does not blow smoke straight at your house or your neighbor. A smokehouse runs for hours, so the smell carries.
- Plan for cold smoke. For a cool chamber, set the firebox 6 to 10 feet away from the smokehouse and connect the two with a buried pipe or trench. The longer the run, the cooler the smoke arrives.
- Size it to your harvest. A 4 by 4 foot floor with a 6 to 7 foot tall chamber hangs a generous batch and still fits in a corner of the yard. Build bigger only if you cure large amounts.
- Build a solid base. A smokehouse needs a flat, level footing. Concrete piers, a gravel pad, or a poured slab all work. Keep the wood off the bare dirt so it does not rot.
- Plan the draft. Smoke must flow in low and out high. A firebox inlet near the floor and an adjustable vent in the roof create the natural draft that pulls smoke up through your food.
- Check local code and fire rules. Some towns and counties have rules on outdoor fires and accessory structures. Many areas have burn bans in dry season. Ask your local office and keep a water source and an extinguisher nearby.
Choosing Your Materials
The materials you pick decide how the smokehouse smokes, how long it lasts, and whether your food is safe. Here are the choices that matter most.
The Frame and Siding
Build the frame and the inside surfaces from untreated, food-safe softwood like cedar, pine, spruce, or fir. Cedar resists rot and smells wonderful. Cover the walls with solid board siding or shiplap so the chamber holds smoke but still breathes a little.
Warning
Never use pressure treated lumber, plywood, OSB, particleboard, or anything with glue, paint, or finish anywhere your smoke or food can touch it. Those materials release chemicals and fumes into your food when they heat up. Use only solid, untreated wood for the chamber, the racks, and the door. Save the treated lumber for the footing posts that sit in the ground, well clear of the smoke.
The Roof
Cap the smokehouse with a simple sloped or peaked roof of solid boards topped with metal roofing or cedar shingles. The roof must shed rain and hold an adjustable vent at the peak so you can control the draft and smoke escape.
The Door
A tight wooden door on strap hinges seals the chamber and gives you easy access to hang and check your food. A simple wood latch and a weather strip of folded canvas keep the smoke in without making the seal airtight, since a smokehouse needs a little air movement.
Racks, Rods, and Hooks
Hang food from hardwood dowels or stainless steel rods set across the upper chamber. Use stainless steel S hooks and food-safe mesh racks for smaller pieces and cheese. Avoid galvanized metal anywhere food touches it, since the zinc coating gives off bad fumes when warm.
The Firebox and Smoke Duct
For cold smoking, build the firebox as a separate small box of brick, block, or steel set 6 to 10 feet from the smokehouse. Connect it to a low inlet in the smokehouse wall with a buried 6 inch metal or clay pipe, or a covered trench. The smoke travels the duct, cools along the way, and drifts up through your food. A simple damper at the firebox lets you choke the fire down to a slow smolder.
Tools You Will Need
Most of these live in a typical home workshop.
- Tape measure, chalk line, and a carpenter's square
- 4 ft level and a torpedo level
- Circular saw and a handsaw
- Cordless drill and impact driver
- Hammer and a framing nailer if you have one
- Post hole digger or a shovel for the footing and the duct trench
- Speed square and a pencil
- Safety glasses, work gloves, and ear protection
A few optional items speed the job along.
- A miter saw for clean, repeatable cuts
- A masonry trowel if you build a block or brick firebox
- A laser level for setting the footing
Materials List and Cost Breakdown
Costs are approximate, based on average United States prices in 2026, for a 4 by 4 foot wood frame walk-in smokehouse about 7 feet tall, with a separate offset firebox and a buried smoke duct. The budget column assumes rough lumber, salvaged roofing, and a steel firebox you build from scrap. Your total swings most with the siding and roofing you choose.
| Item | Quantity | New Cost | Budget Cost |
|---|---|---|---|
| Pressure treated 4x4 footing posts | 4 | $80 | $60 |
| Untreated 2x4 framing lumber | 18 | $130 | $90 |
| Cedar or pine board siding | 120 sq ft | $200 | $120 |
| Solid board roof decking | 20 sq ft | $40 | $25 |
| Metal roofing or shingles | 20 sq ft | $60 | $30 |
| Strap hinges, latch, and hardware | 1 set | $35 | $25 |
| Stainless rods, S hooks, and racks | 1 lot | $60 | $40 |
| Firebox, brick or steel | 1 | $90 | $40 |
| Smoke duct pipe, 6 in, plus fittings | 8 ft | $70 | $45 |
| Adjustable roof vent and damper | 1 | $35 | $20 |
| Gravel or concrete for base | 1 lot | $50 | $30 |
| Total for a 4x4 ft walk-in smokehouse | ~$700 | ~$425 |
That gets you a real walk-in smokehouse for less than a single quality store smoker, and it cures far more meat. Use rough sawn or salvaged lumber and a scrap steel firebox and the price drops fast. Buying a comparable commercial smokehouse of this size easily runs $2,000 or more, so building it yourself saves real money.
Step by Step Build Instructions
Plan on a weekend or two with two people. The frame and siding go up in a day, then you build the firebox and run the duct.
Step 1: Set a Level Base and Footing
Mark out a 4 by 4 foot square on flat, well drained ground. Set four pressure treated 4x4 posts at the corners on concrete piers or in a gravel bed so the frame sits a few inches off the dirt. Level the tops of the posts to each other. A dry, level base keeps the smokehouse from rotting and rocking.
Step 2: Frame the Walls
Build four wall frames from untreated 2x4 lumber, like simple stud walls about 7 feet tall. Stand them on the footing, square them up, and screw the corners together. Add a top plate around all four walls to tie the frame together and carry the roof. Check that every corner is plumb and square before you move on.
Step 3: Sheath the Walls and Build the Roof
Cover the frame with solid board siding or shiplap, leaving no treated wood on the inside. Run the boards tight so the chamber holds smoke. Build a simple sloped or peaked roof from solid board decking, then cover it with metal roofing or cedar shingles. Leave an opening at the peak for the vent in the next step.
Step 4: Hang the Door
Frame a door opening on the front wall and build a tight wooden door from the same untreated boards. Hang it on strap hinges and add a simple wood latch. A folded canvas strip around the edge seals most of the smoke in while still letting the chamber breathe a little.
Warning
Keep your smokehouse well clear of the house, fences, woodpiles, and overhanging branches. A smoke fire burns for hours, often unattended, and sparks travel. Never run a fire during a burn ban or in dry, windy weather. Keep a hose and a fire extinguisher within reach, and check the firebox often.
Step 5: Build the Offset Firebox
Set your firebox 6 to 10 feet from the smokehouse, downwind of the door. Build it from brick, block, or welded steel, with a tight lid and a small air damper to control the burn. Size it to hold a slow, smoldering fire of hardwood or wood chips, not a roaring blaze. The farther the firebox sits, the cooler the smoke arrives for cold smoking.
Step 6: Run the Smoke Duct
Dig a shallow trench between the firebox and the smokehouse and lay a 6 inch metal or clay pipe along it, sloping gently up toward the chamber so smoke draws naturally. Connect the pipe to a low inlet near the smokehouse floor and seal both ends. Bury the pipe and the smoke cools as it travels, which is the secret to a cool cold smoke chamber.
Step 7: Install Racks, Rods, and the Vent
Fit stainless steel rods or hardwood dowels across the upper chamber to hang your food. Add mesh racks for cheese, fish, and small pieces. Mount an adjustable vent at the roof peak so you can open it to pull smoke up and through, or close it down to hold the smoke longer. Smoke in low, smoke out high.
Step 8: Season the Smokehouse Before First Use
Before you smoke any food, fire the smokehouse empty for a few hours with a clean hardwood fire. This burn-in drives off any moisture and sap, coats the inside with a protective smoke film, and tells you how the draft and temperature behave. Once it holds a steady, cool smoke, you are ready to cure and smoke your first batch.
The smokehouse is done.
Tips for a Long Lasting Smokehouse
A few habits separate a smokehouse that lasts decades from one that rots or burns in a few years.
- Burn clean hardwood. Use seasoned oak, hickory, apple, cherry, or maple. Never burn softwood, treated wood, or anything painted or glued, since the resin and chemicals ruin the flavor and your food.
- Keep the wood dry. Wet wood smolders dirty and bitter. Store your smoking wood under cover so it stays seasoned. Our DIY firewood storage shed plans keep a supply dry and ready.
- Control the draft. Learn to work the firebox damper and the roof vent together. A thin blue smoke means a clean burn. Thick white or gray smoke makes food taste harsh.
- Keep food off the dirt. Hang everything from rods and racks so air and smoke flow all around it. Crowded food smokes unevenly.
- Clean out the ash. Empty the firebox and wipe down the chamber between big smokes so old grease and creosote do not turn rancid or catch fire.
Common Mistakes to Avoid
A few traps catch nearly every first time builder. Sidestep these and your smokehouse will serve you for decades.
- Using treated or glued wood. Pressure treated lumber, plywood, and OSB off-gas chemicals into your food. Use only solid untreated wood inside the chamber.
- Skipping the cure. Cold smoking does not cook meat. Cure it properly with weighed salt and a tested recipe first, every time.
- Building too close to the house. A smoke fire runs for hours and throws sparks. Keep the smokehouse and firebox well clear of buildings and anything flammable.
- No offset firebox for cold smoke. A fire inside the chamber gets too hot for bacon, cheese, and cold smoked fish. Use a separate firebox and a buried duct to cool the smoke.
- Burning dirty or wet wood. Resinous softwood and damp wood make harsh, bitter smoke. Burn clean, seasoned hardwood only.
- Ignoring the draft. Without a low inlet and a high vent, smoke stalls and pools. Build in the airflow so smoke draws up through the food.
- Using galvanized metal inside. The zinc coating gives off bad fumes when warm. Use stainless steel for any rods, hooks, and racks that touch food.
- Smoking during dry, windy weather. A spark in dry season can start a wildfire. Skip the smoke during burn bans and high wind.
Frequently Asked Questions
Frequently Asked Questions
A 4 by 4 foot wood frame walk-in smokehouse with a separate offset firebox runs about $425 to $700 in materials when you build it yourself, depending on the siding and roofing you choose. A simple barrel or drum smoker can be put together for under $100, while a permanent brick or block smokehouse costs more in masonry. Using rough sawn or salvaged lumber and a scrap steel firebox keeps the wood frame build at the low end. A comparable commercial smokehouse easily runs $2,000 or more, so doing it yourself saves a lot.
Hot smoking runs the chamber between about 165 and 250 degrees, which cooks the food while it smokes, like smoked chicken, ribs, and hot smoked salmon. Cold smoking keeps the chamber below about 90 degrees and flavors and helps preserve the food without cooking it, like traditional bacon, country ham, hard sausage, and smoked cheese. Cold smoking needs a separate firebox set away from the chamber so the smoke cools before it reaches the food, and the meat must be cured with salt first.
Burn clean, well seasoned hardwood. Oak, hickory, apple, cherry, maple, and pecan all give great flavor. Hickory and oak are strong and classic for bacon and ham, while apple and cherry are milder and sweet, good for poultry, fish, and cheese. Never burn softwood like pine, cedar, or fir for smoke, since the resin makes food bitter and sooty. Keep your smoking wood dry and seasoned so it smolders clean.
Never use pressure treated lumber, plywood, OSB, particleboard, or any wood with glue, paint, stain, or finish anywhere the smoke or food can touch. Those materials release harmful chemicals and fumes into your food when heated. Build the chamber, the door, and the racks from solid, untreated softwood like cedar, pine, or spruce. The only place treated wood belongs is in the ground contact footing posts, kept well clear of the smoke.
Yes, when you do it right. Cold smoking does not cook the meat, so it does not kill bacteria on its own. The meat must be properly cured with weighed salt and a curing agent following a tested recipe before it goes in the smoke. Skipping the cure or guessing at salt levels risks botulism and other illness. Always follow a trusted cure recipe, weigh your salt, and keep the chamber cool and clean. See our smoking and curing meat guide before you start.
A wood frame walk-in smokehouse takes a weekend or two for two people. The footing, framing, and siding go up in about a day, then you build the firebox, dig and run the smoke duct, and fit the racks and vent. A simple barrel or drum smoker can be ready in an afternoon. A permanent brick or block smokehouse takes longer because of the masonry and cure time. Either way, season the smokehouse with an empty burn-in fire before you smoke any food.
It depends on where you live. Many areas treat a small smokehouse as an accessory structure that may need a permit above a certain size, and some have rules on outdoor fires, setbacks, and burn bans in dry season. Check with your local building and fire office before you build and before you light the first fire. Always keep a water source and an extinguisher nearby, and never run a smoke fire during a burn ban or in high wind.
Ready to Build Your Smokehouse?
That is the full picture. You know what a smokehouse does, the difference between hot and cold smoking, how the main types compare, and you have a step by step plan for a wood frame walk-in smokehouse you can build yourself. A smokehouse is real work, but it pays you back every time you pull a slab of home cured bacon or a side of smoked salmon from the smoke.
When your smokehouse is up, put it to work. Learn the craft with our smoking and curing meat guide, then make your first batch with our smoke and cure bacon walk through. Keep your smoking wood dry and seasoned with a set of DIY firewood storage shed plans.
For more weekend projects, browse the full DIY hub.
Happy building, and happy homesteading.

Cole
Founder & Lead Researcher
Cole is the founder of Plan Your Homestead. He works in clinical research and brings a research-first lens to every guide on the site, drawing on a long family line of farmers for grounded, practical perspective.
More in DIY
More articles coming soon. Check back for new diy content.