
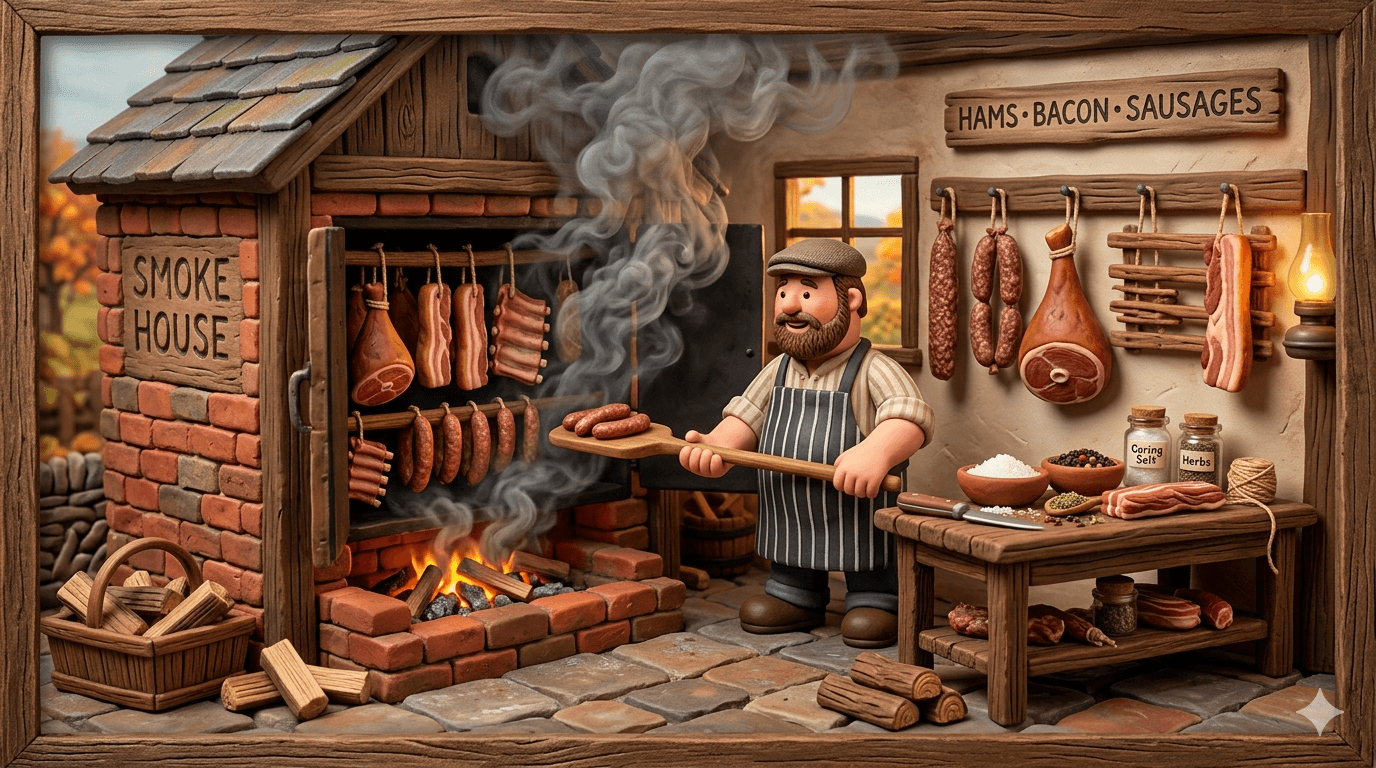
Smoking and curing are the oldest meat preservation tools the homestead has. Long before refrigerators, families fed themselves through winter on hams hanging in the rafters, jerky tucked in tins, and crocks of salt pork pulled out for stew. The science behind those old methods has not changed. The flavor and the food security they deliver are still hard to beat.
This guide is the big picture view of smoking and curing on the homestead. It walks you through what salt and nitrite actually do, the four curing methods every homesteader should know, the difference between cold smoking and hot smoking, which woods pair with which meats, and a full meat by meat reference table with temperatures, times, and storage life. Think of this as your pillar. The hands on deep dive on bacon already lives at how to smoke and cure your own bacon, and you can branch out from here.
You can absolutely do this. Smoking and curing sound technical, but the steps are simple once you see them in plain language. By the end of this guide you will know how to pick a cure, how to set your smoker, how to finish a roast safely, and how to store the result. Your kitchen and your pantry are about to smell like the best version of themselves.
Why Smoking and Curing Belong on Every Homestead
A homestead lives or dies by how well it stores the harvest. Vegetables go in the cellar and the freezer. Fruit goes in jars. Meat is the one harvest that begs for cure and smoke.
Curing pulls moisture out, raises the salt level, and adds a tiny amount of nitrite that blocks the worst spoilage bacteria. Smoking adds antimicrobial compounds, drives off more moisture, and layers in deep wood flavor. Together they turn a fresh cut of pork or beef into something you can hold for weeks in the fridge or months in the freezer.
Cost is the next argument. A whole pasture raised hog yields about 140 pounds of packaged meat. Cure and smoke a portion into bacon, ham, jowl bacon, and sausage and you stretch that hog into eight or nine months of pantry meat at a fraction of the grocery store price. Wild game stretches even further.
Flavor is the part that hooks people. Store bought ham is usually pumped with water and liquid smoke. Homemade ham tastes like real pork and real fire. The same gap shows up in pastrami, jerky, and smoked salmon. One bite of your own and the case is closed.
The reward factor seals it. Pulling your first ham off the smoker, slicing it for Sunday dinner, and watching everyone go quiet is one of those moments that turns a hobby into a tradition. Smoking and curing also pair beautifully with the rest of the pantry. Use pressure canning for the bone broth. Use the freezer for the fresh cuts. Use the root cellar for the hanging hams and the produce that goes with them.
How Smoking and Curing Actually Preserve Meat
Preserved meat is not magic. It is chemistry, water management, and time. Four forces do almost all of the work.
Salt is the foundation. When salt sits against raw meat, water moves out through osmosis and salt moves in. Bacteria that cause spoilage struggle in a salty environment. The meat firms up, the surface dries, and the cut transforms.
Sodium nitrite comes from the small amount of pink curing salt called Cure #1. It blocks the growth of Clostridium botulinum, the bacterium that produces botulism toxin in low oxygen, low acid environments like the inside of a sealed roast or a hanging ham. It also gives cured meat its rosy pink color and the classic cured flavor. For dry cured products that hang for weeks or months, like prosciutto or salami, Cure #2 contains sodium nitrate, which slowly converts to nitrite over time.
Smoke carries phenolic compounds, organic acids, and a thin layer of dehydration. Those compounds slow microbial growth on the surface of the meat. Smoke also infuses the meat with the flavor of whatever wood you choose.
Time and temperature are the last two levers. Time lets salt and nitrite penetrate the meat evenly. Temperature decides whether you are cooking the meat (hot smoking), simply flavoring and drying it (cold smoking), or holding it in a long slow dry cure.
Get all four right and you have safe, shelf stable, deeply flavored meat. Skip a step and you have a science project at best and a sick family at worst. The rules below exist for a reason.
Note
People have been salt curing meat for at least 5,000 years. The earliest written records of ham making come from ancient China and Rome. Cure #1 and the precise gram measurements are modern improvements on an ancient craft. The principles have not changed.
Curing, Smoking, and the Difference Between Them
Beginners often blur the two methods together. They are different tools, and many of the best products use both in sequence.
Curing alone uses salt and nitrite to preserve meat with no fire involved. Salt pork, dry cured ham, gravlax, and corned beef are all cured but not smoked. You finish them by cooking, slicing, or aging.
Smoking alone uses wood smoke and heat to flavor and cook meat without a long cure. A simple smoked chicken or smoked brisket is brined briefly for moisture, then smoked to a safe internal temperature. The smoke flavors. The heat cooks. Storage life is short, usually a few days in the fridge.
Curing plus smoking is the classic preservation combo. Bacon, ham, smoked sausage, pastrami, smoked salmon, and jerky all start with a cure and finish with smoke. The cure does the preservation. The smoke adds flavor and surface drying. Storage life jumps to weeks in the fridge and months in the freezer.
A useful way to picture it: cure is the chemistry that buys you time. Smoke is the flavor and the drying layer that locks the cure in. Heat is the optional cook that turns the cured cut into a finished product. Almost every homestead meat project lands in one of these three categories.
Equipment for the Homestead Smokehouse
You do not need a fortune in gear. A few essentials cover almost every project.
A digital kitchen scale that reads in grams
This is the single most important tool. Cure and salt are measured by percentage of meat weight, and nitrite has a hard safety ceiling. Volume measurements like teaspoons are not precise enough. A scale that reads to one gram or finer costs twenty to thirty dollars and lasts for years. Buy this before anything else.
Cure #1 (Prague Powder #1, pink curing salt)
Cure #1 is 93.75 percent table salt blended with 6.25 percent sodium nitrite, dyed pink to prevent confusion with regular salt. Use it for short cures and any product that finishes by cooking. Bacon, ham, pastrami, sausage, smoked salmon, and jerky all use Cure #1. A small bag costs ten dollars and lasts for many batches.
Cure #2 (Prague Powder #2)
Cure #2 contains both sodium nitrite and sodium nitrate. The nitrate slowly converts to nitrite over weeks or months, which is exactly what you need for dry cured products that hang in cool air without ever being cooked. Prosciutto, dry cured salami, coppa, and pancetta all use Cure #2. Skip this if you are only making cooked or hot smoked products.
Kosher or coarse sea salt
Diamond Crystal kosher salt and Morton kosher salt both work. Avoid iodized table salt, which can taste metallic in cured meat.
A smoker or grill set up for low indirect heat
Any cooker that holds a steady low temperature with indirect heat will smoke meat. Pellet smokers like Traeger, Pit Boss, and Camp Chef are nearly foolproof. Offset smokers, ceramic kamados, electric box smokers, and standard kettle grills all do the job with practice. For cold smoking, you also need a smoke generator or a way to keep smoke flowing without significant heat.
A probe thermometer that reads internal meat temperature
Internal temperature is the only reliable doneness signal for cooked smoked meat. A leave in probe with an external display is ideal. A handheld instant read is the minimum. The built in dial on most smokers is not accurate enough on its own.
A second thermometer for chamber temperature
The temperature inside the smoker chamber matters as much as internal meat temperature, especially when you cold smoke or low smoke. A small wireless probe at grate height keeps you honest.
Vacuum sealer or quality freezer bags
Cured meat that is destined for the freezer keeps far longer when sealed against air. A vacuum sealer pays for itself fast on a homestead that processes whole animals.
Sausage casings, grinder, and stuffer (optional)
If you want to make smoked sausage, summer sausage, snack sticks, or salami, add a meat grinder, a sausage stuffer, and natural or collagen casings. A grinder with a stuffer attachment works for small batches. A dedicated five pound stuffer makes bigger batches sane.
Curing chamber or fridge for dry cured projects (optional)
Dry cured hams, salami, and coppa need steady cool, humid air for weeks or months. A repurposed mini fridge with a temperature and humidity controller works. A cool basement corner with a hygrometer also works in many climates. Skip this for hot smoked and short cured projects.
Tip
Start with a scale, a probe thermometer, a bag of Cure #1, and whatever smoker you already have. That tiny kit covers bacon, pastrami, smoked chicken, jerky, and smoked salmon. Add specialty gear like a grinder, a stuffer, or a dry curing chamber once you know you love the craft.
The Four Curing Methods Every Homesteader Should Know
Almost every cure on the homestead is a version of one of these four methods. Pick the one that matches your cut and your timeline.
Dry cure (salt rub)
A dry cure rubs measured salt, Cure #1, and sugar directly onto the meat. You seal it in a bag or tub, refrigerate, and let time do the rest. Dry curing is the gold standard for bacon, jowl bacon, pancetta, lonzino, and small hams. The cure draws moisture out, then the liquid that forms keeps the meat in steady contact with the salt. Calculate the cure by percentage of meat weight (typically 2 to 3 percent salt, 0.25 percent Cure #1, 1 percent sugar). Weigh in grams. Flip the bag once a day. Cure time runs roughly five to seven days for a five pound belly, longer for larger cuts.
Equilibrium brine (wet)
An equilibrium brine dissolves the same measured salt, Cure #1, and sugar in water, then submerges the meat. Because the salt is dissolved in a known volume of water, the meat cannot over salt. It pulls the brine in until the meat and the brine reach the same salt concentration. This is the safest method for beginners. Brine times run about a day per half inch of meat thickness. Equilibrium brines shine for hams, brined chickens, turkeys, pastrami, corned beef, and smoked salmon.
Pumped cure (for hams and large roasts)
A pumped cure uses an injection needle to drive the brine deep into the center of a thick cut. Whole hams, fresh picnic shoulders, and big bone in roasts can take weeks to fully cure by submersion alone. Pumping cuts that down to a few days by placing the cure right next to the bone where spoilage is most likely. Use a pickling pump and inject the brine in a grid pattern across the muscle. Follow with a soak in the same brine to even out the cure.
Fresh cure for fast smoke (poultry and fish)
Some smoked meats only need a short brine for moisture and seasoning, not deep preservation. Whole chickens, chicken thighs, turkeys, duck breasts, and most fresh water fish do best with a light salt and sugar brine for a few hours, followed by a hot smoke that cooks the meat through. These products are not shelf stable. Treat them like roasted chicken: a few days in the fridge or a few months in the freezer.
Each method has a sweet spot. Dry cure rewards patience and precision. Equilibrium brine rewards beginners. Pumped cure rewards big cuts. Fresh cure rewards anyone who just wants a smoked chicken on Saturday.
Cold Smoking vs Hot Smoking
Smoke happens in two temperature ranges, and they are not interchangeable.
Cold smoking runs below 90 degrees Fahrenheit, ideally 65 to 85 degrees. The smoke flavors and dries the surface of the meat without cooking it. Cold smoked products are always cured first, since the cure does the preservation. Bacon (before slicing), traditional country ham, cold smoked salmon (lox), smoked cheese, and dry cured salami all use cold smoke. Cold smoking is best in cool weather. Hot summer days push the chamber above 90 degrees and turn cold smoke into a danger zone for raw meat.
Hot smoking runs at 180 to 275 degrees Fahrenheit. The smoke flavors while the heat cooks the meat to a safe internal temperature. Smoked brisket, pulled pork, hot smoked salmon, smoked sausage, jerky, and most everyday smokehouse projects use hot smoke. Hot smoking is forgiving. As long as you hit the right internal temperature, you finish safely.
Warm smoking, sometimes called gentle hot smoking, sits at 90 to 170 degrees. Smoked sausage links and summer sausage often start in this range, then ramp up to a finishing temperature. The slow ramp dries the casing and builds smoke flavor before the meat cooks through.
Match the method to the cut. Bacon is almost always cold smoked, then sliced and fried later. Brisket is always hot smoked. Salmon can go either way. When in doubt, hot smoke. It is harder to make a safety mistake when the meat reaches 145 to 165 degrees internal before you call it done.
Warning
Never cold smoke uncured meat. The 65 to 85 degree range is a perfect bacteria farm if the meat does not already have a full cure protecting it. Always cure first, smoke second. This rule has no exceptions for fish, poultry, pork, or beef.
Choosing Your Wood
The wood you burn shapes the flavor more than almost any other choice. A few rules cover most situations.
Hardwoods only. Resinous softwoods like pine, fir, and cedar produce harsh smoke and bitter tar. Stick to hardwoods. The wood should be dry and seasoned, not green.
Mild fruit woods like apple, cherry, and peach are friendly to almost everything. They give a sweet, light smoke that pairs especially well with pork, poultry, and fish. Cherry adds a rosy color to the finished meat.
Medium woods like pecan, maple, and alder sit in the middle. Alder is the classic salmon wood in the Pacific Northwest. Pecan is wonderful with pork shoulder and ribs. Maple plays nicely with bacon and ham.
Strong woods like hickory, oak, and mesquite hit hard. Hickory is the deep south flavor for bacon and pulled pork. Oak burns clean and hot, ideal for brisket and long sausages. Mesquite is intense and best used sparingly or mixed with milder woods.
Wood pairings to memorize:
- Pork belly and bacon → apple, cherry, hickory
- Pork shoulder and ham → apple, pecan, hickory
- Beef brisket and pastrami → oak, hickory, mesquite (mixed)
- Poultry → apple, cherry, alder
- Salmon and trout → alder, cherry, maple
- Sausage links → oak, hickory, beech
- Jerky → hickory, mesquite (mixed), oak
You can blend woods freely. Apple and hickory together is a homestead classic. So is oak and cherry. Avoid green wood, painted wood, treated lumber, and any wood you cannot identify.
Note
The biggest mistake new smokers make is too much smoke too fast. Thin blue smoke that you can barely see is what you want. Thick white smoke means the wood is smoldering badly and depositing creosote, which tastes like a campfire ashtray. Open the vents, raise the temperature a bit, and let the smoke clear out.
Meat by Meat Reference Table
This is the heart of the guide. Use it as a quick reference when you are choosing a project. All values assume a properly weighed cure and a calibrated thermometer.
| Meat or product | Cure type | Cure time | Smoke type | Smoke temp | Internal finish temp | Storage life | Notes |
|---|---|---|---|---|---|---|---|
| Pork belly (bacon) | Dry cure or eq brine | 5 to 7 days | Cold smoke | 65 to 85 F | Not cooked (slice and fry later) | 2 weeks fridge, 6 months freezer | See bacon guide for full walkthrough. |
| Pork jowl (guanciale, jowl bacon) | Dry cure | 7 to 10 days | Cold smoke or air dry | 65 to 85 F | Not cooked | 3 weeks fridge, 6 months freezer | Higher fat than belly. Slice thin. |
| Pork shoulder (smoked) | Light brine, optional | 6 to 12 hours | Hot smoke | 225 to 250 F | 203 F (pull) | 4 days fridge, 4 months freezer | Pull, vacuum seal, and freeze portions for weeknights. |
| Whole ham (bone in) | Pumped and submerged eq brine | 10 to 14 days | Hot smoke | 225 to 250 F | 145 to 155 F | 2 weeks fridge, 6 months freezer | Pump along the bone. Soak the cure across the whole muscle. |
| Country ham (dry cured) | Dry cure | 5 to 7 days per inch of thickness | Cold smoke, then hang | 65 to 85 F | Air dries for months | 1 year hanging in cool air | Old school method. Needs a cool curing chamber or cellar. |
| Beef brisket (pastrami) | Eq brine, then dry rub | 7 to 10 days | Hot smoke | 225 to 275 F | 203 F (pull) | 1 week fridge, 4 months freezer | Brine like corned beef, then coat with pepper and coriander before smoking. |
| Corned beef (brisket) | Eq brine | 5 to 7 days | None (boil after) | n/a | 195 F (simmer) | 5 days fridge, 4 months freezer | The brine is the same as pastrami. Skip the smoke and boil instead. |
| Beef jerky | Light brine or marinade with Cure #1 | 12 to 24 hours | Hot smoke or dehydrate | 160 to 180 F | 160 F | 2 weeks pantry sealed, 6 months freezer | Cure #1 protects the slow drying step. Slice across the grain. |
| Whole chicken (smoked) | Fresh brine (no Cure #1 needed for fast cook) | 4 to 8 hours | Hot smoke | 225 to 275 F | 165 F breast, 175 F thigh | 4 days fridge, 4 months freezer | Spatchcock for even cooking. Pat dry before smoke. |
| Chicken thighs (smoked) | Fresh brine | 2 to 4 hours | Hot smoke | 225 to 275 F | 175 F | 4 days fridge, 4 months freezer | Crisp skin at 275 F. |
| Turkey (whole, smoked) | Fresh brine | 12 to 24 hours | Hot smoke | 250 to 300 F | 165 F breast, 175 F thigh | 4 days fridge, 4 months freezer | Brine first. Smoke breast side up. Tent the breast if it gets ahead. |
| Duck breast (prosciutto style) | Dry cure | 3 to 5 days | Air dry (optional cold smoke) | 55 to 65 F | Not cooked | 2 weeks fridge, 4 months freezer | A simple starter cure that needs no smokehouse. |
| Salmon (hot smoked) | Eq brine | 8 to 12 hours | Hot smoke | 175 to 200 F | 145 F | 1 week fridge, 4 months freezer | Form a tacky surface (pellicle) for 1 hour before smoking. |
| Salmon (cold smoked, lox) | Dry cure or eq brine | 24 to 48 hours | Cold smoke | 65 to 80 F | Not cooked | 1 week fridge, 3 months freezer | Use very fresh, previously frozen fish for parasite safety. |
| Trout (whole, hot smoked) | Eq brine | 4 to 8 hours | Hot smoke | 175 to 200 F | 145 F | 5 days fridge, 4 months freezer | Brine, dry the pellicle, smoke until flaky. |
| Smoked sausage links | Mixed in (cure included in seasoning) | Stuff and rest 12 hours | Warm to hot smoke | Start 130 F, ramp to 175 F | 155 F | 1 week fridge, 6 months freezer | Bloom for an hour at room temp before refrigerating for color. |
| Summer sausage | Mixed in | Stuff and rest 24 hours | Warm smoke ramping | Start 130 F, ramp to 170 F | 155 F | 3 weeks fridge, 6 months freezer | Cool in ice bath after to set the casing and stop the cook. |
| Snack sticks | Mixed in | Stuff and rest 12 hours | Hot smoke | 160 to 180 F | 160 F | 3 weeks fridge, 6 months freezer | Use 19 to 21 mm collagen casings for the classic snap. |
| Venison jerky | Marinade with Cure #1 | 12 to 24 hours | Hot smoke or dehydrate | 160 to 180 F | 160 F | 2 weeks pantry sealed, 6 months freezer | Trim every speck of fat. Slice partially frozen. |
| Venison summer sausage | Mixed in | Stuff and rest 24 hours | Warm smoke ramping | Start 130 F, ramp to 170 F | 155 F | 3 weeks fridge, 6 months freezer | Cut venison with pork fat at 70/30 for the right mouthfeel. |
| Smoked salt (no meat) | n/a | n/a | Cold smoke | 65 to 85 F | n/a | 1 year pantry | A fun gateway project. Smoke a tray of coarse salt for 6 hours. |
A few patterns jump out of the table. Hot smoked products almost always finish at 145 to 165 degrees internal. Cured products that hold for weeks rely on time and salt before they ever see smoke. Wild game lives by the same rules as beef and pork, just leaner.
Safety Rules You Must Not Break
Smoking and curing are safe when you follow a few hard rules. Skip them and you risk botulism, salmonella, or trichinosis, none of which belong in your kitchen.
Weigh everything in grams. Cure #1 has a maximum safe dose of 156 parts per million sodium nitrite in the finished meat. The math only works if you weigh the meat and the cure on the same gram scale. Volume measures are not reliable.
Use the right cure for the project. Cure #1 for short cures and cooked products. Cure #2 for long dry cured products that never reach a cooking temperature. Never substitute one for the other. Never use regular table salt in place of curing salt.
Hit safe internal temperatures. Pork, beef, and lamb hit safety at 145 degrees Fahrenheit. Ground meat and sausage hit 160. Poultry hits 165. Fish hits 145. Jerky needs to reach 160 internal at some point during drying to kill pathogens. Use a thermometer every time.
Mind the danger zone. The danger zone is 40 to 140 degrees Fahrenheit. Bacteria multiply fastest in this range. Hot smoked meats should not sit in the danger zone for more than four hours total during the smoke. Cold smoked products skirt this rule only because the cure protects the meat below 90 degrees. Uncured meat must never sit in this zone.
Refrigerate the cure. Once you mix salt, sugar, and Cure #1 with water or with meat, the whole thing goes in the fridge at 38 degrees or below for the entire cure time. Counter curing is for the movies.
Bring meat to the freezer first for some parasites. Fish destined for cold smoke or lox should be commercially frozen at minus 4 degrees Fahrenheit for seven days, or minus 31 degrees for 15 hours, to kill parasites. Wild caught Pacific salmon usually qualifies. Buy from a sushi grade supplier or freeze yourself.
Trichinosis and pork. Modern USDA inspected pork is essentially free of trichinosis, but wild boar and home raised pork from unknown feed sources should be frozen at zero degrees for 30 days before any uncooked product like dry cured ham.
When in doubt, throw it out. Off colors, slimy surfaces, sour or rotten smells, soft or sticky textures, fuzzy white mold (some surface mold on dry cured products is normal, but black, green, or red mold is not) all mean compost it. The cost of a ruined cut is much smaller than the cost of a hospital visit.
Warning
Never guess at Cure #1. Use 2.5 grams of Cure #1 per kilogram of meat for any standard cure. That delivers about 156 parts per million nitrite, which is the FDA maximum and the proven safe level. Going lower weakens the cure. Going higher is dangerous. Always weigh.
Setting Up a Homestead Smokehouse
You do not need a barn shaped smokehouse out behind the woodshed, but you do need a setup that holds steady temperatures with steady smoke.
A pellet smoker is the easiest first smoker for a homestead. Set the dial, load a hopper, and the auger feeds pellets into a small fire pot. Modern pellet smokers hold 225 degrees with almost no fuss and most can cold smoke with a smoke tube added on the grate. Brands like Traeger, Pit Boss, and Camp Chef cover the gamut.
An offset smoker is the classic backyard rig. A firebox on one side feeds heat and smoke into a long cooking chamber. Offset smokers reward attention and split wood. The flavor is hard to beat once you learn the airflow.
A ceramic kamado like a Big Green Egg or Kamado Joe holds temperatures rock steady and runs on lump charcoal with wood chunks. Kamados can cold smoke with a maze or a smoke tube. They are pricey but last decades.
A converted refrigerator smokehouse is the homestead hack everyone tries eventually. Strip an old fridge of plastic, mount a hot plate or a smoke generator in the bottom, and add a chimney out the top. The insulation holds heat well, the size is generous, and the price is right.
A cinder block smokehouse is the next step up. Stack blocks into a small chimney shape, add a steel grate, mount a metal door, and feed smoke from a separate firebox through a buried pipe. This is the rig that cures hams for a whole community. Plan the airflow carefully.
A cold smoke generator like a smoke tube or a tube maze drops into any cooker and produces smoke from pellets or sawdust without significant heat. For cold smoking bacon, salmon, cheese, or salt in a kettle grill, this is the easiest add on under 30 dollars.
A mailbox mod routes cold smoke from a small generator through a metal mailbox into the side of your cooker via a flexible dryer hose. The smoke cools as it travels, which keeps the cooking chamber under 85 degrees even in mild weather. Plenty of homestead bloggers post step by step builds.
Whatever rig you choose, three habits separate good smoke from bad. Watch chamber temperature with a real thermometer. Watch internal meat temperature with a probe. Aim for thin blue smoke, not thick white smoke.
Storage and Aging
What you do with the finished meat matters as much as the cure. A perfect ham left in a warm pantry will spoil. A modest bacon vacuum sealed and frozen will hold for half a year without losing much.
Fridge storage. Cured and smoked products keep in the fridge for one to three weeks once finished. Wrap tightly in butcher paper or plastic. Let them breathe under loose foil if the surface needs to dry further.
Freezer storage. Cured and smoked products freeze beautifully. Slice bacon, ham, and pastrami before freezing for fast use later. Pack sausages and snack sticks in serving size bundles. Vacuum sealed packages hold for four to six months without significant quality loss. Wrap loose packages tightly enough to exclude air. Label everything with the date and the cut, just like in our food freezing guide.
Pantry storage. Truly shelf stable cured meats are rare on the homestead. Dry cured salami, prosciutto, country ham, and jerky can sit out of the fridge once they have lost enough moisture (usually 30 to 40 percent weight loss). Most home cured products are not in that category and need refrigeration.
Hanging. Whole hams and dry cured products can hang in a cool dry space at 50 to 60 degrees and 70 percent humidity for months. A dedicated curing chamber is ideal. A cool corner of the basement works in many climates. A root cellar can handle some hanging products on the warmer drier shelves.
Vacuum sealing. A vacuum sealer is the single biggest upgrade for homestead meat storage. Vacuum sealed smoked meat lasts three to four times longer in the freezer than the same meat in a zip top bag.
Refrigeration check ins. Smell, look, and feel your stored meat each week. Healthy cured meat smells like itself: sweet, savory, smoky. It feels firm and dry. It does not weep. Off smells, soft sticky surfaces, or color changes all mean it is time to compost.
Common Problems and Fixes
Even careful homesteaders make mistakes. Here are the fixes for the issues you are most likely to see.
The meat is too salty
Too salty almost always means too much salt for too long. Next batch, drop the salt to 2 percent of meat weight and stick to the cure time on the table. If a current batch is already too salty, soak it in cold water for one to four hours, change the water every hour, and pat dry. Most cures bounce back.
The bacon or ham is dry around the edges and soft in the middle
Uneven cure. The salt did not reach the center. Cure longer next time, flip the bag daily, and consider equilibrium brine over dry cure for very thick cuts. Pumped cure also fixes this for hams.
The fat layer is soft or greasy
The smoker ran too hot during a low smoke. Cold smoking should never push the chamber over 90 degrees. Use a smoke generator instead of a fire if you are struggling with heat creep.
The smoke flavor is weak
Three causes. Not enough wood. Smoke for too short a time. Or the surface was wet when smoking started, which blocks smoke absorption. Form a tacky surface (pellicle) by air drying the meat in the fridge uncovered for 6 to 12 hours before smoking.
The cured meat is gray instead of pink
You forgot the Cure #1 or used the wrong cure. Cure #1 gives the pink color through sodium nitrite. Without it, cured meat looks the same as cooked. Gray is also a sign of oxygen exposure. Wrap or vacuum seal as soon as the cure is done.
Fuzzy mold on a dry cured product
A thin white bloom on dry cured salami or country ham is normal and beneficial. Wipe it back with vinegar water if it gets thick. Black, green, blue, or red mold is not normal. Cut away aggressively if the mold has not penetrated the meat. Toss the cut if it has.
The internal temperature stalls during hot smoking
The stall is real. Brisket, pork shoulder, and big roasts hit 160 to 170 degrees internal and then sit there for hours as moisture evaporates from the surface. Wait it out, wrap the meat in butcher paper or foil to push through, or raise the chamber temperature 25 degrees.
The pellicle will not form on fish
You skipped the air dry step. After brining, place fish skin side down on a rack and air dry uncovered in the fridge for at least an hour, ideally overnight. A real pellicle feels tacky like dried glue. Without it, smoke beads up and rolls off the surface.
Sausage casings burst during stuffing
The grind was too coarse or the meat was too warm. Keep meat below 35 degrees while grinding and stuffing. Soak natural casings in lukewarm water for at least an hour before stuffing. Stuff slowly with steady pressure.
Warning
A sour, sulfur, or ammonia smell from cured meat is not a quirk. It is spoilage. Stop, compost the meat, sanitize your work surfaces, and start over with fresh meat and a fresh cure. Never taste meat to test if it has gone bad.
Frequently Asked Questions
Frequently Asked Questions
Pink curing salt is a blend of regular salt and a small percentage of sodium nitrite (or nitrate in Cure #2), dyed pink so you do not mistake it for table salt. The nitrite blocks the growth of Clostridium botulinum, the bacterium responsible for botulism. It also gives cured meat its rosy pink color and the classic cured flavor. Without it, bacon, ham, and sausage would be gray, flabby, and unsafe in low oxygen conditions like sealed bags or hanging muscles. Use Cure #1 for cooked or short cured products. Use Cure #2 for long dry cured products that hang for weeks or months.
You can, but you should understand the trade off. Salt alone, applied at high enough levels, has preserved meat for thousands of years. The drawback is that pure salt cures do not protect against botulism in low oxygen environments. That is why nitrite is standard in modern home charcuterie. Some homesteaders use celery juice powder, which contains natural nitrates that convert to nitrite during the cure. This is the source of the no nitrites added labels on grocery store bacon. Chemically it is the same nitrite, just from a vegetable source. If you want to avoid all nitrites, stick to hot smoked products that finish above 145 degrees internal and are eaten within a week, never long dry cured projects.
Cold smoking happens below 90 degrees Fahrenheit and flavors the meat without cooking it. Cold smoked products are always cured first because the cure does the preservation work. Bacon (before frying), cold smoked salmon (lox), and dry cured salami all use cold smoke. Hot smoking happens between 180 and 275 degrees Fahrenheit and cooks the meat while it flavors. Hot smoked products finish at safe internal temperatures: 145 for pork, beef, and fish, 160 for ground meat and jerky, 165 for poultry. Hot smoking is more forgiving. Cold smoking is more traditional and requires more care.
It depends on the meat. Apple, cherry, and pecan are gentle all rounders that pair with almost anything. Hickory and oak are stronger and ideal for beef brisket, pork shoulder, and bacon. Mesquite is intense and best blended with milder woods or used in small amounts on big beef cuts. Alder is the classic salmon wood. Avoid resinous softwoods like pine and cedar (cedar planks are an exception for fish, since the wood does not actually burn). Use dry, seasoned hardwoods only. Aim for thin blue smoke, not thick white smoke.
It depends on the product and how you store it. Bacon, ham, pastrami, and smoked sausage keep for one to three weeks in the fridge and four to six months in the freezer. Vacuum sealing roughly triples freezer life. Jerky keeps for two weeks sealed at room temperature and six months in the freezer. Dry cured products like prosciutto and country ham can hang at 50 to 60 degrees for six months to a year. The crop by crop reference table earlier in this guide gives specific numbers for each product.
It contains the same active compound (nitrite) and works the same way in your meat, so the safety is similar. The downside for home cooks is precision. Celery powder products vary widely in nitrate concentration, which makes it very hard to hit the FDA target of 156 parts per million nitrite. Cure #1 is engineered for predictable dosing. Most home charcuterie experts recommend Cure #1 by weight on a gram scale for both safety and consistency. Reserve celery powder for occasional projects where you are following a specific tested recipe.
Not at all. A standard pellet smoker, kamado, kettle grill, or even an electric box smoker handles 90 percent of homestead smoking projects. Add a cold smoke generator (a smoke tube costs around 20 dollars) and you can cold smoke bacon, cheese, salt, and salmon. A purpose built smokehouse is wonderful for high volume curing, hams, and traditional dry cured products, but you do not need one to get great results from the start.
Use a pumped equilibrium brine. Calculate the brine by total weight of ham plus brine: 2.5 percent salt, 0.25 percent Cure #1, 1 percent sugar, plus aromatics. Inject the brine deep into the muscle along the bone in a grid pattern, then submerge the ham in the remaining brine. Refrigerate at 38 degrees or below for 10 to 14 days, flipping every other day. Rinse, form a pellicle in the fridge overnight, then hot smoke at 225 to 250 degrees Fahrenheit to an internal temperature of 145 to 155 degrees. Slice once cooled and store in the fridge or vacuum sealed in the freezer.
Yes, with a few adjustments. Set up two zone heat: burners on one side, no burners on the other. Place a smoke box or a foil packet of soaked wood chips directly over a lit burner. Place the meat on the unlit side. Aim for 225 to 250 degrees Fahrenheit on the unlit side. Check chamber temperature with a separate probe at grate height. Replenish wood every 30 minutes. A gas grill cannot match a pellet or offset smoker for long low smokes, but it produces excellent smoked chicken, ribs, and salmon in two to three hours.
The danger zone is the temperature range from 40 to 140 degrees Fahrenheit, where most foodborne bacteria multiply fastest. Hot smoked meat passes through this range as it cooks, which is normal as long as it does not sit there for more than four hours total. Cold smoked meat lives inside the danger zone the entire smoke, which is only safe because the salt and nitrite in the cure block bacterial growth. That is why you must never cold smoke uncured meat. A reliable probe thermometer is the cheapest safety tool on the homestead.
Start with One Project This Weekend
Smoking and curing sound intimidating until you actually try them. The first project teaches you more than any video. You learn how your smoker behaves, how a real pellicle feels, what thin blue smoke smells like, and how the cure transforms a fresh cut into something deeper.
Start small and pick a project that fits your gear. If you have any cooker that holds 225 degrees, smoke a whole chicken with a fresh brine this Saturday. If you have a scale, a fridge, and a pellet smoker, cure and smoke a five pound pork belly into homemade bacon over a week. If you have a smoke tube and a kettle grill, cold smoke a side of salmon into lox. If you have a hunter in the family, mix up a venison jerky cure and run a batch through the smoker.
Track what you do. Weigh the meat. Weigh the cure. Note the temperatures and the times. By the time you finish your third or fourth batch, you will have your own house style for bacon, ham, sausage, or jerky that suits your taste and your family.
A balanced homestead pantry uses several methods together. Pair your smoked and cured meat with pressure canning for bone broth and meat in jars, water bath canning for jams and sauces, dehydrating for jerky and pantry snacks, a root cellar for hanging hams and storage crops, and the freezer for fresh cuts and quick meals. Each one frees up the others.
Welcome to homestead smoking and curing. Your great grandparents would recognize the smoke from a mile away, and they would be proud.

Cole
Founder & Lead Researcher
Cole is the founder of Plan Your Homestead. He works in clinical research and brings a research-first lens to every guide on the site, drawing on a long family line of farmers for grounded, practical perspective.
More in Food Preservation
More articles coming soon. Check back for new food preservation content.