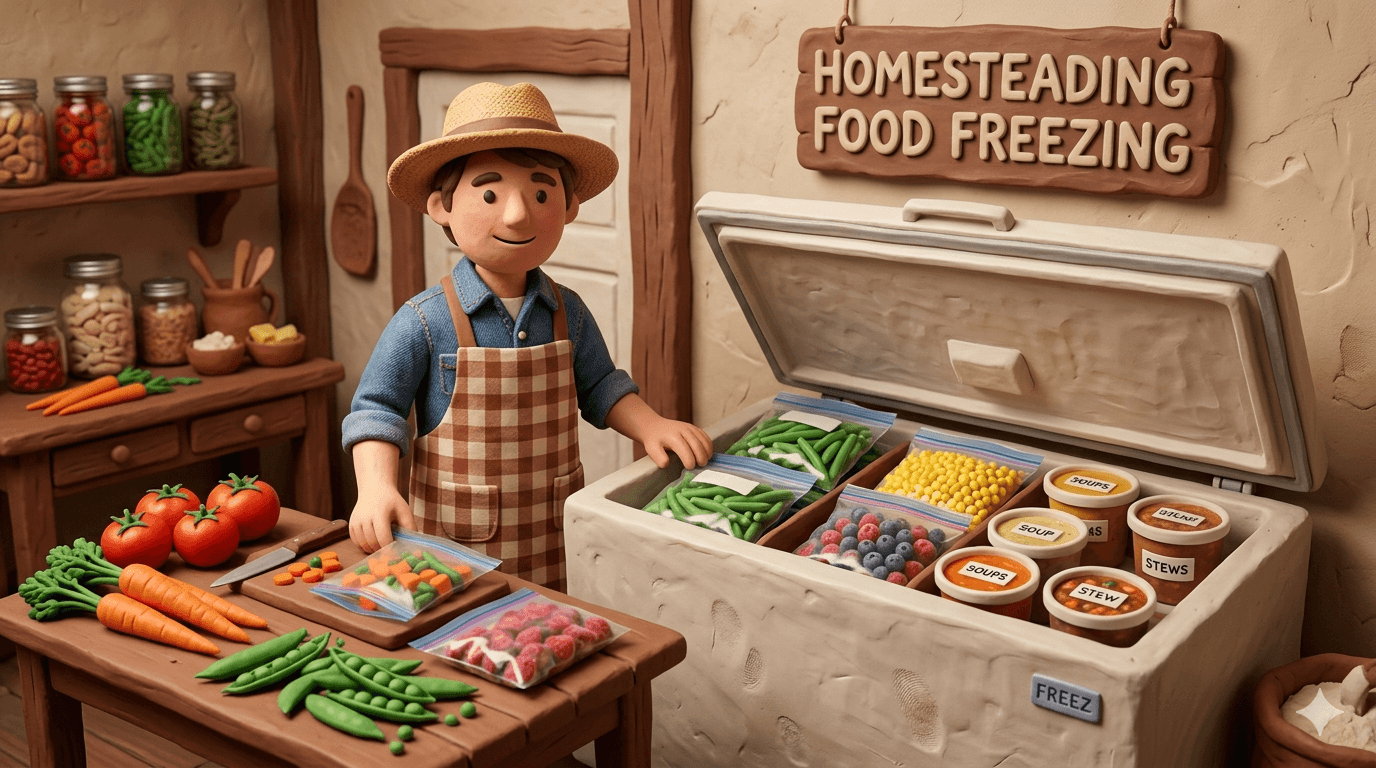
The freezer is the quiet workhorse of the modern homestead pantry. It does not ask for jars or pressure gauges. It does not need a root cellar dug into a hillside. It just hums along in the corner, holding a year of meals at a steady zero degrees Fahrenheit.
This guide is the big picture view of homestead freezing. It is not the step by step for blanching green beans or wrapping a roast. That deeper how to lives in our best practices for freezing the harvest guide. This one is about the system. How to pick the right freezer, where to put it, how to fill it across the seasons, and how to keep it running through butcher day, harvest week, and the occasional power outage.
A well planned freezer pantry can carry a family of four through most of the year. It pairs beautifully with canning, dehydrating, fermenting, and root cellaring. Once the system is in place, freezing is almost effortless. You toss in a tray of berries on Tuesday, a vacuum sealed roast on Saturday, and a few quarts of garden soup on Sunday. Six months later you are still eating fresh, even when the ground is frozen.
Why Freezing Belongs at the Heart of the Homestead
Freezing is the fastest, most forgiving preservation method on the homestead. There is no botulism risk. There is no fermentation crock to monitor. There is no altitude chart to memorize. You wash, prep, pack out the air, and slide the bag into the freezer.
Freshness holds longer than almost any other method. Frozen peas in February taste like peas in July. Blueberries hold their color and juice. A vacuum sealed ribeye still bleeds red on the cutting board after eight months. Few other methods get that close to the original.
Freezing also matches the rhythm of homestead life. The garden produces faster than you can eat. The freezer absorbs the surplus. A neighbor brings over half a deer. The freezer absorbs that too. You score a flat of strawberries at the farm stand. Tray freeze them on the way home. Freezing is the catch all for everything you do not have time to can today.
It pairs perfectly with the rest of your preservation toolkit. Use water bath canning for shelf stable jams and pickles. Use pressure canning for low acid foods that need to live off the freezer. Use dehydrating for snacks and pantry staples. Use a root cellar for whole hardy crops. Freezing fills the gap for everything in between.
Note
The home freezer is younger than most preservation tools. Chest freezers only became common on American farms after World War II. Before that, families relied on root cellars, salt curing, smokehouses, and home canning. Today the freezer carries more of the homestead harvest than any other single method.
Choosing the Right Freezer for Your Homestead
The freezer you choose shapes how you preserve for the next decade. Get this part right and the rest gets easier.
Chest versus upright
A chest freezer is the classic homestead pick. The lid opens upward, cold air sinks and stays put, and the box recovers quickly after you open it. Chest freezers run more efficiently than uprights of the same size. They also hold safe temperatures longer during a power outage. The trade off is access. Anything at the bottom is buried until you dig down to it.
An upright freezer trades some efficiency for convenience. Shelves and door bins let you see what you have at a glance. You can grab a single bag without lifting three others first. Cold air spills out every time you open the door, which means higher energy use and faster temperature swings.
For most homesteaders the answer is both. A chest freezer in the garage or basement holds the long term bulk like meat, butter, and seasonal harvests. An upright or the kitchen fridge freezer handles the weekly rotation of leftovers, bread, and tonight's dinner.
Sizing the freezer
A good rough rule is one and a half to two cubic feet of freezer space per person, per year of self sufficiency. A family of four that wants to put up a serious chunk of their food needs eight to sixteen cubic feet of dedicated freezer space, plus the kitchen fridge freezer.
A whole hog yields about one hundred forty pounds of packaged meat. That fills roughly seven cubic feet on its own. A quarter beef yields about one hundred pounds and fills five cubic feet. Add a season of garden vegetables, fruit, and prepared meals and the math gets real fast.
Buy bigger than you think you need. Empty space costs almost nothing to run. Running out of space at the worst possible moment, the day the butcher calls or the strawberry patch peaks, is the homestead version of regret.
New or used
Used chest freezers from the eighties and nineties are everywhere on local marketplace listings. They are tanks. They run forever. They are also energy hogs by modern standards. A new Energy Star chest uses about half the electricity of a thirty year old unit of the same size.
If you find a good used freezer for free or cheap and you have the power budget, take it. If you are buying new, an Energy Star certified chest in the seven to fifteen cubic foot range is the homestead sweet spot.
Tip
Before you buy any freezer, measure the doorway, the stairwell, and the spot where it will live. A fourteen cubic foot chest freezer is bigger than most people picture. Get it home only to realize it does not fit through the basement door and you will be telling that story for years.
Where to Put the Freezer
Freezers run best in cool, dry, well ventilated spaces. The hotter the room, the harder the compressor works, and the higher your electric bill climbs.
A basement is the gold standard. Steady cool temperatures year round. Easy access. Protected from extreme heat and cold. If your basement runs damp, set the freezer on a couple of two by fours to lift it off the floor and let air move underneath.
A garage works in mild climates but struggles in extremes. Most modern chest freezers are rated to about thirty two degrees Fahrenheit on the low end. A garage that drops to twenty degrees in January can confuse the thermostat and stop the compressor from cycling. Some manufacturers sell garage ready models with wider operating ranges. Look for that label if your garage swings hard.
A mudroom, pantry, or back porch closet works fine as long as the temperature stays in a livable range. Do not stuff a freezer into a tight space without airflow. The coils on the back or sides need at least two inches of clearance to vent heat.
An outbuilding or insulated shed is great if you already have power run out there. Just confirm the wiring can handle the load and the building stays within the freezer's operating range.
Avoid sunny windows, the spot next to the wood stove, and any corner that swings between hot and cold. Steady cool is the goal.
Setting Up the Freezer System
A freezer without a system slowly turns into a graveyard for forgotten food. A freezer with a simple system runs itself for years.
The thermometer
Spend five dollars on a freezer thermometer. The built in dials on most units are unreliable, and the difference between zero and ten degrees Fahrenheit cuts your storage windows in half. Drop the thermometer in the middle of the freezer, check it once a week, and adjust the thermostat until it reads zero or below.
The inventory sheet
Tape a sheet of paper and a pencil to the freezer lid or door. Every package that goes in gets a line. Every package that comes out gets crossed off. Once a month, glance at the list and plan a meal around the oldest thing on it.
A simple inventory beats every fancy app. The paper is right there. The pencil is right there. Updates take three seconds.
Zones inside the freezer
Group similar foods together. Meats in one bin or stack. Vegetables in another. Fruit in another. Bread and baked goods together. Prepared meals together. This single habit cuts your dig time in half and saves cold air every time you open the lid.
In a chest freezer, use stackable plastic bins or milk crates as dividers. Lift a whole bin out instead of digging through it. Label each bin with masking tape and a marker.
In an upright, dedicate shelves or drawers by food group. Heaviest items go on lower shelves so falling bags do not crush eggs or berries.
First in, first out
Put new packages in the back or bottom. Older packages move forward or to the top. Use the oldest first. This single habit will keep your freezer rotating instead of stockpiling.
Label everything
Write the food name and the date on every package. Use a permanent marker on freezer tape or directly on the bag. "Beef, May 25" tells you everything you need to know. "Beef" written on a frozen brick six months later tells you nothing.
Tip
The cheapest and most useful freezer upgrade is a sleeve of freezer tape, a fat Sharpie, and ten minutes spent labeling everything in there right now. You will save more food in the first month than the supplies cost you in a year.
What to Freeze Across the Homestead Year
A homestead freezer pantry fills in waves. The garden, the orchard, the butcher, and the farm stand all pulse on their own schedule. Plan around those pulses and your freezer stays useful all year.
Late winter and early spring. Stock up on sales. Hams after Easter. Turkeys after holidays. Pasture raised beef bought a quarter at a time when the local rancher posts a fall schedule. Freezer space is empty after winter, which makes this the best time to buy big and pack deep.
Spring. Asparagus, rhubarb, and the first greens. Freeze rhubarb in chopped one cup portions for winter pies. Blanch and freeze asparagus in serving size bags. Wash and chop greens, blanch, squeeze dry, and freeze flat in bags for soups and smoothies.
Early summer. Strawberries, peas, and snap beans. Tray freeze berries on parchment lined sheet pans, then bag once solid. Shell peas, blanch one and a half minutes, shock, and bag. Beans get a three minute blanch and a fast cool down.
Midsummer. Cherries, blueberries, raspberries, blackberries, and the first sweet corn. Pit cherries before freezing. Tray freeze all the berries. Blanch corn on the cob, cut the kernels off, and bag.
Late summer. Peaches, plums, tomatoes, peppers, summer squash, and bumper cucumber harvests headed for pickles. Peel and slice peaches with a quick lemon dip. Core tomatoes and freeze whole on trays, then bag. The skins slip right off once thawed. Chop peppers, no blanch needed, and tray freeze.
Fall. Apples, pears, brassicas, hard squash bound for cooked puree, and the start of butcher season. Pressure can the broth bones, freeze the rest of the carcass meat. Pick over the orchard and freeze sliced apples for pies and crisps.
Late fall and winter. Whole birds, hams, pork halves, beef quarters, deer, elk, and game birds. Bread for sandwiches, casseroles for the chest freezer reserve, and big batches of soup and chili for fast weeknight dinners.
By spring the cycle restarts. The freezer should be running low when the first asparagus pokes up. That is the point. You eat through the old before the new arrives.
Bulk Processing Days
The biggest leaps in freezer pantry building happen on bulk days. A butcher schedule. A flat of peaches from a U pick. A hundred ears of corn from a friend with too much. These days are where the freezer earns its keep.
A few rules make bulk days survivable. Prep your workspace. Clear counter space, set out sheet pans, fill the sink for the blanch and ice baths, and lay out bags and a Sharpie. Recruit help if you can. A second pair of hands cuts a butcher day or a corn day in half. Pre cool the freezer. Drop the thermostat to its coldest setting the morning before. The colder the freezer is when warm food arrives, the faster the new packages freeze through and the better the texture later.
Stage in layers. Spread fresh packages in a single layer against the cold walls or floor of the chest freezer for the first twelve to twenty four hours. Once each package is solid, stack normally. Trying to freeze a hundred pounds of warm meat in a tight stack overworks the compressor and leaves the inside packages soft for too long.
For huge harvests, work in batches. Freeze one sheet pan of strawberries while you wash the next. Blanch one pot of beans while you pack the last. The rhythm is more important than the volume.
Warning
Never load more than two thirds of the freezer's volume with warm food at once. The compressor cannot pull it all down to zero degrees fast enough. The half frozen middle of a big load grows ice crystals and ruins texture. Spread big bulk days across two or three sessions or two freezers.
Power Outage Protocol
A full freezer holds safe temperatures for about forty eight hours after the power goes out. A half full freezer holds about twenty four. Both numbers assume the door stays closed.
The first rule of an outage is do not open the freezer. Every peek bleeds cold air. If you are not sure how long the power will be out, treat the freezer like a sealed time capsule and walk away.
Block ice extends your safety window. A few gallon jugs of frozen water tucked into the empty spaces double as cold mass and emergency drinking water. Keep two or three jugs frozen all the time. Add more before a forecast storm.
For longer outages, a small portable generator can keep a chest freezer running on a few gallons of fuel a day. The freezer does not need continuous power. Run the generator two or three hours every six to eight hours and the freezer holds zero degrees indefinitely. Dry ice from a grocery store or welding supply works too. Five pounds of dry ice will hold a half full chest freezer cold for about twenty four hours.
When the power comes back on, evaluate each package. Anything that still has visible ice crystals can be refrozen safely. Texture will suffer but the food is safe. Anything fully thawed but still cold (forty degrees Fahrenheit or below) should be cooked or eaten right away. Anything that warmed above forty degrees for more than two hours goes in the trash.
Meat, poultry, fish, dairy, and prepared meals are the most time sensitive. Bread, butter, and most fruit are more forgiving.
What a Homestead Freezer Costs to Run
The freezer is one of the cheapest appliances in your house to operate. A modern Energy Star chest freezer in the ten to fifteen cubic foot range uses roughly two hundred to three hundred fifty kilowatt hours per year. At the national average of fifteen cents per kilowatt hour, that is about thirty to fifty dollars a year. Even at higher rates in places like California or New York, you are looking at sixty to ninety dollars a year for the same unit.
That is two or three dollars a month to hold a year of meat, vegetables, fruit, and prepared meals. Compared to grocery store prices, the payback is enormous. One quarter beef alone covers ten years of freezer electricity.
A full freezer runs more efficiently than an empty one. Frozen food acts as thermal mass and helps the box recover quickly when you open the lid. If your freezer is half empty, fill the gaps with jugs of water. The water freezes once, then quietly does its job for years.
Skip the older sub freezer in the garage if it is from the eighties or earlier. The bill on one of those can hit one hundred fifty dollars a year for the same volume.
How Freezing Pairs With Other Methods
The homestead pantry works best when no single method has to do everything. Each one has a sweet spot.
Freezing carries fresh quality the longest, holds variety, and absorbs surplus on short notice. It is the default for almost everything that fits.
Canning wins for shelf stable storage that does not need power. Use water bath canning for jams, salsas, and pickles. Use pressure canning for soups, beans, meat, and broth. Pressure canned meat and broth free up freezer space for the cuts you actually want to grill.
Dehydrating turns the harvest into shelf stable snacks and pantry staples. Dried tomatoes, apple chips, fruit leather, herbs, jerky. See dehydrating 101 for the basics. Dried foods take up almost no space and need no power once they are sealed.
Fermenting gives you fresh probiotic foods with almost no equipment. A jar of sauerkraut or kimchi in the fridge stays good for months. Start with our beginner's guide to lacto fermentation.
Root cellaring holds whole hardy crops for months without power. Carrots, potatoes, beets, cabbage, apples, winter squash. See the root cellar guide for setup and crop by crop storage life.
Smoking and curing turns pork bellies, hams, and bacon into months of pantry meat. See how to smoke and cure your own bacon for the dry cure and smokehouse approach.
A balanced pantry uses several of these together. Freeze the cuts you cook fresh. Pressure can the stew meat and the bone broth. Dehydrate the snack apples and the herbs. Ferment the kraut. Cellar the squash. Smoke the bacon. Each one frees up the others.
Common Mistakes That Waste Freezer Space
Most freezer pantry failures trace back to a few habits.
No labels. A frozen brick of brown stew or red sauce is anonymous after six months. By the time you guess wrong twice, that container is heading to the compost. Always label.
No inventory. Without a list, the back of the freezer becomes a mystery. Items get bought, hidden, and forgotten until they are freezer burned. Tape a sheet to the door. Update it as you go.
Bags packed too thick. A four inch thick brick of ground beef takes hours to freeze through. Press meat flat to a half inch thickness in the bag. It freezes fast, thaws fast, and stacks like books.
Wet food in the bag. Water that goes in as droplets comes out as ice crystals stuck to the bag. Pat everything dry before packing. Wet beans, wet berries, and wet meat freeze into icy clumps.
Air left in the bag. Air is the enemy of frozen food. Press the bag flat, roll up from the bottom, and seal. A drinking straw inserted in a gap lets you suck out the last of the air. A vacuum sealer does it best.
Mason jars with the wrong shape. Tapered shoulder jars crack when frozen liquids expand. Straight sided jars only, full inch of headspace, and freeze with the lid loose until solid.
Stacking warm food. Warm packages stacked tight take days to freeze through. Spread new packages against the cold walls in a single layer for the first day, then restack once solid.
Overlooked door seals. A door seal that no longer grips lets warm air leak in twenty four hours a day. Run a dollar bill across the seal. If it pulls out with no resistance, replace the gasket or get help from a repair tech.
Buying meat with no plan. Half a hog sounds great until you realize the freezer is already full. Always know your space before you commit to a butcher.
Fix these habits and your freezer pantry runs cleaner, lasts longer, and wastes less food.
Frequently Asked Questions
Frequently Asked Questions
Plan on one and a half to two cubic feet of dedicated freezer space per person, per year of meals you want to put up. A family of four building a serious freezer pantry needs eight to sixteen cubic feet, plus the kitchen fridge freezer. A quarter beef alone fills about five cubic feet, and a whole hog fills about seven. Buy bigger than you think you need. Empty freezer space costs almost nothing to run, while running out of space the day the butcher calls is the homestead version of regret.
A chest freezer is more efficient, holds temperature better during a power outage, and offers more storage per dollar. An upright is easier to organize and lets you see what you have at a glance. Most homesteaders end up with both: a chest in the basement or garage for long term bulk like meat and big harvests, and an upright or the kitchen fridge freezer for the weekly rotation of leftovers, bread, and tonight's dinner.
Yes, if the garage stays within the freezer's operating range. Most chest freezers are rated to about thirty two degrees Fahrenheit on the low end. A garage that drops below freezing in winter can stop the compressor from cycling, which thaws the contents. Look for garage ready models with wider operating ranges if your garage swings hard. In hot climates, expect higher electric bills because the compressor works harder against the heat.
A full freezer holds safe temperatures for about forty eight hours after the power goes out. A half full freezer holds about twenty four. Both numbers assume the door stays closed. Block ice in the empty spaces extends the window. A small generator run two or three hours every six to eight hours keeps the freezer cold indefinitely on a few gallons of fuel a day. Dry ice works too. When power returns, refreeze anything with visible ice crystals. Cook or eat anything that thawed but stayed below forty degrees. Toss anything that warmed above forty for more than two hours.
A modern Energy Star chest freezer in the ten to fifteen cubic foot range uses about two hundred to three hundred fifty kilowatt hours per year. At the national average of fifteen cents per kilowatt hour, that is roughly thirty to fifty dollars a year. Higher rates push the bill to sixty or ninety. A full freezer runs more efficiently than an empty one, so fill any gaps with jugs of frozen water. Older units from the eighties or earlier can cost three times as much to run for the same volume.
Start with what you would have bought anyway. A pound of ground beef pressed flat in a bag. A tray of berries from a weekend trip to the farm stand. A double batch of soup or chili. Get used to the four step rhythm of prep, blanch if needed, pack out the air, and freeze fast. Once that feels natural, move up to bigger projects like a quarter beef, a flat of peaches, or a hundred ears of sweet corn. Our [best practices for freezing the harvest](/food-preservation/best-practices-freezing) guide walks through the technique for each food type.
Tape a sheet of paper and a pencil to the lid or door. Every package that goes in gets a line. Every package that comes out gets crossed off. Once a month, glance at the list and plan a meal around the oldest item. A simple inventory sheet beats every fancy app because the paper is right there when you have a bag in your hand. The whole system takes three seconds per update and saves food worth hundreds of dollars a year.
Not at first. One properly sized chest freezer plus the kitchen fridge freezer covers most homesteads. A backup makes sense once you are processing whole animals, putting up bulk harvests, or building deep reserves for outages and inflation. Two smaller freezers also reduce risk: if one fails, you only lose half your pantry. Many homesteaders end up with one chest for meat and one chest or upright for vegetables, fruit, and prepared meals.
No. Anything stored on top of a freezer blocks heat from venting off the compressor and shortens the life of the unit. Keep the top clear. The sides need at least two inches of clearance for the same reason. If you need flat storage in a tight space, build a shelf above the freezer rather than stacking directly on the lid.
Freezing is the default for fresh quality and short notice surplus. Canning handles shelf stable storage that does not need power. Dehydrating gives you snacks and pantry staples that take almost no space. Fermenting gives you probiotic foods in the fridge. Root cellaring holds whole hardy crops without power. Smoking and curing turn pork into months of pantry meat. A balanced pantry uses several together so no one method has to do everything. Freezing usually carries the largest share, especially for meat and prepared meals.
Start Building Your Freezer Pantry This Month
A homestead freezer pantry is not built in a day. It grows one bag, one tray, one bulk day at a time. The first goal is to set up the system. Pick the freezer, find its spot, hang the thermometer, tape the inventory sheet to the door, and label your first package.
From there, let the seasons fill it. Strawberries in June. Peaches in August. Tomatoes in September. A quarter beef or a whole hog in October. Bread, soup, and ready to heat meals all winter. By spring you will pull the last bag of garden corn from the freezer the same week the asparagus pokes up. That is what a working freezer pantry looks like.
When you are ready to dive into the hands on technique, best practices for freezing the harvest covers blanching times, fruit packs, meat wrapping, freezer burn defense, thawing safely, and detailed storage windows for every food type. Pair this system level guide with that tactical one and you have the whole picture.
Pair your freezer with water bath canning, pressure canning, dehydrating the harvest, a root cellar, and a smokehouse for your own bacon, and you have a pantry that feeds your family year round on what you grew, raised, or sourced from your neighbors.
Welcome to homestead freezing. Your freezer is about to become the most valuable appliance you own.

Cole
Founder & Lead Researcher
Cole is the founder of Plan Your Homestead. He works in clinical research and brings a research-first lens to every guide on the site, drawing on a long family line of farmers for grounded, practical perspective.
More in Food Preservation
More articles coming soon. Check back for new food preservation content.