
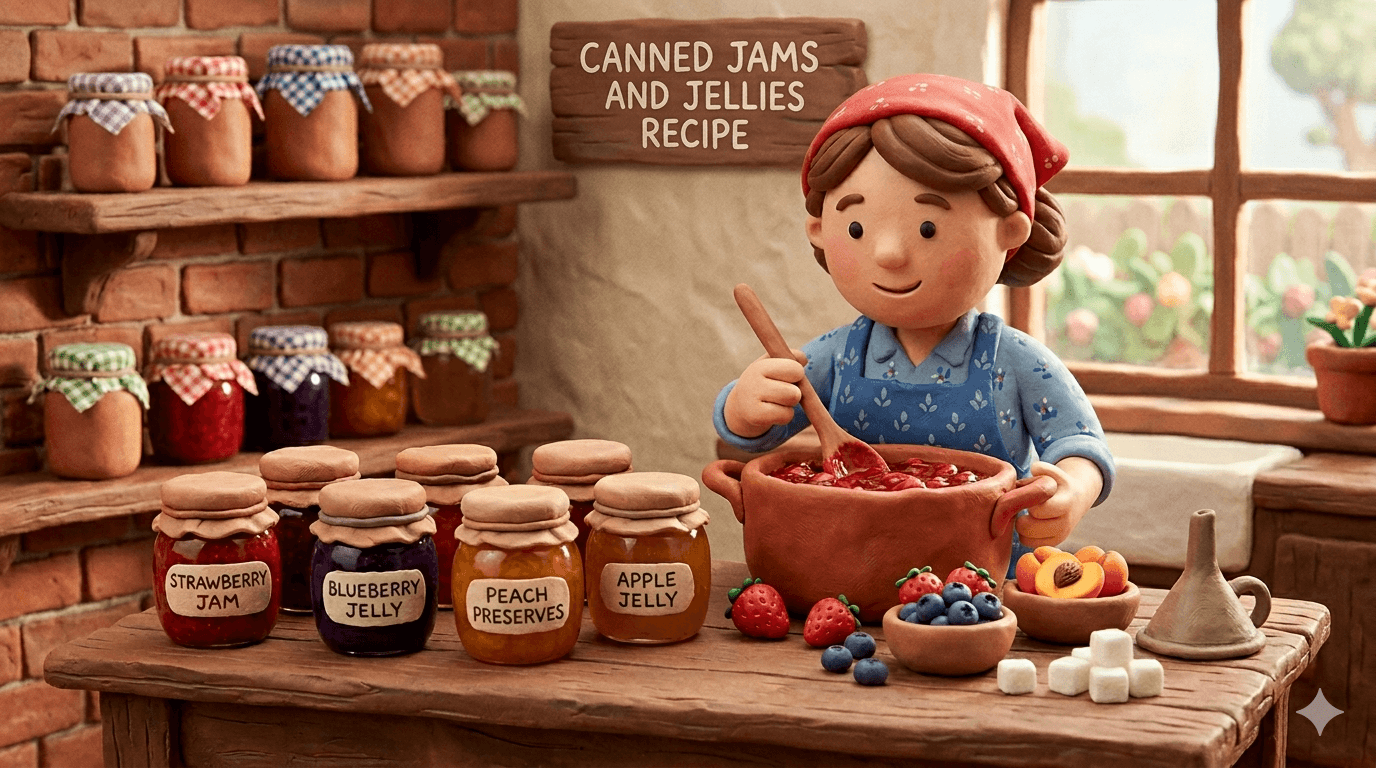
A good canned jams and jellies recipe turns a flat of berries or a basket of windfall fruit into a row of jewel colored jars that last all year. The kitchen smells like warm strawberries and lemon. Sugar crackles as it dissolves into hot fruit. You hear the lids ping as the jars cool on a towel, and you know breakfast in February is already taken care of.
This guide gives you one tested signature jam recipe, a step by step water bath canning process, and four variations so you can use whatever fruit is in season. You will learn why pectin and acid matter more than anything, how to test the set without guessing, and how to spot a bad jar long before it lands on a slice of toast.
You do not need to be a seasoned canner to nail this. Follow the recipe by weight, hit the processing time for your altitude, and let the lids do their job. Your first batch will probably disappear before the next harvest. That is normal.
Why Can Your Own Jams and Jellies
A jar of decent strawberry jam at the grocery store costs five to nine dollars and tastes like sugar and a vague memory of fruit. The same jar from your kitchen costs about a dollar in ingredients if you picked the berries yourself, and it tastes like June.
Jams and jellies are also the perfect answer to a glut of fruit. Strawberry patches give you twenty pounds in a single weekend. Grape vines hand over more clusters than anyone can eat fresh. Peach trees drop bushels on the ground every August. You can only freeze so much. A canning afternoon turns a perishable mountain of fruit into shelf stable jars that hold for a year.
Flavor is the real reason though. You pick the sugar level. You pick the fruit ratio. You can add lemon zest, ginger, vanilla bean, or a splash of bourbon. Once your pantry has a dozen half pints of homemade jam lined up, store brands are dead to you. The leftover jars become Christmas gifts that people actually look forward to.
Jam vs. Jelly vs. Preserves vs. Marmalade
The names get used interchangeably. The differences matter when you are shopping for fruit and planning a batch.
Jam is made from crushed or chopped whole fruit cooked with sugar and pectin. It has pulp, seeds, and texture. Strawberry jam, blueberry jam, and peach jam all fall here.
Jelly is made from strained fruit juice cooked with sugar and pectin. It is clear, smooth, and wobbly. Grape jelly and apple jelly are the classics. You extract the juice through a jelly bag or several layers of cheesecloth, then can the juice alone.
Preserves are whole fruit or large chunks of fruit suspended in a soft gel. The pieces stay intact. Whole strawberry preserves and apricot preserves are the most common.
Marmalade is a citrus jam that includes the peel for bitterness and bite. Seville orange marmalade is the original.
This guide covers jams and jellies, which together account for the vast majority of home canning recipes and the easiest entry point for first timers.
Why Pectin and Acid Matter
Jams and jellies set because of three things working together. Sugar, acid, and pectin. Get the ratio right and the jar gels into the soft spreadable texture you want. Get it wrong and you end up with syrup or rubber.
Pectin is a natural fiber found in fruit. Some fruits have plenty of it on their own. Apples, tart citrus, cranberries, and quince are pectin heavy. Strawberries, peaches, blueberries, and grapes are pectin light and almost always need added pectin to set.
Added pectin comes in three styles. Powdered regular pectin is the most common and the most forgiving. Liquid pectin is added at the end of cooking. Low sugar or no sugar pectin (like Pomona's Universal) uses calcium to activate the gel, which lets you cut sugar dramatically.
Acid does two jobs. It triggers the pectin to form a gel. It also pushes the pH low enough for safe water bath canning. Most fruits are naturally acidic enough, but a splash of bottled lemon juice in every batch guarantees the pH stays below 4.6 and the gel sets clean. Use bottled lemon juice, not fresh. Bottled is standardized. Fresh varies too much.
Sugar is preservative, texture, and flavor all at once. It binds water, which keeps mold and yeast from growing on the surface. It works with pectin to form the gel. It is also what carries the fruit flavor across your tongue. Full sugar jams hold for years on the shelf. Low sugar jams need different pectin and tighter storage.
Warning
Do not freelance the sugar or pectin ratios in a jam recipe. Reduce the sugar without switching to low sugar pectin and the jam will not set, will mold faster, and may ferment in the jar. Skip the lemon juice and the gel falls apart while also putting the safe canning window at risk. Follow tested recipes or work from a pectin manufacturer's tested ratios. The chemistry is not a suggestion.
This is also why the canning safety rules are worth a careful read before your first batch. The rules are short, they are based on real test data, and they keep your family safe.
Equipment You Need
Jam and jelly canning does not need fancy gear. You can do every step with basic kitchen tools and one large pot.
You will need a water bath canner or a tall stock pot with a rack on the bottom that holds jars off the heat. The canner needs to be deep enough to cover the jar tops with at least one inch of water. A second heavy bottomed pot for cooking the jam. A jar lifter, a wide mouth funnel, a headspace tool or chopstick, and a clean ladle. Half pint or pint Mason jars, new flat lids, and reusable bands. A digital kitchen scale that reads to one gram. A candy or instant read thermometer that reads to at least 220 degrees Fahrenheit. A potato masher or pastry blender for crushing fruit.
For jelly making you also need a jelly bag or a fine mesh strainer lined with four layers of cheesecloth. A second large bowl to catch the strained juice. A tall jar or pitcher works fine as a drip station.
The scale is the unsung hero. Jam and jelly recipes by weight are far more accurate than recipes by cup. A cup of crushed strawberry can vary by 30 percent depending on how juicy the berries are. A pound of fruit is always a pound of fruit. Buy the scale before you buy anything else.
If you are brand new to the process, walk through the canning for beginners guide first. It covers jar prep, lid handling, headspace, and the small details that decide whether a lid seals or pops.
The Signature Homestead Strawberry Jam Recipe
This is the recipe to start with. Strawberry jam is the gateway jam. The fruit is forgiving, the color is gorgeous, and the flavor is universally loved. It yields about 7 half pint jars and processes for 10 minutes in a water bath at sea level.
Ingredients by weight
| Ingredient | Weight | Approximate volume |
|---|---|---|
| Fresh strawberries, hulled and crushed | 1.8 kg (4 lb) | About 8 cups crushed |
| Granulated sugar | 1.6 kg (3.5 lb) | About 7 cups |
| Powdered regular pectin | 49 g (1 box) | One 1.75 oz box |
| Bottled lemon juice | 60 ml | 4 tablespoons |
| Unsalted butter (optional) | 7 g | Half tablespoon |
Prep notes
Use ripe but firm strawberries. Overripe berries are mushy and lose their flavor in the cook. Underripe berries are tart and low in pectin. The sweet spot is a deep red berry that still holds its shape when you press it with a thumb.
Wash the berries quickly in cold water and drain well. Wet berries dilute the jam. Hull them with a paring knife or a strawberry huller, then crush them in batches with a potato masher. Some recipes pulse the berries in a food processor for a smoother jam. Hand crushed gives you a more rustic texture with visible chunks.
The butter is optional but worth it. A half tablespoon of butter cuts the foam that forms during the boil. Without it, you skim foam off the surface for ten minutes before filling jars. With it, you barely skim at all.
Tip
Toss the crushed strawberries with about a quarter of the sugar an hour before cooking. This step is called macerating. The sugar draws juice out of the fruit and dissolves into a thick syrup. The jam sets cleaner, the color stays brighter, and the fruit holds its shape better in the final jar.
Method
- Prep the canner. Fill your water bath canner two thirds full, put the rack in, and start heating it on medium. Wash 7 half pint jars, place them in the hot water to warm, and set 7 new flat lids in a small bowl of hot tap water. Bands stay clean and dry.
- Macerate the fruit. Combine the crushed strawberries with about 400 grams of the sugar in a large bowl. Stir gently. Let it sit for 30 to 60 minutes while the rest of the kitchen comes together.
- Combine in the pot. Pour the macerated strawberries and all their juice into a large heavy bottomed pot. Add the bottled lemon juice. Sprinkle the powdered pectin over the surface and whisk it in until no clumps remain.
- Bring to a hard boil. Heat the pot over medium high heat, stirring constantly with a wooden spoon. You want a full rolling boil that does not stop when you stir, not just bubbles around the edge.
- Add the rest of the sugar. Once the fruit is at a hard boil, dump in the remaining sugar all at once. Stir to dissolve. The boil will calm down for a minute as the cold sugar lowers the temperature.
- Return to a hard boil. Bring everything back to a full rolling boil and time exactly one minute. Stir constantly to keep the bottom from scorching. Add the butter now if you are using it. The foam will collapse and the surface will go glossy.
- Test the set. Pull the pot off the heat. Spoon a small amount of jam onto a frozen plate (a plate you set in the freezer at the start of the session). Wait 30 seconds, then push the jam with a fingertip. If it wrinkles and holds a shape, the set is right. If it runs, return the pot to the heat and boil another minute, then retest.
- Skim if needed. With the heat off, skim any foam from the surface with a metal spoon. If you used butter, this step is quick.
- Fill the jars. Lift one hot jar out with the jar lifter. Ladle hot jam through a wide mouth funnel into the jar, leaving exactly one quarter inch of headspace at the top.
- Debubble. Slide a clean chopstick or plastic headspace tool down the inside of the jar in a few spots to release trapped air. Top off with a little more jam if the level dropped.
- Wipe and lid. Wipe the jar rim with a clean damp cloth to remove any jam, seeds, or sugar that would block a seal. Center a new flat lid on the jar and screw on a band to fingertip tight. Fingertip tight means you turn the band on until it stops, then back it off about a quarter turn. Air needs to escape during processing.
- Load the canner. Lower the filled jars into the canner with the jar lifter, keeping them upright. Make sure the water covers the lids by at least one inch. Add more boiling water from a kettle if needed.
- Process. Bring the canner back to a full rolling boil, then start the timer. Process half pints for 10 minutes at sea level. Adjust for altitude using the table below.
- Cool. Turn the heat off. Remove the canner lid. Let the jars sit in the water for 5 minutes to relax. Then lift each jar straight up with the jar lifter and set it on a folded towel on the counter, several inches apart, undisturbed.
- Check seals after 12 to 24 hours. Press the center of each lid. A sealed lid stays down and does not pop or flex. An unsealed lid pops up and down. Refrigerate unsealed jars and eat within three weeks.
Step by Step: Water Bath Canning the Jars
The canning step is the same for every variation in this guide. The recipe above includes the full method, but a few details deserve a closer look so your first batch goes smoothly.
Processing time and altitude
The processing time is the minimum time at a full rolling boil after the canner returns to a boil with the loaded jars. If the boil stops, restart your timer. Altitude matters because water boils at a lower temperature in thinner air. Higher altitudes need longer to reach the same kill.
| Altitude | Half pint processing time | Pint processing time |
|---|---|---|
| 0 to 1,000 ft | 10 minutes | 10 minutes |
| 1,001 to 6,000 ft | 15 minutes | 15 minutes |
| Above 6,000 ft | 20 minutes | 20 minutes |
Headspace, jars, and lids
One quarter inch of headspace is the right amount for jams and jellies. Less, and jam can bubble up under the lid and break the seal. More, and the jar may not vent properly during processing, leaving too much air on top and shortening shelf life.
Use jars made for canning. Mayonnaise and pickle jars from the store are not designed for repeated heat cycles and can crack. Lids must be new. Bands can be reused as long as they are not rusted or bent.
After the bath
Resist the urge to retighten bands when the jars come out. The bands are there to hold the lid in place during processing. Once the jars cool, the lid forms a vacuum seal on the rim and the band stops doing anything important. Tightening hot bands can break a forming seal.
After 24 hours, unscrew the bands, lift each jar by the lid only, and confirm the lid is fused tight to the jar. Wipe each jar with a damp cloth to remove any sticky residue, label with the contents and date, and store in a cool dark pantry. Bands can go back on loose for storage or stay off entirely.
Warning
If a lid pops up and down or hisses when pressed, the jar did not seal. Refrigerate it, eat it within three weeks, or freeze it. Do not reprocess a 24 hour old jar of jam. Reprocessing breaks down the gel, dulls the flavor, and gives the contents too long in the danger zone before resealing.
Variations: Grape Jelly, Blueberry Jam, Peach Jam, and Low Sugar Jam
These four variations stay safely inside the tested water bath envelope. Each yields about 6 to 8 half pint jars and processes for 10 minutes at sea level. Adjust for altitude using the chart above.
Grape jelly
Grape jelly is a classic for a reason. The flavor is bright, the color is gorgeous, and the technique teaches you how juice based jelly works. This recipe uses Concord grapes, which have the strongest flavor and natural pectin.
Start with 2.3 kg (5 lb) of stemmed Concord grapes. Crush them in a large pot with a potato masher. Add 250 ml of water and bring to a boil. Reduce heat and simmer 10 minutes, stirring often. Pour the hot pulp into a jelly bag or a strainer lined with four layers of cheesecloth set over a deep bowl. Let it drip for at least 2 hours, or overnight in the refrigerator. Do not squeeze the bag. Squeezing pushes pulp through and gives you cloudy jelly.
You should end up with about 1.2 liters (5 cups) of grape juice. Strain the juice one more time through cheesecloth to catch any sediment.
In a clean large pot, combine the juice with 49 g (1 box) of powdered regular pectin and 60 ml of bottled lemon juice. Bring to a hard boil. Add 1.6 kg (7 cups) of granulated sugar all at once. Stir to dissolve. Return to a hard boil and time exactly one minute. Test the set with the frozen plate method. Skim any foam. Fill, wipe, lid, and process for 10 minutes at sea level.
Blueberry jam
Blueberry jam is forgiving and gorgeous. The deep purple color holds well on the shelf and the flavor is one of the best ways to remember summer.
Start with 1.8 kg (4 lb) of fresh or frozen blueberries. Wash and drain. Crush about half the berries with a potato masher and leave the rest whole for texture. In a large pot, combine the crushed and whole berries with 49 g of powdered regular pectin and 60 ml of bottled lemon juice. Bring to a hard boil. Add 1.6 kg (7 cups) of granulated sugar all at once. Stir to dissolve. Return to a hard boil and time exactly one minute. Test the set. Skim if needed. Fill, wipe, lid, and process for 10 minutes at sea level.
Frozen blueberries work as well as fresh. Use them straight from the freezer with no thawing. The cook time is the same.
Peach jam
Peach jam tastes like dessert in a jar. The trick is using ripe but firm fruit and not skipping the lemon juice.
Start with 1.4 kg (3 lb) of peaches, peeled, pitted, and chopped. To peel peaches, score an X on the bottom, dump them in boiling water for 30 seconds, and shock them in ice water. The skins slip off. Chop the flesh into half inch pieces.
In a large pot, combine the chopped peaches with 49 g of powdered regular pectin and 75 ml of bottled lemon juice. The extra lemon juice is important because peaches are lower in acid than berries. Bring to a hard boil. Add 1.4 kg (6 cups) of granulated sugar all at once. Stir to dissolve. Return to a hard boil and time exactly one minute. Test the set. Skim if needed. Fill, wipe, lid, and process for 10 minutes at sea level.
For a fancier version, add 1 teaspoon of vanilla extract or a scraped vanilla bean at the end of the cook. Peach and vanilla together is a magic combination.
Low sugar jam with Pomona's Pectin
Pomona's Universal Pectin uses calcium water to activate the gel instead of high sugar levels. The result is a jam that lets the fruit flavor shine through, sets reliably with as little as a quarter of the sugar in a regular recipe, and stores safely for a year on a cool pantry shelf.
Follow the Pomona's instructions exactly for your fruit. For strawberry jam, the ratios run about 1.8 kg of crushed strawberries, 60 ml of bottled lemon juice, 3 teaspoons of Pomona's pectin powder, 3 teaspoons of calcium water (prepared from the calcium packet that comes in the box), and 450 g to 900 g of sugar depending on how sweet you want the final jam. Process for 10 minutes at sea level.
Low sugar jams have a slightly looser texture than full sugar jams. Once opened, they should be used within a month rather than the longer fridge life of full sugar jam. The fruit flavor that comes through is worth the tradeoff for most people.
Testing the Set
The single biggest source of jam failure is pulling the pot off the heat at the wrong moment. Three reliable tests catch problems before the jars go into the canner.
Frozen plate test
Put two or three small plates in the freezer at the start of the session. When you think the jam is ready, pull a plate out, spoon a teaspoon of hot jam onto the cold surface, and wait 30 seconds. Push the jam with a fingertip. If it wrinkles and holds the trail you push through it, the set is right. If it runs back together flat, return the pot to the heat and boil another minute. Repeat the test with a fresh cold plate.
Sheet test
Dip a cold metal spoon into the boiling jam, lift it above the pot, and turn it sideways. Watch how the jam falls off the edge. If it drips in single droplets, the jam is not ready. If two droplets merge into a single sheet that slides off the spoon together, the set is right.
Temperature test
Jam sets at about 220 degrees Fahrenheit at sea level. Use a candy or instant read thermometer to check. Subtract 2 degrees for every 1,000 feet of altitude. So at 4,000 feet, your target is 212 degrees. The frozen plate test is more reliable than the thermometer alone because pectin types and sugar ratios shift the actual set point a few degrees in either direction, but the thermometer is useful as a confirmation.
Use any two of the three tests together for the most reliable result.
Storage, Shelf Life, and Spotting a Bad Jar
A properly sealed jar of jam or jelly stored in a cool dark pantry holds its flavor and safety for at least 12 months. The contents stay safe past a year, but the color starts to darken and the fruit flavor begins to fade. By 18 to 24 months the jam is still safe but no longer special.
Storage temperature matters more than people think. Jam kept in a 65 to 70 degree pantry holds beautifully. Jam stored in a garage that swings from 35 to 95 degrees breaks down fast. The sugar can crystallize. The color goes muddy. Cool, dark, and steady is the goal. A basement shelf or a closet under the stairs beats a window seat every time.
Once a jar is opened, refrigerate it and use within three weeks for full sugar jam, or one month tops. Low sugar jams should be used within two weeks once opened. The vacuum seal is gone. The contents are now just refrigerated cooked fruit.
Spotting a bad jar starts before you open it. Look for these warning signs.
- A lid that has unsealed, popped up, or flexes when pressed.
- Bulging lid, cloudy syrup, or fizzing on opening.
- Mold on the surface, even a small spot.
- Off smells of yeast, fermentation, or anything sour beyond a normal fruit tang.
- A jar that spurts liquid when opened, like a shaken soda.
If any of those are present, the answer is the same. Do not taste it. Do not feed it to a pet. Wrap the jar in a sealed bag and throw it out. Wash the area with hot soapy water. The cost of a lost jar of jam is nothing compared to a hospital visit.
Troubleshooting Common Jam and Jelly Problems
Most jam and jelly issues are about gel set, not safety. Here are the ones you will run into and how to fix them next time.
Jam did not set. The most common cause is not enough boil time, not enough acid, or expired pectin. Fix it by reboiling. Empty the unset jars back into the pot, add another 4 tablespoons of bottled lemon juice and 25 g (half a box) of powdered pectin per 1 liter of jam, bring to a hard boil for one full minute, retest the set on a frozen plate, and refill, lid, and process from scratch. Reprocess for the full water bath time. Do this within 48 hours of the original batch.
Jam set too stiff. Too much pectin, too much cooking, or fruit very high in natural pectin. Stir a tablespoon of hot water into the opened jar to loosen, or use it on toast as is. Next batch, drop the boil to 45 seconds instead of a full minute.
Weeping or syneresis. Liquid pools on top of the jam in the jar. Usually caused by too much pectin, slight under cooking, or jars stored at temperatures that swing. The jam is safe. Stir before serving.
Cloudy jelly. Almost always caused by squeezing the jelly bag during juice extraction. Squeezing forces pulp through and clouds the gel. Next time, let the bag drip on its own gravity for several hours.
Floating fruit in jam. Pieces of berry or peach float to the top of the jar after cooling. Harmless and common. Reduce by crushing the fruit more uniformly, letting the jam rest in the pot for 5 minutes after cooking before filling, and giving the jars a gentle swirl as they sit.
Crystallized sugar in the jar. Tiny sugar crystals form during long storage, especially in jars stored cold or stored a long time. The jam is fine. Warm the jar gently in a pan of warm water to redissolve the crystals.
Mushy or muddy color. Fruit was overripe or stored too long before canning. Use ripe but firm fruit. Process the day you pick or buy.
Jars that did not seal. Common causes are food residue on the rim, bands tightened too hard, jars not covered with enough water, or a hairline crack in a jar. Refrigerate the unsealed jar, eat it within three weeks, and try again next batch. Wipe rims carefully. Use fingertip tight, not crank tight, on the bands.
Foam on top of the jars. Pretty cosmetic only. Skim better next time, or add a half tablespoon of unsalted butter to the boil to break the foam.
Frequently Asked Questions
Frequently Asked Questions
Powdered regular pectin is the easiest for first timers. Boxes are sold under brands like Sure Jell and Ball Classic. Liquid pectin works well too but is added at the very end of cooking instead of the beginning. Pomona's Universal Pectin is the best choice for low sugar or no sugar jams because it uses a calcium activator instead of sugar to set the gel.
Not with regular pectin. Regular pectin needs a specific sugar to fruit ratio to set the gel and to act as a preservative. Reducing the sugar with regular pectin almost always leaves you with syrup that molds quickly. If you want a less sweet jam, switch to Pomona's Pectin and follow its low sugar instructions. The result is a true jam, not a runny mess.
Yes. Freezer jam skips the water bath process entirely. You cook the fruit, sugar, and pectin briefly, pour into clean plastic or glass containers, leave one inch of headspace for expansion, and store in the freezer for up to a year. Once thawed, freezer jam holds in the fridge for about three weeks. The flavor is brighter than canned jam because the fruit barely cooks. The tradeoff is freezer space.
No. Single use flat lids must be new every time. The sealing compound is designed for one heat cycle and degrades after that. Bands are reusable as long as they are not rusted or bent. Some reusable lid systems exist, like Tattler and Harvest Guard, but they require their own technique and rubber rings.
No, not for processing times of 10 minutes or longer. The processing itself sterilizes everything. Just wash the jars in hot soapy water or run them through a dishwasher cycle and keep them warm until you fill them. Cold jars filled with hot jam can crack from thermal shock.
No, not for jams and jellies. Doubling messes with the gel. The larger volume takes longer to come to a hard boil, the pectin breaks down from extended cooking, and the jam either does not set or comes out rubbery. Run two batches back to back instead. The canner can hold the second batch while the first one cools.
Bottled lemon juice every time. Bottled is standardized to a known acid level. Fresh lemon juice varies from pH 2 to pH 4 depending on the fruit, the season, and how old the lemon is. Standardized acid is what makes the safety math work and the gel set predictably.
The four common causes are not boiling long enough at a true hard boil, expired pectin, not enough acid, or wrong fruit to sugar ratio. Rebatch the jam within 48 hours by adding more pectin and lemon juice, boiling for a full minute, retesting the set on a frozen plate, and reprocessing the jars. Save the labels for the rebatched jars so you remember which ones to eat first.
Yes. Frozen fruit works as well as fresh for almost every recipe. Use it straight from the freezer with no thawing for jam recipes that call for crushed or chopped fruit. The cooking time is the same. Frozen fruit is often a better choice in winter when fresh berries from the grocery store taste like styrofoam.
Yes, for high acid foods like properly acidified jam and jelly, USDA approved steam canners are now considered safe for processing times under 45 minutes. Follow the steam canner manufacturer instructions and use the same processing time you would for a water bath. Steam canners save a lot of water and heat up faster.
No. Paraffin wax sealing is an outdated method that the USDA and the National Center for Home Food Preservation no longer recommend. Wax seals are not airtight enough to prevent mold and yeast over the long term. Always use a water bath process with new flat lids.
At least 12 months stored cool and dark, often closer to 24 months for full sugar jam. The contents stay safe well past a year but the flavor and color start to fade after 18 months. Most homestead pantries rotate through their jam well before that becomes a concern. Once opened, refrigerate and use within three weeks.
Pair Your Jams With the Rest of the Pantry
A shelf full of jam is a beautiful thing, but jam works even better as part of a bigger preservation plan. Pair it with home canned tomato sauce and salsa for the savory side of the pantry, dehydrated fruit for snacks and trail mix, and frozen berries for smoothies and pies. The whole fruit harvest gets turned into something useful, and nothing rots in a bowl on the counter.
Before you run your first batch, read the canning safety rules one more time and walk through water bath canning if any step of the process feels unfamiliar. The rules are short, the technique is simple, and the result is a pantry that pays you back all year.
If you want to dial in altitude or batch size for your specific setup, the canning calculator does the math for you in a few clicks. Bookmark it before strawberry season starts.
Now go fill some jars. Your future self, on a snowy morning with a slice of toast in one hand and a spoon of summer in the other, is going to thank you.

Cole
Founder & Lead Researcher
Cole is the founder of Plan Your Homestead. He works in clinical research and brings a research-first lens to every guide on the site, drawing on a long family line of farmers for grounded, practical perspective.
More in Food Preservation
More articles coming soon. Check back for new food preservation content.