
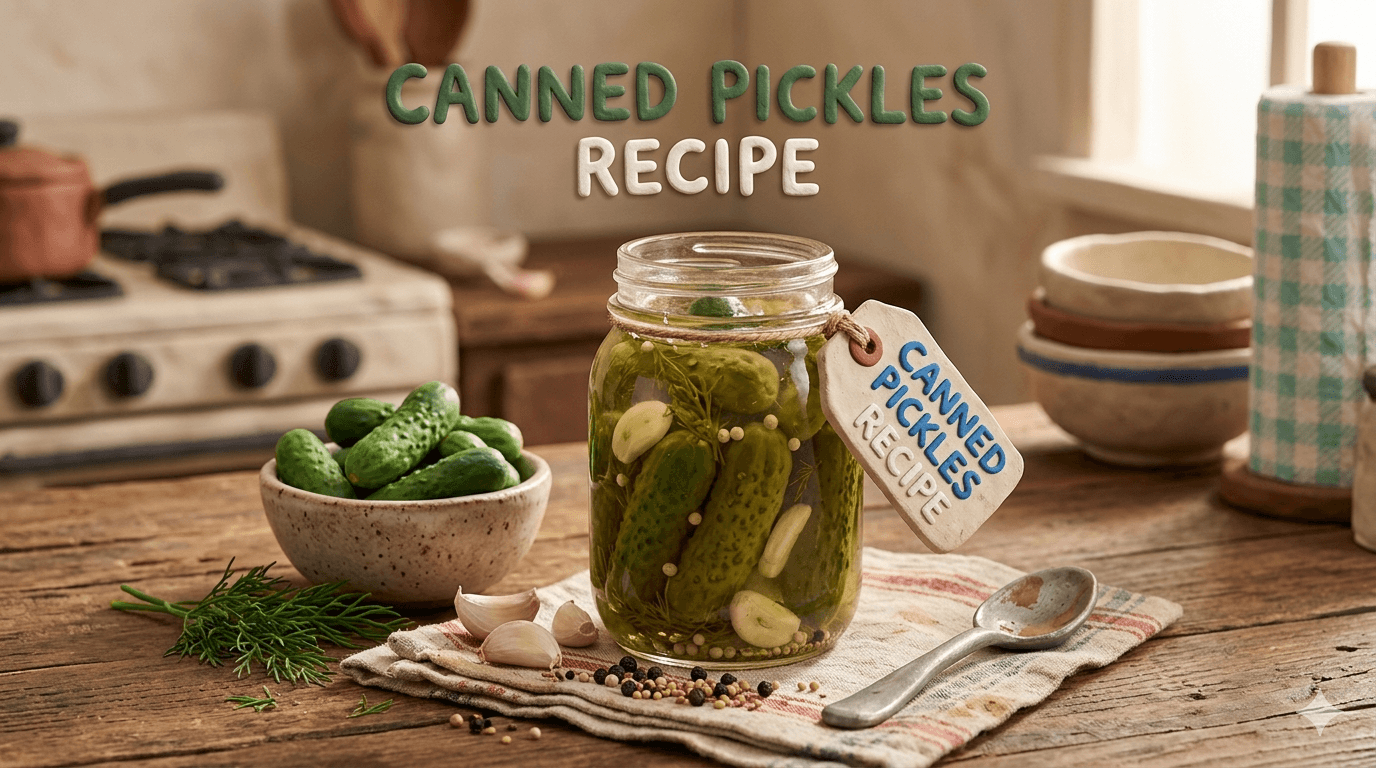
A good canned pickles recipe is one of the most rewarding projects in a homestead kitchen. You pick a basket of cucumbers in the morning, pack them into jars with fresh dill and garlic, and by evening your pantry shelf has a dozen new jars lined up. The lids ping as they cool. Six weeks later you crack one open, and the snap of a homemade pickle reminds you why you went to the trouble.
This guide gives you a tested signature recipe for classic canned dill pickles, plus three short variations so you can use whatever the garden gives you. You will learn the acidity rules that make a pickle shelf safe, the tricks that keep a homemade pickle crisp, and the small mistakes that turn a beautiful jar into mush.
You do not need to be a master canner to pull this off. Follow the brine ratio by weight, pack the jars while they are hot, and process for the time your altitude calls for. Your first batch is going to taste better than anything from the store. Keep reading and by the end you will have a clear picture of exactly what to do.
Why Can Your Own Pickles
A jar of decent kosher dills at the grocery store costs five to nine dollars and still tastes like a memory of a cucumber. The same jar from your kitchen costs about a dollar in vinegar, salt, and lids if you grew the cucumbers yourself. A bushel of pickling cucumbers turns into 20 quart jars in an afternoon. That math beats every other preservation project on the homestead.
Pickles also solve the cucumber glut problem every gardener faces in July. A few healthy pickling cucumber plants can hand you 10 to 15 pounds of fruit a week at peak season. You cannot give that many cucumbers away. Pickling moves a lot of cucumbers fast, keeps for a year on the shelf, and turns into snacks, sandwiches, deviled eggs, and bloody marys for months.
The flavor gap is the real reason though. You choose the garlic level. You choose the heat. You pick fresh dill heads from a plant you grew, not a freeze dried sprinkle. Once your pantry has 12 quarts of homemade pickles lined up, the store stuff is dead to you.
There is a quieter reason too. A pantry full of jars feels different than a shelf full of plastic tubs. You know what is in the jar. You know who made it. You know it did not travel 1500 miles in a refrigerated truck. That kind of food security is hard to put a price on.
Why Pickle Recipes Have to Be Tested
Pickles look acidic. They are full of vinegar and they smell sharp. The taste tricks people into thinking any brine ratio is safe to can. It is not.
Cucumbers are a low acid vegetable. Fresh cucumbers sit between pH 5.1 and pH 5.7. That is well above the pH 4.6 line where botulism spores can survive a boiling water bath. The only reason canned pickles are shelf safe is because the brine you pour over them is acidic enough to push the contents of the whole jar below pH 4.6 before the spores have a chance to do anything.
The vinegar percentage matters more than anything else in the recipe. Every tested water bath pickle recipe is built around vinegar that is at least 5 percent acidity. That number is printed on the bottle. White vinegar, apple cider vinegar, and most quality wine vinegars sold in American grocery stores are 5 percent. Some specialty vinegars are 4 percent or weaker. Those cannot be used in a canning recipe without changing the safety math.
Fresh lemon juice is not a substitute for vinegar in pickles. Its acidity varies from lemon to lemon, and the flavor profile is wrong anyway. Bottled lemon juice is standardized but the recipes here are built around vinegar.
The brine ratio is the other piece. The standard tested ratio is one part 5 percent vinegar to one part water, with pickling salt for flavor. That ratio pushes the whole jar safely below pH 4.6 once the cucumbers absorb the brine over the first few weeks on the shelf. You can shift the salt up or down a little for flavor. You cannot cut the vinegar.
Warning
Do not water down the vinegar. Do not swap 5 percent vinegar for a 4 percent vinegar. Do not skip the brine ratio because the pickles taste sharp on day one. The sharpness mellows after four to six weeks on the shelf, which is exactly when the pickles taste their best. Cutting the acid is the single fastest way to put a botulism risk on your pantry shelf.
If you have not read the canning safety rules yet, do that before your first batch. The rules are short, they are based on USDA and NCHFP testing, and they keep your family safe.
Water Bath Canning Is the Right Method for Pickles
The decision tree for pickles is simple. Use water bath canning for any tested vinegar brined pickle recipe. Pressure canning is not needed because the acid does the heavy lifting.
Pressure canning relies on reaching 240 degrees Fahrenheit to kill botulism spores in low acid foods. Pickles do not need that temperature because the spores cannot grow in the acidic brine. A boiling water bath at 212 degrees Fahrenheit holds the cucumbers at a high enough temperature long enough to kill yeasts, molds, and lactobacillus, while the acid keeps the jar safe long term. Pressure canning would just turn the cucumbers into mush.
If you are curious about why the method matters for different foods, the water bath vs pressure canning guide walks through every difference. For now, the short version is this. Cucumbers in vinegar brine belong in a water bath. Nothing else.
Equipment You Need
Pickle canning does not need fancy gear. You can do every step with basic kitchen tools and one big pot.
You will need a water bath canner or a tall stock pot with a rack on the bottom that holds jars off the heat. A canner needs to be deep enough to cover the jar tops with at least one inch of water. A second smaller pot for the brine. A jar lifter, a wide mouth funnel, a headspace tool or chopstick, and a clean ladle. Pint or quart Mason jars, new flat lids, and reusable bands. A digital kitchen scale that reads to one gram. A sharp knife and a large cutting board.
The scale is the unsung hero. A pickle brine measured by weight is far more accurate than one measured by cup. A pinch of salt can swing the flavor of a quart jar more than people realize. Buy the scale before you buy anything else.
A few extras make the process faster but are not strictly required. A mandoline slicer speeds up the bread and butter variation. A pickling spice grinder lets you mix your own blends. A large stainless or food grade plastic bowl holds the ice water soak that keeps pickles crisp.
If you are brand new to canning, walk through the water bath canning guide first. It covers jar prep, lid handling, headspace, and the small details that decide whether a lid seals or pops.
Choosing the Right Cucumbers
This is the step most home canners get wrong. The cucumber variety matters more than the brine.
Pickling cucumbers, sometimes labeled Kirby or pickling, are the only cucumbers that hold up well to canning. They have thick walls, dense flesh, small seed cavities, and bumpy skin. Common varieties include Boston Pickling, National Pickling, Calypso, Bush Pickle, and Homemade Pickles. If you grow your own, plant one of these. If you buy them, look for the short, fat, lumpy cucumbers at the farmers market or the produce section. They are almost always sold loose, not in shrink wrap.
Slicing cucumbers, the long smooth dark green ones you see in every grocery store, do not work for canning. Their walls are thin, their seed cavities are large, and they turn to mush in the heat of a water bath. You can use them for refrigerator pickles, but they will not hold up to canning.
Size matters too. Pick cucumbers between three and five inches long for whole pack pickles, or four to six inches for spears and chips. Cucumbers larger than six inches almost always have soft, seedy centers that go hollow in the jar.
Freshness is the third piece. Process cucumbers within 24 hours of picking. The pectin in a cucumber starts breaking down the moment it leaves the vine, and that pectin is what makes a pickle crunchy. Cucumbers that sit on the counter for three days will never give you a truly crisp pickle no matter what you do.
If you cannot process the same day, store the cucumbers in a paper bag in the coldest part of the refrigerator and cut the time to under 48 hours. After that, eat them fresh instead.
The Crispness Question
Soft pickles are the single most common complaint in home canning. The good news is that crispness is mostly a matter of habit, not luck. Five steps stack on top of each other to give you a snap that lasts a year.
Pick cucumbers fresh and small. Step one is covered above. If you start with cucumbers that are not pickling varieties, picked under five inches, and processed within a day of harvest, no trick on this list will fully save them.
Trim the blossom end. Cucumbers have two ends. The stem end is hard and dry. The blossom end is soft and contains enzymes that break down pectin and turn the pickle soft from the inside. Slice off a sixteenth inch from the blossom end of every cucumber before packing. This is the single most important crispness step.
Soak in ice water. Before packing, soak the cucumbers in a bowl of ice water with a generous handful of salt for two to four hours. The cold water firms the flesh and the salt draws out a little excess moisture. Some homesteaders swear by this step. The evidence is mostly anecdotal but it does no harm and many people see a clear improvement.
Add a tannin source. A grape leaf, an oak leaf, a bay leaf, or a tea bag in the bottom of each jar adds natural tannins that inhibit the enzymes that soften pickles. One leaf per quart is plenty. Black tea works in a pinch. This is the old grandmother trick that actually has some real chemistry behind it.
Use calcium chloride or skip it. Pickle Crisp granules, sold by Ball, are food grade calcium chloride. Half a teaspoon per quart firms up the cucumbers and works better than tannins for most home canners. It is optional but reliable. Do not use pickling lime or alum unless you really know what you are doing, because both have safety considerations and can create off flavors.
The final option is a lower temperature pasteurization process that USDA NCHFP has tested. Pickles are held at 180 to 185 degrees Fahrenheit for 30 minutes in a water bath instead of boiled. This produces a crisper pickle but requires a candy thermometer and constant attention to the water temperature. The boiling water bath recipe in this guide is the standard approach and gives a great result if you follow the crispness steps above.
Signature Recipe: Classic Canned Dill Pickles
This is the recipe to start with. It is balanced, crisp, and tastes like the dill pickles your grandmother used to make. It yields about 7 quart jars and processes for 15 minutes in a water bath at sea level.
Ingredients by weight
| Ingredient | Weight | Approximate volume |
|---|---|---|
| Pickling cucumbers, blossom end trimmed | 3.2 kg (7 lb) | About 7 quart jars worth |
| White vinegar, 5 percent acidity | 1.2 L (5 cups) | 5 cups |
| Filtered or distilled water | 1.2 L (5 cups) | 5 cups |
| Pickling salt or canning salt | 90 g | 6 tablespoons |
| Fresh dill heads with stems | About 14 | 2 per quart |
| Garlic cloves, peeled and lightly smashed | About 14 | 2 per quart |
| Whole black peppercorns | 14 g | 2 tablespoons |
| Yellow mustard seed | 14 g | 2 tablespoons |
| Crushed red pepper flakes (optional) | 4 g | 1 teaspoon |
| Pickle Crisp granules (optional) | 17 g | 0.5 tsp per quart |
| Grape leaf or oak leaf (optional) | 7 leaves | 1 per quart |
Prep notes
Use only pickling cucumbers. Read the cucumber section above if you skipped it. Trim a sixteenth inch from the blossom end of every cucumber. The stem end you can leave alone or trim flush. Wash the cucumbers in cold water, scrub off any field dirt with a soft brush, and drain them on a clean towel.
Pickling salt and canning salt are pure sodium chloride with no iodine or anti caking agents. Table salt works in a pinch but the anti caking agents can make the brine cloudy. Do not use kosher salt by volume because the flake size makes the conversion unreliable. Always weigh the salt or use a salt specifically labeled for pickling.
Smash the garlic cloves with the flat of a knife. Smashed garlic releases flavor into the brine. Whole peeled cloves work too but the flavor stays mild.
Note
Soak the cucumbers in a large bowl of ice water with a quarter cup of pickling salt for two to four hours before packing. This step firms up the flesh and is the easiest way to bump your crispness without changing the recipe. Drain and rinse the cucumbers before you pack the jars.
Method
- Prep the canner. Fill your water bath canner two thirds full, put the rack in, and start heating it on medium. Wash 7 quart jars, place them in the hot water to warm, and set 7 new flat lids in a small bowl of hot tap water. Bands stay clean and dry on the counter.
- Make the brine. In a medium pot, combine the white vinegar, water, and pickling salt. Bring to a low boil over medium heat and stir until the salt fully dissolves. Keep the brine hot at a low simmer while you pack the jars.
- Add the aromatics to each jar. Lift one hot jar out with the jar lifter. Drop in one grape leaf if using, two garlic cloves, one teaspoon of mustard seed, one teaspoon of peppercorns, a pinch of red pepper flakes if using, and half a teaspoon of Pickle Crisp if using. Top with two fresh dill heads. Repeat for each jar.
- Pack the cucumbers. Stand the cucumbers upright in the jar, packed snug but not crushed. For whole pickles, cut larger cucumbers in half or quarters lengthwise to fit. Stop packing when the cucumbers are about half an inch below the jar shoulder.
- Pour the brine. Ladle the hot brine through a wide mouth funnel over the cucumbers until they are fully submerged, leaving exactly half an inch of headspace at the top of the jar. The cucumbers must stay under the brine. If a stubborn one floats, push it down or wedge it under a shorter spear.
- Debubble. Slide a clean chopstick or plastic headspace tool down the inside of the jar in a few spots to release trapped air bubbles. Top off with more brine if the level dropped, keeping the half inch headspace.
- Wipe and lid. Wipe the jar rim with a clean damp cloth to remove any salt, seeds, or brine that would block a seal. Center a new flat lid on the jar and screw on a band to fingertip tight. Fingertip tight means you turn the band on until it stops, then back it off about a quarter turn. Air needs to escape during processing.
- Load the canner. Lower the filled jars into the canner with the jar lifter, keeping them upright. Make sure the water covers the lids by at least one inch. Add more boiling water from a kettle if needed.
- Process. Bring the canner back to a full rolling boil, then start the timer. Process quart jars for 15 minutes at sea level. Adjust for altitude using the table below.
- Cool. Turn the heat off. Remove the canner lid. Let the jars sit in the water for 5 minutes to settle. Then lift each jar straight up with the jar lifter and set it on a folded towel on the counter, several inches apart, undisturbed.
- Check seals after 12 to 24 hours. Press the center of each lid. A sealed lid stays down and does not pop or flex. An unsealed lid pops up and down. Refrigerate unsealed jars and eat within two months.
- Wait. Set the sealed jars in a cool dark pantry and walk away. Pickles need at least four weeks to cure. Six weeks is better. The brine, the spices, and the cucumbers all need time to come into balance.
Processing Time and Altitude
The processing time is the minimum time at a full rolling boil after the canner returns to a boil with the loaded jars. If the boil stops, restart your timer. Altitude matters because water boils at a lower temperature in thinner air. Higher altitudes need longer to reach the same kill.
| Altitude | Pint processing time | Quart processing time |
|---|---|---|
| 0 to 1,000 ft | 10 minutes | 15 minutes |
| 1,001 to 6,000 ft | 15 minutes | 20 minutes |
| Above 6,000 ft | 20 minutes | 25 minutes |
These times come from USDA NCHFP tested guidelines for whole pack dill pickles and apply to the signature recipe in this guide.
Note
If you live above 1,000 feet, set a recurring reminder on your phone for the right processing time. Almost every canning mistake at higher elevations comes from a canner who forgot the altitude adjustment. Boulder, Denver, Albuquerque, Santa Fe, Salt Lake City, Asheville, and most of the mountain West sit above 1,000 feet.
Variations: Kosher Garlic Dill, Bread and Butter, Spicy Hot Dill
These three variations stay safely inside the tested acid envelope of the signature recipe. Each yields about 7 quart jars and processes for the same time as the classic dill.
Kosher garlic dill
This is the deli style pickle with serious garlic punch. Keep the signature recipe exactly as written. Increase the garlic from 2 cloves per quart to 4 cloves per quart. Add one teaspoon of dried dill seed to each jar along with the fresh dill heads. The flavor is sharp, garlicky, and bright. Cure for six weeks before opening. Best on Reuben sandwiches and next to a smoked brisket.
Bread and butter pickles
These are the sweet, slightly tangy slicing pickles that go on every burger and every plate of pulled pork sandwiches. The brine is different but the canning method is the same.
Slice the cucumbers into quarter inch rounds using a mandoline or a sharp knife. Salt 3.2 kg of sliced cucumbers and 450 g (1 lb) of thinly sliced yellow onion with 90 g of pickling salt in a large bowl. Cover with ice and let sit for three hours. Drain and rinse twice.
For the brine, combine 1 L (4 cups) of 5 percent apple cider vinegar, 1 L (4 cups) of water, 600 g (3 cups) of granulated sugar, 14 g (2 tablespoons) of yellow mustard seed, 7 g (1 tablespoon) of celery seed, 7 g (1 tablespoon) of ground turmeric, and 4 g (1 teaspoon) of ground cloves in a large pot. Bring to a low boil and stir until the sugar dissolves.
Pack the drained cucumber and onion mix into hot pint or quart jars, leaving a half inch headspace. Pour the hot brine over the top. Debubble, wipe rims, lid, and process at the same times as the signature recipe. Cure for at least two weeks before opening. These are the variation that disappears fastest in our pantry.
Spicy hot dill pickles
For the fire pickle crowd. Keep the signature recipe exactly as written. Increase the red pepper flakes from one teaspoon for the whole batch to one teaspoon per jar. Add one fresh sliced jalapeno or two slices of habanero to each quart. The heat builds over the six week cure, so a jar that tastes pleasantly warm on day one will taste aggressive by month two. Start one step milder than you think you want.
A single slice of habanero per quart is plenty. Two slices is hot. Three slices is for people who win bets.
Storage and Shelf Life
A properly sealed jar of pickles stored in a cool dark pantry holds its quality for 12 to 18 months. The contents stay safe past 18 months but the texture starts to soften and the brine starts to taste flat. Most homestead pantries rotate through their pickles long before that becomes a concern.
The four to six week cure is non negotiable. Day one pickles taste sharp, raw, and a little bitter. The brine has not made it to the center of the cucumber yet, and the spices have not bloomed. By week four the cucumbers are translucent, the brine is mellow, and the dill and garlic taste like one thing instead of three. By week six the pickles are at their peak. Anything before that is just impatience tasting unfinished work.
Storage temperature matters more than people think. Pickles kept in a 60 to 70 degree pantry hold beautifully. Pickles stored in a garage that swings from 35 to 95 degrees break down fast. Cool, dark, and steady is the goal. A basement shelf or a closet under the stairs beats a window seat every time.
Once a jar is opened, refrigerate it and use within three months. The vacuum seal is gone. The contents are now just refrigerated brined cucumbers, which is exactly how they should be treated.
Troubleshooting Common Pickle Canning Problems
Most pickle canning issues are cosmetic, not safety problems. Here are the ones you will run into and how to fix them next time.
Soft or mushy pickles. The number one complaint. The fix is almost always upstream. Use only pickling cucumbers picked within 24 hours. Trim the blossom end on every cucumber. Soak in ice water for two to four hours. Add a tannin source or Pickle Crisp. Do not over process. If all of those are in place and the pickles are still soft, the cucumbers were probably older than they looked.
Hollow pickles. The cucumbers were too large or grew too fast. Pickles made from cucumbers under five inches and harvested at peak maturity will not be hollow. If your garden hands you a hollow center cucumber, eat it fresh and skip it for canning.
Shriveled pickles. The brine was too salty or too vinegary, or the cucumbers were not soaked first. Follow the recipe ratios by weight and add the ice water soak. Severe shriveling sometimes also means a slow cool down or an over processed jar.
Cloudy brine. Three common causes. Table salt with anti caking agents was used instead of pickling salt. The water was very hard. Or the pickles fermented slightly before sealing. Cloudy brine alone is not a safety issue if the lid sealed properly, but the appearance is off.
Dark or pink garlic. Garlic naturally turns blue, green, or pink in acidic brines. The cause is a reaction between sulfur compounds in the garlic and trace minerals in the water or vinegar. The pickles are completely safe and taste fine. Use distilled water if the color bothers you.
White sediment in the bottom. Almost always undissolved salt or natural starches from the cucumbers settling out. Harmless. Stir the jar before serving if the look bothers you.
Jars that did not seal. Common causes are food residue on the rim, bands tightened too hard, jars not covered with enough water, or a hairline crack in a jar. Refrigerate the unsealed jar, eat within two months, and try again next time. Wipe rims carefully. Use fingertip tight, not crank tight, on the bands.
Brine that turned dark. Long term storage in a warm or sunny pantry can darken the brine over time. The pickles are safe but the flavor has likely started to fade. Eat them sooner and store the rest of the pantry somewhere cooler.
Pickles that floated to the top. Air trapped in the cucumber tissue. Harmless. Make sure to debubble thoroughly with a chopstick during packing. As long as the cucumbers are mostly submerged in brine at the time of sealing, they hold fine.
Warning
Safety red flags. Do not eat from a jar that has a bulging lid, a hissing or spurting brine on opening, a soft or popped lid, mold on the surface, an off smell beyond the vinegar tang, or fizzing bubbles in the brine. Wrap the jar in a sealed bag and throw it out. Wash the area with hot soapy water. The cost of a lost jar of pickles is nothing compared to a hospital visit.
Frequently Asked Questions
Frequently Asked Questions
Not for canning. Slicing cucumbers have thin walls, large seed cavities, and high water content. They turn to mush in the heat of a water bath. Use them for refrigerator pickles where the texture matters less, but stick with pickling cucumbers for any jar that is going on the shelf.
Yes, as long as the bottle says 5 percent acidity. Apple cider vinegar adds a slight sweetness and a brown tint to the brine. Many homesteaders use it for bread and butter pickles and white vinegar for classic dills. Do not mix vinegars or use anything below 5 percent acidity.
The blossom end of a cucumber contains enzymes that break down pectin and turn pickles soft from the inside out. Trimming a sixteenth inch off the blossom end removes the enzyme reservoir. This is the single most important crispness step in the whole process.
Only for refrigerator pickles. The vinegar concentration of a used brine has been diluted by the cucumbers, which means it is no longer safe for water bath canning. Use a fresh brine for every batch you plan to can.
Yes, salt in pickle canning is for flavor, not safety. You can cut the salt by up to half without changing the safety of the jar. Expect a duller flavor and a slightly less crisp texture if you go very low. The acid is what makes the pickle safe, not the salt.
No. Pickle Crisp is optional. If you start with fresh pickling cucumbers, trim the blossom end, soak in ice water, and add a grape or oak leaf, your pickles will be plenty crisp without it. Pickle Crisp is the easiest insurance policy though, and a small jar lasts years.
Four to six weeks. Day one pickles taste sharp and raw because the brine has not penetrated to the center of the cucumber yet. By week four the spices and brine have come into balance. By week six the pickles are at their best. Patience is the secret ingredient.
Yes. USDA has approved properly designed steam canners for high acid foods with processing times under 45 minutes, which includes every recipe in this guide. Follow the steam canner manufacturer instructions and use the same processing time as for a water bath.
Some floating is normal and harmless. As long as the cucumbers were fully submerged in brine when the jar was sealed, they will be safe and tasty. To minimize floating, pack the cucumbers tightly upright, wedge a shorter piece across the top, or use a fresh grape leaf to hold them under.
Yes. Doubling is fine because the ratio of every ingredient stays the same. The brine pot needs to be larger and the canner will need to run two batches, but the acid balance and the safety stay intact. Plan for about 7 quarts per batch in a standard water bath canner.
Not for processing times of 10 minutes or longer. The processing itself sterilizes everything in the jar. Just wash the jars in hot soapy water or run them through a dishwasher cycle and keep them warm until you fill them.
Some siphoning is normal, especially with very full jars. As long as the jar sealed, it is safe. The cucumbers above the lower brine line may darken sooner on the shelf, so eat those jars first. To reduce siphoning, leave a full half inch of headspace and let jars cool in the canner for five minutes before lifting them out.
Pair Your Pickles With the Rest of the Pantry
A pantry full of pickles is a beautiful thing, but pickles work even better as part of a bigger preservation plan. Pair them with quart jars of canned tomato sauce for pasta nights, home canned salsa for taco nights, and lacto fermented vegetables for a different kind of pickle on the same shelf. The whole cucumber harvest gets turned into something useful, and nothing rots in a bucket on the counter.
Before you run your first batch, read the canning safety rules one more time and walk through the water bath canning guide if any step of the process feels unfamiliar. The rules are short, the technique is simple, and the result is a pantry that pays you back all year.
If you want to dial in altitude or batch size for your specific setup, the canning calculator does the math for you in a few clicks. Bookmark it before harvest week starts.
Now go fill some jars. Your future self, on a January evening with a sandwich in one hand and a snap of homemade dill in the other, is going to thank you.

Cole
Founder & Lead Researcher
Cole is the founder of Plan Your Homestead. He works in clinical research and brings a research-first lens to every guide on the site, drawing on a long family line of farmers for grounded, practical perspective.
More in Food Preservation
More articles coming soon. Check back for new food preservation content.