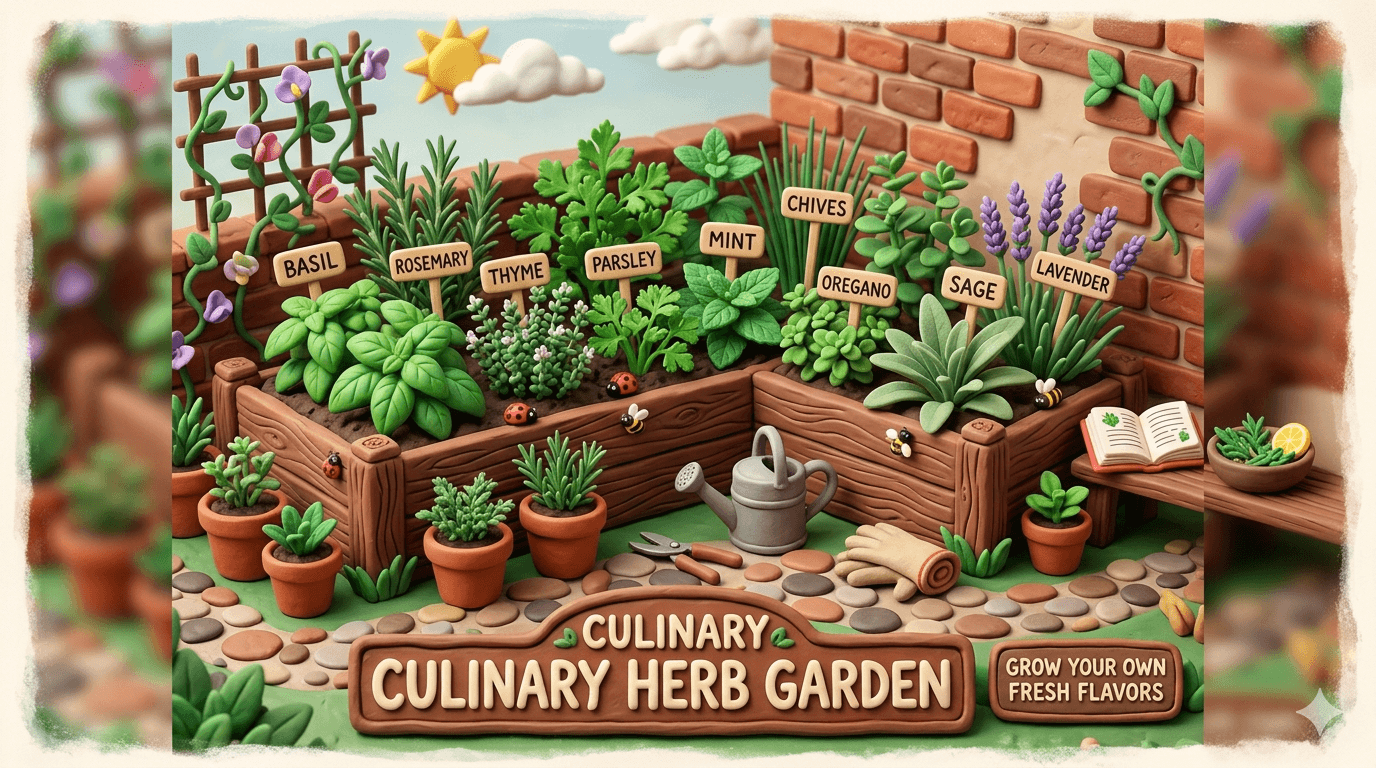
A dedicated culinary herb garden is the single best ten square feet you can plant on a homestead. It lives steps from your kitchen door. It produces every day of the growing season. And it pays you back in flavor, savings, and beauty every time you walk past it.
Most beginners try to scatter herbs through their vegetable beds and end up forgetting where they planted what. A dedicated culinary herb garden fixes that. Everything you cook with is in one place, in the same patch of sun, organized the way your kitchen actually works.
This guide walks you through how to build that garden from scratch. You will learn how to pick the right spot, choose between raised beds, containers, or in ground plantings, design a layout that keeps everything thriving, and care for your herbs through every season. By the end you will have a clear plan you can put in the ground this weekend.
Why Build a Dedicated Culinary Herb Garden
The first reason is convenience. A herb garden five steps from the kitchen door gets used. A herb garden at the far edge of the property does not. The closer your herbs are to where you cook, the more often you will reach for them, and the more flavor your meals will carry.
The second reason is cost. Fresh herbs at the grocery store run three to five dollars for a tiny clamshell that wilts in two days. The same money buys a transplant that produces for an entire season, and most herbs come back year after year. A small garden pays for itself in a single month of cooking.
The third reason is beauty. A well planned herb garden is gorgeous. Silver sage, purple basil, feathery dill, flowering chives, and trailing thyme look as good as any flower bed. Many people grow herbs purely for the way the garden looks.
The fourth reason is the ecosystem. Flowering herbs feed pollinators all summer long. Dill and parsley host swallowtail butterflies. Oregano and thyme bring in honeybees. A culinary herb garden is one of the most pollinator friendly patches you can plant.
The last reason is simple. Homegrown herbs taste better. The volatile oils that give herbs their punch start fading the moment a leaf is cut. Herbs you snip five minutes before dinner are a completely different ingredient than anything you can buy.
Picking the Right Location
Location is the single most important decision in your herb garden. Get this right and the rest of the work gets easier.
Sun comes first. Most culinary herbs want six to eight hours of direct sun a day. The Mediterranean herbs like rosemary, thyme, oregano, and sage need every minute of that. The leafy herbs like basil, parsley, and chives will accept a bit less, around four to six hours. South or southwest facing spots are ideal.
Drainage comes second. Herbs hate wet feet more than almost anything. If water pools in the spot after a rain, pick somewhere else, or plan to build a raised bed. Sandy or rocky soil is a feature, not a problem.
Proximity to the kitchen. This is the rule most people skip and regret. Walk the distance from your kitchen door to your planned herb garden. If it feels far, move closer. The garden you can step out and clip from while a pan is on the stove is the garden you will actually use.
Watch for microclimates. A south facing wall radiates heat and gives Mediterranean herbs a head start in spring. A north facing nook stays cooler and lets cilantro and parsley last longer into summer. The space along a foundation often drains better than open lawn.
Tip
Choosing Your Garden Style
There is no single right way to build a culinary herb garden. The best style depends on your space, your soil, and how much you want to fuss. Here are the five most common setups, and which homestead each one suits best.
| Garden Style | Best For | Sun Needed | Cost to Start | Maintenance |
|---|---|---|---|---|
| In ground bed | Good soil and a sunny yard | Full sun | Low | Moderate |
| Raised bed | Heavy clay, poor soil, bad backs | Full sun | Moderate | Low |
| Container garden | Patios, balconies, small spaces | Full sun | Low to moderate | Higher (more watering) |
| Herb spiral | Visual showpiece, multiple microclimates | Full sun | Moderate (materials) | Low |
| Windowsill garden | Apartments, winter growing | Bright window | Very low | Moderate |
In ground beds are the cheapest and easiest if your soil drains well. Mark out a four foot by eight foot patch, amend with a few inches of compost, and plant. Most established homesteads with decent soil should start here.
Raised beds solve almost every soil problem at once. Build a frame, fill with a quality blend, and you have perfect drainage from day one. A four foot by four foot raised bed is plenty for a starter kitchen herb garden.
Container gardens turn any patio, balcony, or back step into a herb garden. The trade off is that pots dry out faster and need more attention. Use terracotta or fabric grow bags for the Mediterranean herbs and glazed pots for the leafy ones.
Herb spirals are a permaculture classic. A stacked stone or brick spiral gives you sunny dry spots at the top for rosemary and thyme, and shadier moist spots at the bottom for parsley and cilantro. They look beautiful and pack a lot of herbs into a small footprint.
Windowsill gardens are the answer for apartment dwellers and for winter growing in cold climates. A row of small pots in a south facing window will keep basil, parsley, chives, and mint going twelve months a year.
Designing the Layout
A smart layout is the difference between a thriving herb garden and a frustrating one. The trick is to group plants by what they want, not by what you cook with most.
Group herbs by water needs. Mediterranean herbs (rosemary, thyme, oregano, sage, lavender) want it lean and dry. Leafy herbs (basil, parsley, cilantro, chives, dill) want richer soil and steady moisture. Plant the two groups in separate sections or separate containers. Mixing them is how good gardens turn into sad ones.
Put perennials in the back. Rosemary, sage, thyme, oregano, chives, and mint come back year after year. Plant them along the back of the bed where you will not disturb their roots when you replant annuals like basil and dill in front.
Contain the spreaders. Mint and oregano will eat your entire bed if you let them. Always grow mint in a buried pot, a separate container, or a fully isolated bed. Oregano stays politer but still needs an edge.
Think about height. Rosemary and sage grow tall. Thyme and chives stay short. Place the tall plants where they will not shade out the small ones, usually at the back or center of the bed.
Leave paths. If your bed is wider than four feet, build in a stepping stone or two so you can harvest from the middle without stomping the edges.
Here is a simple four foot by eight foot layout that works for most homesteads:
+--------------------------------------------------+
|  Rosemary    Sage      Oregano    Thyme          |  (back row, perennial, dry)
|                                                  |
|  Chives      Parsley   Basil      Basil          |  (middle row, mixed)
|                                                  |
|  Cilantro    Dill      Parsley    [Mint in pot]  |  (front row, annual or contained)
+--------------------------------------------------+
This single bed gives you everything you need for daily cooking, leaves room for a second basil plant when you want a lot of pesto, and keeps the mint safely jailed.
Planting Calendar Tool
Enter your zip code to get a personalized planting schedule based on your USDA zone.
Try it free →Building the Soil
Most beginners overbuild their herb soil. The best culinary herb gardens have lean, fast draining soil, not the rich black compost beds you want for tomatoes.
Start with drainage. If your native soil is heavy clay, mix in equal parts coarse sand and compost to lighten it. In raised beds and pots, use a quality potting mix and add perlite or pumice for extra drainage.
Go easy on the compost. A one inch top dress at planting time is plenty for the Mediterranean herbs. Rich soil makes them grow lush and floppy, with weaker flavor and shorter lives. The leafy herbs like basil and parsley can handle a bit more, around two inches of compost worked into the top few inches.
Skip the fertilizer. Most herbs do not want it. A light scratch of compost in spring is all the food they need. Fertilizer pushes weak, sappy growth that bugs love and humans do not.
Mulch lightly. A thin layer of small gravel, pine bark, or shredded straw helps retain moisture for leafy herbs and keeps the lower leaves of Mediterranean herbs from rotting. Avoid heavy wet mulches like grass clippings around woody herbs.
Test the pH if you can. Most culinary herbs prefer a slightly alkaline soil, around 6.5 to 7.5. If your soil is acidic, a light dusting of garden lime in spring helps the Mediterranean herbs thrive.
For a deeper dive on building living soil from scratch, see the homestead soil building guide.
What to Plant (and Where to Learn More)
Once your bed is ready, the next question is which herbs to plant first. A starter kitchen garden does not need every herb on earth. Start with the four or five you actually cook with, then expand from there.
If you cook a lot of Italian food, start with basil, oregano, rosemary, and parsley. If you grill, start with rosemary, thyme, sage, and chives. If you love Mexican and Asian food, start with cilantro, chives, and mint.
For a deep dive on the ten herbs every homestead kitchen should grow, including when to plant each one, how to harvest, and the best kitchen uses for every herb, see our companion guide on essential culinary herbs. That article is the perfect next read once your garden is built.
Here is a quick starter list to plant first:
- Basil for tomato season
- Rosemary for roasts and bread
- Thyme for almost everything savory
- Chives for eggs and potatoes
- Parsley for finishing dishes
- Mint (in a pot) for tea and cocktails
Six plants. One bed. A full season of fresh flavor.
Watering, Feeding, and Maintenance
A culinary herb garden is one of the lowest maintenance food plots you can grow. Once it is established, it asks for very little.
Watering. Deep and infrequent beats shallow and daily. Stick a finger an inch into the soil. If it is dry, water. If it is damp, wait. Most established herb beds need a deep soak once a week in summer, and almost nothing in spring and fall. Containers dry out faster and often need water every two or three days in the heat of summer.
Pruning and harvesting. Pruning is harvesting and harvesting is pruning. The more you snip, the bushier and more productive your plants become. For most herbs, cutting the top third every week or two during the growing season is the sweet spot. Plants left untouched bolt faster and produce less.
Pinch off flowers. Once a culinary herb flowers, it starts shifting energy from leaf production to seed production, and the leaves often turn bitter. Basil, parsley, and cilantro are especially sensitive. Pinch flower buds off the moment you see them, unless you want the seeds for next year or the blooms for pollinators.
Mulch maintenance. Top up your gravel or bark mulch once a year in spring. Pull back wet mulch from the crowns of woody herbs in winter to prevent rot.
Winterizing. In cold climates, the perennial herbs go dormant. Cut them back lightly in fall, mulch the crowns with a few inches of straw or leaves, and they will come back in spring. Tender perennials like rosemary often need to come indoors below zone 7. Annuals like basil and dill die at the first frost and need replanting each spring.
Warning
Extending the Season
A homestead culinary herb garden does not have to shut down when the weather turns cold. With a little planning, you can have fresh herbs at least nine months of the year, and dried herbs for the other three.
Bring tender herbs indoors. Rosemary, bay, and tender basil can live happily in a pot on a sunny windowsill all winter. Pot them up in late summer so they have time to settle in before the heat comes on.
Cold frame the hardier herbs. Parsley, chives, sage, and thyme will keep producing well into winter under a simple cold frame or low tunnel. Even unprotected, many perennials hold their leaves through several light frosts.
Dry the rest. Cut the bulk of your perennial herbs in late summer, just before they flower, and dry them for the pantry. Rosemary, thyme, oregano, sage, and mint dry beautifully. Hang bundles upside down in a warm, dry, dark spot for one to two weeks, then strip the leaves and store in jars.
Freeze the leafy ones. Basil, parsley, cilantro, dill, and chives lose flavor when dried but freeze perfectly. Chop, pack into ice cube trays, cover with olive oil, and freeze. Drop a cube into the pan whenever you need fresh flavor in January.
For more on stretching your harvest through every month, see our guide to year round growing on the homestead.
Common Beginner Mistakes
A few simple errors trip up most first time herb gardeners. Watch for these and you will save yourself a season of frustration.
Overwatering. This is the number one killer of culinary herbs. Most herbs would rather be slightly thirsty than slightly soggy. When in doubt, wait a day.
Overcrowding. Beginners pack plants in too tight because the transplants look small. Give your herbs the spacing they need. Air flow prevents disease, and full sized plants need real room.
Too much fertilizer. Most culinary herbs are weakened by rich soil and added fertilizer. They grow leggy, lose flavor, and attract bugs. Let your herbs grow a little lean.
Letting mint loose. We have said it twice already. We will say it one more time. Always contain mint. Always.
Timid harvesting. New gardeners barely cut anything because they are scared of hurting the plant. The opposite is true. Frequent harvesting makes herbs bushier and more productive. Cut more, not less.
Skipping the kitchen test. Plant what you actually cook with. A row of beautiful tarragon you never use is wasted space. A row of basil you eat every day is gold.
Quick Reference: Herb Garden Sizes by Household
How big should your herb garden be? Here is a rough guide based on how much you cook.
| Household | Garden Size | Approximate Plant Count | Style |
|---|---|---|---|
| Solo cook or couple | 2 ft x 4 ft, or 4 to 6 pots | 6 to 8 herbs | Containers or small raised bed |
| Family of four | 4 ft x 4 ft raised bed | 10 to 12 herbs | Single raised bed or in ground patch |
| Family of six or large household | 4 ft x 8 ft raised bed | 15 to 20 herbs | Larger raised bed or herb spiral plus pots |
| Serious home cook or canner | 8 ft x 8 ft section | 20 plus herbs | Multiple beds with separate Mediterranean and leafy zones |
Start small. You can always add another bed next year. A herb garden that is bigger than you actually use is a chore. A herb garden that is just the right size is a joy.
Frequently Asked Questions
Frequently Asked Questions
The single best location is a sunny spot within a few steps of your kitchen door. Aim for six to eight hours of direct sun, well drained soil, and a south or southwest facing aspect if possible. Proximity matters more than perfection, because the closer the garden is to your stove, the more often you will actually use it.
Most households are well served by a four foot by four foot raised bed, which fits ten to twelve herbs. A couple or solo cook can do everything they need in a few large pots. A larger family or serious cook may want a four foot by eight foot bed. Always start smaller than you think and add space later if you outgrow it.
Yes, with the right setup. A south facing window with six or more hours of direct sun will support basil, parsley, chives, mint, and thyme through the winter. North facing windows need a small grow light to give the herbs enough energy. Indoor gardens dry out faster than outdoor beds, so check the soil every few days.
Start with the herbs you actually cook with. A reliable starter list is basil, rosemary, thyme, chives, parsley, and a contained pot of mint. These six cover almost every cuisine, are forgiving for beginners, and together build a garden you will use every single day.
Most do. The Mediterranean herbs like rosemary, thyme, oregano, sage, and lavender want six to eight hours of direct sun and will sulk in shade. The leafy herbs like parsley, chives, mint, and cilantro can manage with four to six hours, especially in hot climates where afternoon shade keeps them from bolting.
Both work beautifully. Raised beds give you more space, better soil control, and easier maintenance, and are ideal if you have a sunny yard. Containers are perfect for patios, balconies, and small spaces, and let you move tender herbs indoors for winter. Many homesteaders use both, with a raised bed for the perennials and pots for the annuals and the mint.
Deep and infrequent watering is best. Most established herb beds need a thorough soak once a week in summer and almost nothing in spring and fall. Containers dry out faster and may need water every two or three days in hot weather. The simplest test is to push a finger an inch into the soil. If it is dry, water. If it is damp, wait.
Start Small and Build From There
The best culinary herb garden is the one that gets used. Start with a single small bed or a row of pots right outside the kitchen door. Plant the four or five herbs you actually cook with. Water them when they are thirsty, snip them when you cook, and watch them get bushier and happier every week.
By midsummer you will be reaching for fresh herbs without thinking about it. By the end of the first season, you will have saved more on grocery store herbs than the whole garden cost to build. And by next spring, you will already be planning where to put the second bed.
A culinary herb garden is one of the most satisfying projects on any homestead. It is small. It is forgiving. And it is the patch you will visit more than any other. Plant it close to the kitchen, keep the design simple, and let the herbs do the rest.

Cole
Founder & Lead Researcher
Cole is the founder of Plan Your Homestead. He works in clinical research and brings a research-first lens to every guide on the site, drawing on a long family line of farmers for grounded, practical perspective.
More in Gardening
More articles coming soon. Check back for new gardening content.