Fruit tree grafting looks like surgery and feels like magic, but it is really just two sticks held tight against each other. Once you understand how the cambium layers heal together, you can turn one cheap rootstock into a tree that grows your grandmother's favorite apple. You can plant a single trunk and harvest four different fruits from it. You can rescue a dying heirloom variety nobody nursery sells anymore.
This guide walks you through everything you need to start grafting fruit trees in your backyard. You will learn what grafting actually is, why every homesteader should know how, when to do it for each kind of tree, which four grafts cover almost every situation, and exactly how to make your first whip and tongue graft. You will see a compatibility table for which species graft onto what, plus the eight mistakes beginners make most often.
If you have ever wanted to multiply your favorite fruit tree for free or grow a variety nobody sells locally, you are in the right place. Pick up a sharp knife. Let us dig in.
What Grafting Actually Is
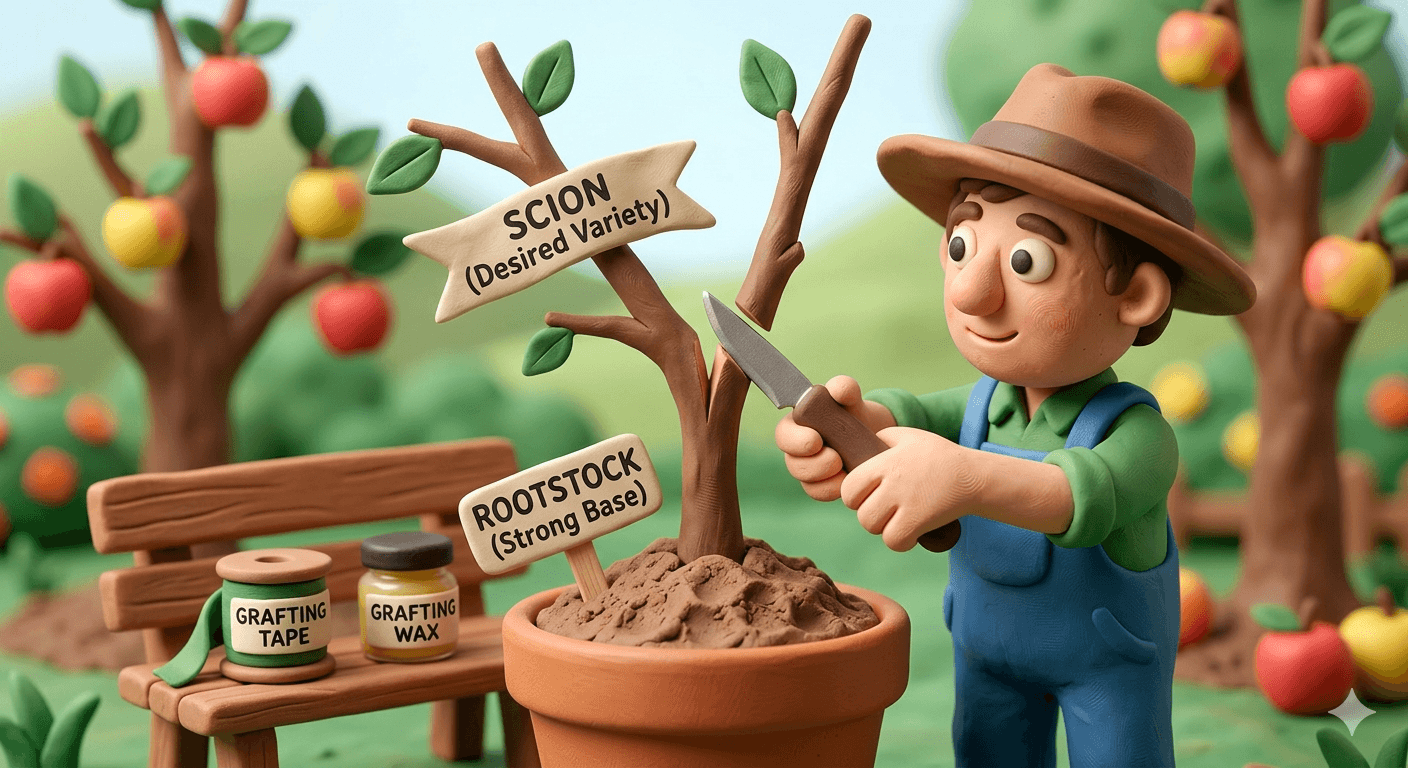
Grafting is joining two pieces of living wood so they grow together as one tree. The top piece is called the scion. The bottom piece is called the rootstock. When the cuts heal, the scion grows leaves, flowers, and fruit, while the rootstock pulls water and nutrients up from the soil.
The whole point is that every fruit you have ever loved is a clone. An apple grown from seed will not taste like the apple it came from. A Honeycrisp seed grows a tree that produces some other kind of apple, usually a sour one. The only way to copy a favorite variety is to take a cutting from the original tree and graft it onto a rootstock.
This means every commercial apple, pear, peach, plum, cherry, citrus, and fig tree you have ever bought is a grafted tree. The variety on top might be one hundred years old. The root system underneath might be a different species entirely. They live their whole life as one tree.
The magic happens at the cambium, a thin layer of green tissue just under the bark. Cambium cells are the only cells that can grow new wood. When you press the cambium of the scion against the cambium of the rootstock and hold them tight for two to four weeks, those cells fuse. The graft has taken. The tree is one.
Why You Would Graft a Fruit Tree
Grafting is the most useful skill a backyard orchardist can learn. Once you understand it, your options open up in five big ways.
You can copy any variety you love. Take a cutting from your neighbor's gnarly Northern Spy apple and graft it onto a new rootstock. You now own a Northern Spy tree, for free.
You can save heirloom and disappearing varieties. Old apple and pear cultivars that no nursery carries anymore still live on backyard trees across the country. A few cuttings and a few rootstocks bring them back from the edge.
You can build a multi variety tree. Graft four different apple varieties onto one rootstock. Pick the right four and you get fresh fruit from August through November on a single tree. Same trick works with stone fruit. One peach tree can carry three or four varieties.
You can control tree size with rootstock. The same Honeycrisp scion grows eight feet tall on M27 rootstock and twenty five feet tall on a seedling rootstock. Choosing the rootstock chooses the eventual size.
You can save money. A nursery grafted fruit tree runs thirty to sixty dollars. A bare root rootstock costs three to six dollars. Scion wood is free if you know one person with a fruit tree. Grafting your own ten tree orchard costs less than buying two finished trees.
If you are still picking which trees to plant on your homestead, our best fruit trees by zone guide covers the varieties that actually thrive in your climate. Once they are in the ground, our fruit tree pruning guide keeps them productive for decades.
When to Graft Each Kind of Fruit Tree
Timing is half of grafting. The wrong window gives you a dead stick. The right window gives you a take rate above ninety percent.
Late winter to early spring is the workhorse window for bench grafts and field grafts on apples, pears, plums, and cherries. The rootstock is just waking up. Sap is starting to flow. The scion is still fully dormant from cold storage. Most homestead orchardists do their bench grafting in February or March, then plant the grafted trees in April.
Spring bark grafting happens a few weeks later, right when the bark of the rootstock starts to slip. Slipping means you can lift the bark away from the wood with your knife tip. This usually lines up with the first pink buds on apples in your area.
Summer for bud grafts. T budding and chip budding work best from late June through early September, when the bark is actively growing and slipping. This is the standard technique for stone fruit, citrus, and any tree where bench grafting in February did not take.
Avoid mid winter and mid summer heat waves. Grafting in deep cold causes the cambium to freeze before it heals. Grafting in extreme heat dries the scion before the union seals. Pick mild days when possible.
A simple way to remember the calendar: bench graft in late winter, bark graft in early spring, bud graft in mid to late summer. Most homesteaders do almost everything in the first window.
Planting Calendar Tool
Enter your zip code to get a personalized planting schedule based on your USDA zone.
Try it free →The Tools You Actually Need
You can graft a whole orchard with five basic supplies. Skip the gimmicks.
A grafting knife. This is the one tool you cannot compromise on. A grafting knife is single beveled, meaning one flat side and one angled side, which lets you cut a perfectly flat surface against the wood. The Tina 605 and the Victorinox grafting knife are both excellent and run twenty to forty dollars. Keep it razor sharp. A dull knife crushes the cambium instead of slicing it and ruins your take rate.
Grafting tape or parafilm. Parafilm M is a stretchy waxed film that self seals, holds moisture in, and falls off naturally as the union grows. Buddy Tape is the upgraded version made specifically for grafting. Both run about ten dollars for enough to do fifty grafts. If you only buy one wrapping material, buy parafilm.
Grafting wax or sealing compound. Optional for parafilm wrapped grafts but useful for cleft grafts and bark grafts where you cannot wrap the whole wound. Doc Farwell's and Treekote are both common. A small can lasts years.
Bypass pruners. Used to collect scion wood and to cut rootstock to the right height. Felco, ARS, or Bahco bypass pruners are the gold standard.
Plant labels and a permanent marker. Label every graft with the variety name and the date. You will forget which is which by July. Aluminum or plastic plant tags work fine. Sharpie fades in sun, so use a paint pen or grease pencil for anything you want to read in two years.
That is the whole kit. A grafting starter setup costs about sixty dollars and lasts the rest of your life.
Tip
If you can only buy one supply, buy parafilm. Wrapping a whole graft union in parafilm seals the wood, holds in moisture, and protects the cambium from drying out, all without any wax. Most beginner failures come from a graft drying out before it heals. Parafilm fixes that single biggest mistake.
Understanding Scion Wood and Rootstock
Good scion wood and the right rootstock matter more than perfect knife work.
Scion wood is the cutting you take from the variety you want to clone. Collect it in late winter while the tree is fully dormant, ideally on a dry day before bud break. You want pencil thick wood from the previous year's growth. Look for water sprouts and one year old branches. Avoid old gray wood and skinny twigs that look weak.
Cut each scion into pieces six to eight inches long with three or four healthy buds. Label every variety with a tag tied right to the bundle. Wrap the scion in slightly damp paper towel, slide it into a plastic bag, and store it in the refrigerator at thirty four to thirty eight degrees. Properly stored scion stays viable for three months or more.
Warning
Never store scion wood near apples, pears, or other ripening fruit in the same fridge. Ripening fruit gives off ethylene gas, which causes scion buds to break dormancy early and dry out. A dedicated scion crisper drawer, or even a separate mini fridge, is worth the trouble if you are storing wood for more than a few weeks.
Rootstock is the lower piece that becomes the root system of your new tree. Bare root rootstocks ship from specialty nurseries like Cummins Nursery, Fedco Trees, or Trees of Antiquity in late winter for three to six dollars each. Choose the rootstock based on the final size you want and your soil conditions.
For apples, the common choices are:
- M27 for very dwarf trees, four to six feet tall, ideal for containers and small yards. Needs staking forever.
- Bud 9 for true dwarf trees, eight to ten feet tall, very cold hardy. Also needs staking.
- G935 and G41 for semi dwarf trees, twelve to fifteen feet, fireblight resistant.
- M111 for semi standard trees, sixteen to twenty feet, drought tolerant, no staking needed.
- Antonovka seedling for full standard trees, twenty five feet or more, very cold hardy.
For pears, OHxF333 and OHxF87 are reliable semi dwarf options. For stone fruit, Lovell and Krymsk 86 are standards. For cherries, Gisela 5 is the popular semi dwarf. Match your rootstock to your space, your climate, and your patience for staking.
The Four Grafts Every Homesteader Should Know
Once you know four grafts, you can handle almost every situation in a backyard orchard.
Whip and Tongue Graft
The workhorse of bench grafting. Use it when your scion and rootstock are roughly the same diameter, about a pencil thick. The interlocking tongue cut gives a huge surface area of cambium contact and a strong mechanical hold.
When to use it: late winter bench grafting, scion and rootstock matched in size. Expected take rate with practice: ninety percent or better.
Step by step: Cut a long sloping face about an inch and a half long on both the rootstock and the scion. On each cut face, make a second cut about a third of the way down to create a tongue. Slide the two tongues together so the cuts interlock. Wrap with parafilm. Done in three minutes once you have the muscle memory.
Cleft Graft
The grafter's tool for when the rootstock is much larger than the scion. Common when you are top working an existing tree or grafting onto a small stump.
When to use it: rootstock or trunk one to three inches across, scion pencil thick. Best done in early spring just as buds begin to swell. Expected take rate: seventy to eighty five percent.
Step by step: Cut the rootstock cleanly across. Split the rootstock down the center with a grafting chisel or a heavy knife to a depth of two inches. Cut the bottom of two scion pieces into long wedges. Wedge them into each side of the split so the outer cambium of each scion lines up with the cambium of the rootstock. Seal the entire cut surface with grafting wax. Both scions may take, but pick the stronger one after the first season.
Bark Graft
The high success technique for grafting small scions onto a large stump or thick branch. Only works when the bark is slipping, which usually happens in mid spring.
When to use it: rootstock two to six inches across, scion pencil thick, bark actively slipping. Expected take rate: eighty to ninety five percent.
Step by step: Cut the rootstock cleanly across. Make a vertical cut down through the bark, about an inch and a half long. Carefully lift the bark away from the wood with your knife tip. Cut the bottom of the scion at a long slant on one side. Slide the cut face under the lifted bark, push it firmly against the wood underneath, and nail or tape it in place. Repeat with two to four scions evenly spaced around the stump. Seal everything with wax.
T Bud and Chip Bud Graft
The summer technique. Instead of grafting a whole stick, you graft just one bud. Bud grafting is fast, healing is quick, and a single rootstock can carry multiple varieties.
When to use it: late June through early September, on actively growing rootstock. Standard technique for stone fruit, citrus, roses, and any tree where spring grafting did not take. Expected take rate: ninety percent or better.
T budding: Cut a T shape in the bark of the rootstock. Lift the corners. Slice a single shield shaped bud from your scion variety, including a sliver of wood behind it. Slide the bud down into the T pocket so the cambiums touch. Wrap with parafilm above and below the bud, leaving the bud itself exposed. Two weeks later check that the bud is plump and green. The following spring, cut the rootstock off just above the new bud and the bud takes over as the new tree.
Chip budding: Cut a small chip out of the rootstock that exactly matches the shape and size of a chip cut from the scion containing one bud. Slide the new chip into the empty notch. Wrap with parafilm. Same outcome as T budding but works even when the bark is not actively slipping, so chip budding has a longer summer season.
Master these four grafts and you can handle ninety nine percent of homestead grafting situations.
Step by Step: Your First Whip and Tongue Graft
Start with a whip and tongue. It is the most useful, the most forgiving once you practice, and the only one you really need to learn first.
Step 1: Match your pieces. Pick a scion and a rootstock as close to the same diameter as you can find. Pencil thick is ideal. Smooth straight sections cut and heal better than knotty sections.
Step 2: Cut the sloping face. Hold the rootstock against a chopping surface. With your grafting knife, make one long, single, sloping cut about an inch and a half long, going right through the wood. Aim for a flat surface, not a curved one. Then do the same on the bottom end of the scion.
Step 3: Cut the tongue. Lay the cut face up. About one third of the way down from the tip of the slope, push your knife straight in toward the center of the wood, then pull it down to create a small tongue about half an inch long. Do the same on the scion face, mirrored, so the tongues will interlock when the two are joined.
Step 4: Join the pieces. Slide the scion onto the rootstock so the two tongues mesh and pull tight. If the diameters do not match perfectly, line up the cambium on one side. One side cambium contact is enough for a good take. Two sides is better.
Step 5: Wrap the union. Stretch parafilm so it doubles in length, then wrap it around the union in overlapping turns starting just below the joint, working up over the joint, and ending just above. Cover every bit of the cut wood. The parafilm seals itself.
Step 6: Label and plant. Tie a tag with the variety name and date. Plant the rootstock so the graft union sits two inches above the soil line. Water it in. Walk away for a month.
By week four you should see the buds on the scion swelling and pushing leaves. By the end of the first growing season the graft union has fused and the tree is one. Congratulations, you are a grafter.
Aftercare for a New Graft
A grafted tree needs careful babysitting through the first summer, then it is just like any other young tree.
Water deeply every week through the first growing season. A drying scion is the most common cause of late graft failure. Mulch out to the dripline to hold soil moisture.
Watch for the bud break window. Three to six weeks after grafting, the scion buds should swell and push. If the buds dry up and turn brown before pushing, the graft failed and you can try again next year on the same rootstock.
Remove any growth from the rootstock below the graft union. The rootstock will try to push its own shoots, and those shoots steal energy from your scion and produce inferior fruit. Cut them off every time they appear.
If you used a nurse limb or left a stub above the graft, remove it as soon as the scion is clearly growing well. The nurse limb served its purpose by drawing sap up through the rootstock.
Stake the new tree if your rootstock requires staking. M27 and Bud 9 need permanent stakes. Semi dwarf rootstocks like G935 benefit from staking for the first two years. M111 and Antonovka are free standing once established.
Do not let the new graft fruit in year one. Pinch off any flowers. Let the tree build wood and roots first. By year three or four you will get your first real harvest.
For long term success, our fruit tree guild guide walks through which companion plants build soil, attract pollinators, and protect young grafted trees while they get established.
What Grafts Onto What
Grafting only works between compatible species. Generally you can graft within a species or genus, sometimes across a genus, almost never across a family. This quick table covers the combinations every homesteader will run into.
| Scion | Compatible Rootstock | Notes |
|---|---|---|
| Apple | Apple seedling, M27, M111, G935, Bud 9, Antonovka | Universal apple to apple compatibility. |
| Pear | Pear seedling, OHxF333, OHxF87, quince | Quince dwarfs the tree but not all pears tolerate quince. |
| European plum | Plum seedling, Myrobalan, St. Julien A | Best within the European plum group. |
| Japanese plum | Myrobalan, peach, Krymsk 86 | Often interchanges with peach rootstocks. |
| Peach or nectarine | Lovell, Krymsk 86, Halford | Peach is also a common rootstock for Japanese plums. |
| Apricot | Plum seedling, peach, Myrobalan | Apricots are flexible across stone fruits. |
| Sweet cherry | Mazzard, Gisela 5, Krymsk 5 | Mazzard for full size, Gisela for semi dwarf. |
| Sour cherry | Mahaleb, Mazzard | Sour cherry is tougher and more flexible. |
| Citrus | Trifoliate orange, Sour orange, Carrizo | All citrus interchange freely across the genus. |
| Fig | Fig only | Figs are commonly grown on their own roots from cuttings. |
A general rule: stay within the genus and you are usually safe. Apples on apples. Pears on pears. Stone fruit on stone fruit. The further you stretch, the lower your take rate.
The Eight Most Common Grafting Mistakes
Watch for these eight problems and your take rate will jump from fifty percent to ninety.
Dull knife. A dull blade crushes cambium instead of slicing it. Strop your grafting knife before every session and resharpen every few days of work.
Cambium not aligned. The two cambium layers must touch each other for the graft to take. If the diameters do not match, line up one side perfectly rather than centering them.
Slow work. Cut surfaces start drying within seconds of exposure. Have your parafilm cut and ready, make your cuts, join, and wrap in under sixty seconds.
Dirty tools or hands. Wipe your knife with alcohol between varieties to avoid spreading fire blight or canker. Wash sticky hands too.
Wrong timing. Bench grafting in November is dead by April. T budding in October fails in cold climates. Match the graft to the season.
Scion dried out before grafting. If your scion wood is shriveled or the buds look papery, the wood is dead. Always refresh the cut just before grafting by slicing off the bottom inch.
Graft union buried. Planting too deep covers the union, which lets the scion form its own roots and defeats the whole point of the rootstock. Always plant with the union two inches above soil level.
Rootstock suckers left in place. Suckers from below the graft steal energy and weaken the scion. Cut them off every time they appear.
Avoiding these eight mistakes puts you ahead of ninety percent of first year grafters.
What to Do This Weekend
You do not need to learn everything at once. Start small.
If it is still late winter or early spring, collect scion wood from one fruit tree variety you love or order three rootstocks online. If it is summer, find a fruit tree you want to clone and plan to T bud onto one of your existing trees in the next two weeks.
Buy a real grafting knife. Skip the kitchen knife. Buy parafilm. Sharpen your pruners.
Pick a quiet afternoon. Watch one YouTube video of a whip and tongue graft to see the motions. Then make five practice grafts on willow or apple prunings you collected from the yard, just to feel the cuts. Throw the practice grafts away.
Then graft one real tree. Match a pencil thick scion to a pencil thick rootstock. Make the slope. Cut the tongue. Join. Wrap with parafilm. Label.
Stick the new tree in a pot of potting soil and put it somewhere protected. In a month you should see the buds swelling. That is your first grafted fruit tree.
If you fall in love with grafting (and most homesteaders do), our perennial food garden guide covers the long lived companion plants that pair beautifully with a backyard orchard of trees you grafted yourself.
Two hours of practice this weekend and you will have a skill that pays you back every year for the rest of your life. Your grafting knife is waiting. Go make the first cut.
Frequently Asked Questions
Late winter to early spring is the best window for bench grafting apples, pears, plums, and cherries. The rootstock is just waking up and the scion is still dormant from cold storage. Bark grafting happens a few weeks later, when the bark of the rootstock begins to slip. T budding and chip budding work best from late June through early September on actively growing rootstock. Avoid grafting in deep cold or extreme heat.
A first year grafter with a sharp knife and good scion wood typically sees a fifty to seventy percent take rate. By your second season, most homesteaders push that to eighty percent or higher. A whip and tongue graft made with practice routinely takes above ninety percent. The most important variables are knife sharpness, cambium alignment, and speed.
Sometimes. You can graft within a genus reliably, like apple onto apple or pear onto pear. You can sometimes cross between closely related stone fruits, like Japanese plum onto peach rootstock. You generally cannot cross between unrelated families, like apple onto cherry. The further you stretch from the same species, the lower your take rate and the shorter the tree's lifespan.
Collect scion wood in late winter while the tree is fully dormant, on a dry day before bud break. Cut pencil thick pieces of one year old growth into six to eight inch lengths with three or four healthy buds each. Label each variety. Wrap in damp paper towel, seal in a plastic bag, and refrigerate at thirty four to thirty eight degrees. Keep scion away from ripening fruit, which gives off ethylene and causes early bud break. Properly stored scion stays viable for three months.
Parafilm M and Buddy Tape are both stretchy waxed films that self seal, hold in moisture, and fall off naturally as the graft union grows. They are ideal for whip and tongue grafts because they cover every bit of cut wood without trapping water. Standard rubber grafting tape works well too but needs to be removed by hand after the graft heals or it can girdle the tree. For beginners, parafilm is the easiest single supply to start with.
Choose your rootstock based on your space, climate, and willingness to stake. M27 makes a tiny four to six foot tree perfect for containers but needs a permanent stake. Bud 9 makes a true dwarf eight to ten foot tree and is very cold hardy. G935 and G41 are popular semi dwarfs at twelve to fifteen feet with good disease resistance. M111 is a semi standard rootstock at sixteen to twenty feet that is drought tolerant and free standing. Antonovka seedling gives you a full size twenty five foot tree with the most cold hardiness.
T budding cuts a T shape in the rootstock bark and slides a shield shaped bud underneath the lifted bark. It only works when the bark is actively slipping, which is mid to late summer in most climates. Chip budding cuts a matching chip out of both rootstock and scion and presses the new chip into the empty notch. Chip budding works even when the bark is not slipping, so it has a longer summer season. Both are fast, high success techniques for summer grafting.
The most common reasons are a dull knife that crushed the cambium, the scion drying out before the union sealed, the cambium layers not lined up on at least one side, dirty tools that introduced disease, or wrong timing for the species. If the scion buds dried and turned brown before pushing leaves, the graft did not take and the rootstock is still alive for another try next year. Refresh your cuts, use parafilm to seal in moisture, and graft quickly.
For whip and tongue grafts wrapped completely in parafilm or Buddy Tape, no wax is needed because the wrap already seals every cut surface. For cleft grafts and bark grafts where parts of the wound cannot be wrapped, sealing the exposed cut wood with grafting wax keeps moisture in and disease out. Modern research has shown that pruning paints on regular pruning cuts actually slow healing, so wax is only useful on exposed graft wounds, not on routine pruning cuts.

Cole
Founder & Lead Researcher
Cole is the founder of Plan Your Homestead. He works in clinical research and brings a research-first lens to every guide on the site, drawing on a long family line of farmers for grounded, practical perspective.
More in Gardening
More articles coming soon. Check back for new gardening content.