There is something honest about heating with wood. You cut it, you stack it, you light it, and your home stays warm. No utility bill arrives in the mail. No propane truck rolls down the driveway. The work comes in the summer and the reward comes in January. For most homesteaders, that trade lands somewhere between satisfying and addictive.
Wood heat is also the single most reliable backup any off grid home can have. Solar panels can be snowed in for a week. Generators can run dry of fuel. A wood stove just keeps burning as long as you have dry wood and a clean chimney. That is why almost every serious off grid cabin in cold country still has one in the corner of the living room.
This guide walks you through every step. You will learn how a modern wood stove actually works, how to size one for your home, how to choose, season, and stack firewood, and how to install everything so a chimney fire never visits your house. By the end you will have the confidence to plan your first winter on wood heat, or to make your current setup safer and far more efficient. Grab a notebook. Let us walk through it together.
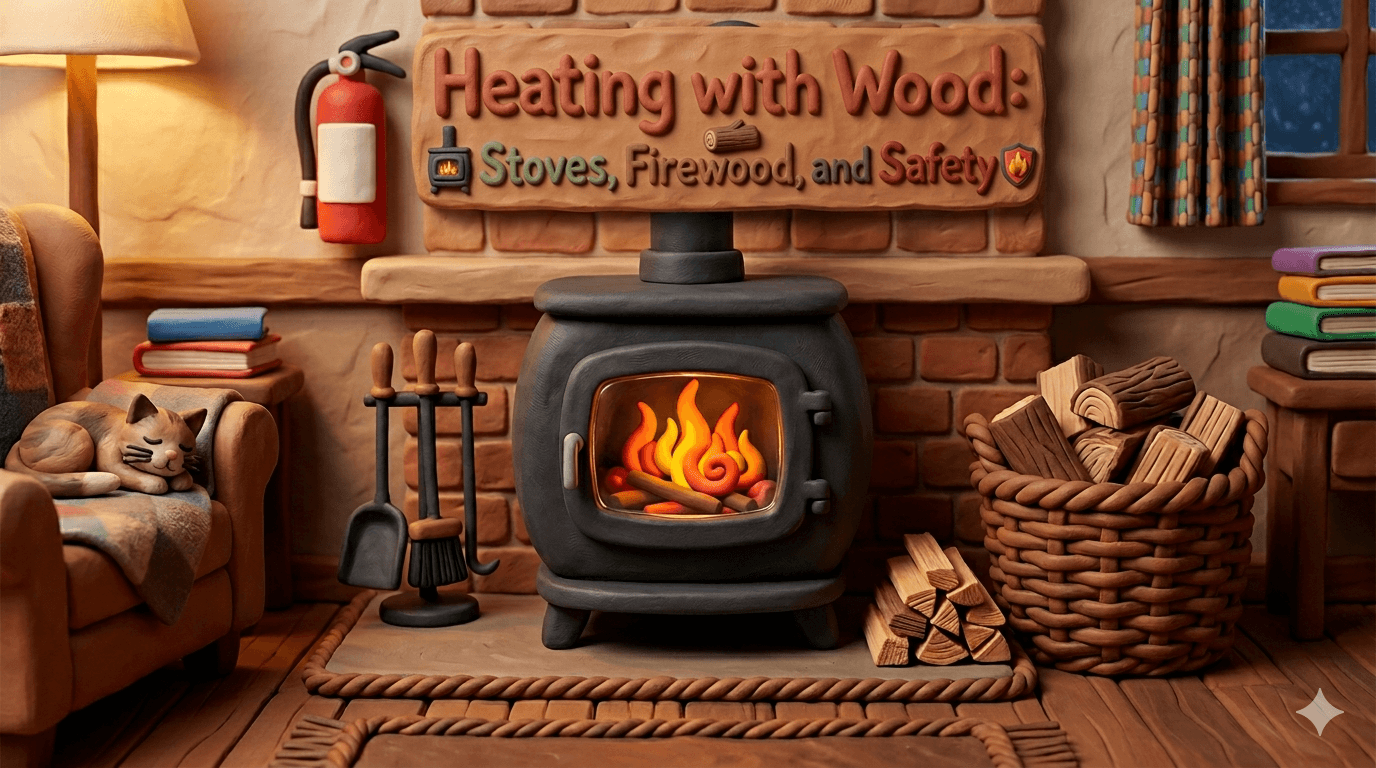
What Heating with Wood Actually Means
Heating with wood means using a contained appliance to burn cordwood and radiate that heat into your living space. The appliance can be a freestanding stove, a fireplace insert, an outdoor boiler, or a built in masonry heater. The fuel is almost always seasoned hardwood or softwood, cut and split to fit your firebox.
What it does not mean is an open fireplace. An old style open fireplace looks lovely on a Christmas card but it loses about 80 percent of its heat straight up the chimney. Some of them actually run a net negative in cold weather because they pull heated room air outside through the draft. A modern EPA certified wood stove flips that math entirely. It captures 70 to 80 percent of the heat the wood produces and pushes it into your room.
Modern stoves earn that efficiency through secondary combustion. The first burn happens in the firebox where wood becomes flames. The smoke that would normally vent up the chimney gets reignited a second time by superheated air or a catalyst. That second burn squeezes the rest of the energy out of the wood and dramatically reduces the smoke leaving your chimney. Cleaner air outside, more heat inside, less wood used over the winter. Everyone wins.
Off grid homes pair beautifully with wood because the heater does not need electricity to run. A basic stove with no fan, no thermostat, and no remote control will warm your house through a five day power outage without missing a beat. Pair that with a clean burning design and a tall straight chimney and you have a heating system that will outlive most of the rest of your home.
Why Wood Heat Is Worth It on a Homestead
The first reason is independence. You control your fuel from tree to fire. No supplier can shut you off. No price spike can wreck your winter budget. If you own woodland you can heat for the cost of a chainsaw, a tank of gas, and your time. Even buying firewood by the cord runs cheaper than propane or electric resistance heat in most of the country.
The second reason is the quality of the heat itself. Wood heat is radiant. It warms your body, your floor, your couch, and your cat before it warms the air. Forced air systems heat the air and let the air heat you. The two feel completely different. Most people walk into a wood heated house in January and immediately understand why their grandparents never moved past it.
The third reason is the bonus utilities you get along the way. A flat top wood stove will boil a kettle, simmer a stew, and warm bread in the firebox. A water jacket on the stove pipe can preheat your domestic hot water. A stove in the center of the house dries laundry on a rack faster than any dryer. None of that shows up on the spec sheet but all of it shows up on the power bill.
The fourth reason is resilience. A wood stove is the simplest backup any homestead can own. It needs no fuel deliveries, no electronics, no internet, and no permit to operate once it is installed. When the lights go out, the woodstove keeps the pipes from freezing and the family from panicking. That alone justifies the install in any climate that sees a real winter.
The Main Types of Wood Burning Appliances
You have more options than you might think. Most homesteaders settle on a freestanding wood stove, but it helps to know what else is out there before you spend money.
Modern EPA wood stoves
The default pick. A modern EPA 2020 certified freestanding stove burns clean, holds a fire for 8 to 12 hours, and warms 1,000 to 2,500 square feet depending on the model. You set it on a hearth pad, run a chimney up through the roof, and load it once or twice a day. This is the appliance most of this guide is about.
Catalytic versus non catalytic
EPA stoves use one of two designs to clean up the smoke. A catalytic stove runs the smoke through a honeycomb coated in precious metals. The catalyst ignites the smoke at lower temperatures, which means longer burns and more steady heat. The downside is the cat itself wears out after 8 to 12 years and replacement runs 200 to 600 dollars.
A non catalytic stove instead injects superheated secondary air into the firebox through metal tubes. The smoke reignites on its own when it hits that air. Non cats are simpler, cheaper to maintain, and forgiving for new users. They tend to give shorter overall burns and a hotter peak.
For most beginners a non catalytic stove is the easier first stove. For long overnight burns in very cold climates, a catalytic stove pays back the extra complexity.
Soapstone and cast iron
The body material matters more than people expect. A steel stove heats fast and cools fast. A cast iron stove holds heat a little longer thanks to the mass of the iron. A soapstone stove is the slowest to come up to temperature but it radiates gentle heat for hours after the fire dies down.
Soapstone stoves shine in homes where you load the stove twice a day and want a steady warmth between fires. Steel stoves shine in cabins and shops where you want fast heat after a cold day away. Cast iron sits in the middle and is the most common build.
Fireplace inserts
If your house already has a masonry fireplace, an insert is the fastest way to turn that pretty hole in the wall into a real heat source. An insert slides into the existing firebox, seals against the opening, and runs a stainless liner up the chimney. You keep the look of a fireplace and gain the efficiency of a modern stove. Inserts cost a little more than freestanding stoves but they save the build out of a brand new chimney.
Rocket mass heaters and outdoor wood boilers
Two specialty options worth knowing about. A rocket mass heater burns small diameter wood in a tiny insulated combustion chamber and stores the heat in a long thermal mass bench. It uses a fraction of the wood of a regular stove and is a classic DIY homestead project. An outdoor wood boiler sits in a small shed outside the house, burns large chunks of wood, and pumps hot water through underground lines to heat your home, shop, and domestic hot water. Boilers handle whole property heating but they cost real money and demand serious maintenance. We will cover both in dedicated guides soon.
For this article we are focused on the freestanding EPA wood stove since that is the right choice for the vast majority of homesteaders.
Sizing a Wood Stove for Your Home
A common first mistake is buying a stove that is too big for the space. An oversized stove forces you to run small, smoky fires all winter, which coats your chimney with creosote and shortens the life of the stove. Sizing it correctly is the most important decision you make before you spend a dollar.
Start with the square footage of the area the stove actually needs to heat. That is not always your whole house. Most homesteads use a single stove to warm the main living area and let bedrooms run cooler. Once you have that number, match it against the chart below.
| Stove Size | BTU per Hour | Square Footage Heated | Best Fit |
|---|---|---|---|
| Small | 25,000 to 40,000 | 600 to 1,200 | Cabins, small homes, well insulated tiny houses |
| Medium | 40,000 to 60,000 | 1,200 to 2,000 | Average single story homes, open plan layouts |
| Large | 60,000 to 80,000 | 2,000 to 3,000 | Large open homes, poorly insulated farmhouses |
Climate and insulation push the numbers around. A drafty 1900 farmhouse in Minnesota needs a much bigger stove per square foot than a tight modern build in Tennessee. If your home is old and leaky, lean one size up. If your home is tight and well insulated, lean one size down.
Ceiling height also matters. A 9 or 10 foot ceiling adds a meaningful amount of cubic volume that the stove has to warm. A loft or a stairwell pulls a lot of heat upstairs, which can be a feature in a two story home or a bug if the upstairs is unfinished.
Beware of going too big. A stove rated for 2,500 square feet in a 1,200 square foot cottage will roast you out of the room on a normal evening. You will end up choking the air down to keep things bearable, which creates a slow smoldering fire that produces almost nothing but creosote. Right sized is far more important than oversized.
Choosing a Wood Stove You Will Love
Sizing handles the math. Now you get to choose the stove that fits how you actually live.
Look for EPA 2020 certification first. The 2020 standard is the cleanest burning rating currently on the market. Stoves built to this standard burn cleaner, qualify for some tax credits, and meet the most current local codes. If you find a screaming deal on a 2015 stove, walk away. The 2020 design is worth it.
Look at firebox size. A bigger firebox holds longer overnight burns. A 2.0 cubic foot firebox is a comfortable middle ground for most homes. A 3.0 cubic foot firebox can hold a fire for 10 to 12 hours when you need it. Keep in mind that firebox size also drives stove footprint, so big fireboxes need big hearths.
Look at the loading style. A front loading stove opens like a door and is the most common style. A top loading stove lets you drop split wood in from above, which is friendlier on the back. A side loading stove can be handy in tight floor plans. Top and side loaders cost a little more but are pleasant to use.
Look at the glass. A modern stove uses an airwash system that blows clean air across the glass to keep it clear. A good airwash means you can see the fire all winter without scrubbing the glass every morning. Read reviews. Bad airwash is a daily annoyance.
Look at the ash pan. Some stoves drop ashes into a removable tray underneath the firebox. Others require you to scoop the ashes by hand. The pan is a small feature that becomes a big quality of life win in February.
Budget brands like Drolet, Englander, and Pleasant Hearth deliver real value at 800 to 1,500 dollars. Mid range brands like Pacific Energy, Lopi, and Quadra Fire run 2,000 to 3,500 dollars and give you better welds, better finishes, and longer warranties. Premium brands like Jotul, Hearthstone, Blaze King, and Morso run 3,500 to 6,000 dollars and either deliver superb soapstone aesthetics or extraordinary catalytic burn times.
Tip
Buy in spring or summer if you can. Stove dealers run their best sales between April and August when nobody is thinking about winter. Showing up to the dealer with cash in May can knock 10 to 20 percent off the same stove that costs full price in November.
Firewood 101: Species, BTU, and Seasoning
The stove is only half of the heating system. The other half is the firewood you feed it. Get the firewood wrong and even the best stove on the market will disappoint you.
Three things separate good firewood from bad firewood. The species, the size, and the moisture content.
Species sets the upper limit on how much heat a piece of wood can produce. Hardwoods like oak, hickory, and maple pack the most BTUs per cord. Softwoods like pine, fir, and cedar burn faster and produce less total heat but light easily and make great kindling. Mix the two and your fires light fast and burn long.
Size matters because a stove burns best when the wood roughly matches the firebox. A typical stove likes splits 16 to 20 inches long and 4 to 6 inches thick. Smaller pieces give you fast heat. Larger pieces give you long overnight burns. Vary the size of your stack so you have options for every fire.
Moisture content is where almost every beginner stumbles. Fresh cut wood is 50 to 60 percent water. That water has to boil off before the wood can really burn. Wet wood hisses, smokes, builds creosote, and produces maybe half the heat of properly dry wood. Your target is below 20 percent moisture content. A 15 dollar moisture meter from any hardware store will tell you the truth in seconds.
| Wood Species | BTU per Cord (millions) | Seasoning Time | Notes |
|---|---|---|---|
| Hickory | 28 to 30 | 12 to 18 months | The gold standard. Hot, long, and steady. |
| Oak (white or red) | 25 to 28 | 18 to 24 months | Slow to season but burns beautifully. |
| Beech | 24 to 27 | 12 to 18 months | Excellent heat, splits well. |
| Sugar maple | 24 to 25 | 12 to 18 months | Classic Northern firewood. |
| Ash | 23 to 24 | 6 to 12 months | Fastest seasoning hardwood. Burns even slightly green. |
| Birch | 20 to 23 | 6 to 12 months | Great for shoulder season. Bark lights fast. |
| Cherry | 20 to 22 | 12 months | Sweet smell, easy to split, clean burn. |
| Soft maple | 19 to 21 | 9 to 12 months | A friendly middle of the road wood. |
| Douglas fir | 20 to 21 | 6 to 9 months | The best softwood for heat. |
| Pine | 15 to 18 | 6 months | Burns fast, fine for kindling, watch creosote. |
| Spruce | 15 to 17 | 6 to 9 months | Light, fast, and easy to split. |
| Cottonwood | 13 to 15 | 12 months | Cheap calories. Use it for shoulder season. |
| Aspen | 12 to 14 | 6 to 9 months | Light heat, fine for spring fires. |
You do not need to chase the highest BTU number on the chart. The best firewood is whatever burns clean, splits well, and grows on your land or nearby. A cord of dry ash beats a cord of wet oak every single time.
Cutting, Splitting, and Stacking
Wood you process yourself costs the time it takes you to drop a tree, buck it to length, split it, and stack it. The reward is a deep freezer of dry calories for your house. Here is how the rhythm runs.
Start with a sharp saw. A dull chainsaw is a dangerous chainsaw. Sharpen the chain every other tank of fuel and run the right bar oil. If you are buying your first saw, a 50 to 60 cc Stihl or Husqvarna with a 20 inch bar handles almost everything a homestead throws at it.
Cut to fit your stove. Measure the firebox before you start bucking. Most stoves want 16 to 18 inch splits. Cutting a uniform length saves you hours of swearing in February when nothing fits.
Split early. A round dries faster after it is split because there is more exposed surface. The sapwood near the bark dries fastest of all. A maul, a splitter, or a kinetic splitter all work. For more than three or four cords a year, a hydraulic or kinetic splitter pays for itself in saved shoulders.
Stack with airflow in mind. Stack splits crosswise at the ends of each row so the stack stands up on its own. Keep at least an inch of air between splits. Run rows north to south so both faces get sun. Keep the stack at least an inch off the ground on pallets, rails, or treated lumber.
Top cover but do not wrap. A roof of metal or tarp over the top of the stack keeps rain and snow off the wood. Wrapping the sides of the stack traps moisture and slows drying. Wind is your friend. Let it move through the pile.
Run one full season ahead. The single best habit a wood heater can build is staying one year ahead on firewood. Wood cut this summer should heat your house next winter. Wood cut last summer should heat your house this winter. That one rule will fix almost every creosote and burn quality problem a beginner runs into.
Tip
Buy a moisture meter for 15 dollars and use it every fall. Split a piece in half, jam the prongs into the freshly exposed face, and read the moisture content. Below 20 percent is ready to burn. Above 25 percent goes back on the stack.
Installing a Safe Stove and Chimney
This is where shortcuts turn into house fires. Read this section twice and then read the manufacturer manual three times.
A safe install has four parts. A non combustible hearth pad under and in front of the stove. Manufacturer specified clearances to all combustible walls and ceilings. A correctly sized class A chimney that runs straight and tall. And a working CO detector in the same room.
The hearth pad protects the floor from radiant heat and stray embers. Most stoves require an R value of 1.0 to 1.5 for the hearth, and most stoves require the pad to extend 16 to 18 inches in front of the loading door and 8 inches on either side. Premade hearth pads are easy. A poured concrete pad with tile works too. Just confirm the R value with the stove manual before you buy.
Clearances are non negotiable. A typical freestanding stove needs 36 inches to any combustible wall on the sides and back. A heat shield on the wall can reduce that to 12 inches in many models. Reducing clearances without an approved shield is the most common code violation home inspectors find.
The chimney is the system. The chimney is more important than the stove. A correctly drafted chimney pulls smoke out, holds a clean burn, and resists creosote. A bad chimney smokes the room, smolders the fire, and lines itself with tar.
Use double wall stove pipe inside the room from the stove to the ceiling. Use insulated class A chimney from the ceiling up through the roof. Insulated class A pipe stays hot, which keeps the draft strong and the creosote down. Single wall stove pipe gives off more heat into the room but it must terminate at the ceiling box.
Run the chimney straight up if you can. Every elbow steals draft. Two 45 degree offsets are workable. A 90 degree bend through a wall is the worst configuration and it almost always creates draft problems and creosote pools.
Run the chimney tall. The common rule is the 3 2 10 rule. The chimney must extend at least 3 feet above the roof penetration, and at least 2 feet higher than anything within 10 feet horizontally. Going higher than the minimum almost always helps the draft and reduces backpuffing on windy days.
Install the cap and storm collar correctly. The rain cap keeps water out. The spark arrestor screen keeps embers from landing on the roof. The storm collar seals the flashing to the chimney pipe with high temperature silicone. Skipping any of these invites either water damage or a roof fire.
When in doubt hire a chimney sweep with the install. A WETT or CSIA certified pro can plan the path, source the right components, and pass an insurance inspection. An afternoon of their time can save you from a denied claim later.
Creosote, Chimney Fires, and Carbon Monoxide
Warning
Wood heat is safe when you respect three things. Creosote, chimney fires, and carbon monoxide. Ignore any of the three and a wood stove will hurt you. Read this section every fall before you light the first fire of the season.
Creosote is the tar that builds up inside a chimney when wood burns cool or wet. Smoke condenses on the inner walls of the chimney and leaves a flammable residue. There are three stages. Stage one creosote is a light flaky dust that brushes out easily. Stage two creosote is a hard shiny crust that needs scraping. Stage three creosote is a glossy black glaze that can be impossible to remove and is the fuel for chimney fires.
A chimney fire is creosote igniting inside your chimney. Symptoms include a low roar like a freight train, sucking sounds in the stove, sparks shooting from the chimney top, and the chimney pipe glowing dull red. If you suspect a chimney fire, shut all the air controls on the stove, close the damper if you have one, get everyone out, and call 911. Chimney fires can crack flue tiles and ignite the framing around the chimney. Even a small one earns a full inspection before the next fire.
The way to never have a chimney fire is simple. Burn dry wood. Burn hot fires, not slow smoldering ones. Have your chimney swept every year before the first fire of the season. A good sweep also inspects the firebox, gaskets, and stove pipe and tells you what needs attention.
Carbon monoxide is the silent killer. CO is colorless, odorless, and deadly. A wood stove with a clean chimney almost never produces dangerous CO in the room, but a clogged chimney, a backdraft, or a downdraft from another appliance can dump CO indoors. Install a CO detector with a digital readout in the same room as the stove and replace it every five years. Keep a window cracked when first lighting a cold chimney. If your CO detector ever alarms, open windows, get out, and call for help.
Insure the install. Most home insurance companies require a WETT or CSIA inspection certificate for a wood stove install. Without one, a claim related to the stove can be denied. Schedule the inspection before you light the first fire and keep the certificate in your file cabinet.
Daily Operation: How to Run a Wood Stove Well
A great stove run by a beginner can disappoint. A modest stove run by a pro can amaze. Here is how the pros do it.
Light fires from the top down. Stack two or three larger splits on the bottom, smaller splits crosswise above that, kindling on top, and a piece of newspaper or a fire starter on the very top. Light the top. The fire burns down through the stack. Top down fires light cleaner, smoke less, and warm up the chimney faster than the old teepee method.
Open the air all the way for the first 20 minutes. A cold chimney does not draft. Pulling all the air available into the firebox gets the chimney hot fast and avoids the dreaded smoke spill into the room. Once the chimney is hot you can throttle the air back to find the cruising sweet spot.
Watch the stove pipe thermometer. A magnetic thermometer on the stove pipe is the most useful 15 dollar accessory you can buy. Most stoves cruise happiest with stove pipe temperatures between 250 and 475 degrees Fahrenheit on a single wall pipe section, or whatever the manual specifies on a double wall section. Below that range you are building creosote. Above it you are wasting wood and stressing the stove.
Load when the coals are deep, not when the fire is out. A fresh load on top of a thick bed of coals lights almost immediately. A fresh load on a cold firebox can stall, smoke, and fight you for half an hour. Time your reloads.
Bank a fire for an overnight burn. Around 30 minutes before bed, load the stove full of large splits, close the door, and let the new wood catch with the air wide open for 15 minutes. Once the splits are well lit and outgassing strongly, slowly close the air down to a cruising position. A correctly banked load can hold a usable bed of coals 8 to 12 hours later, and you wake up to a still warm house and an easy relight.
Note
The single biggest beginner mistake is choking the air down too far. A stove starved for air smolders, smokes, and coats the chimney in creosote. If your glass is black every morning, your fire is too cool. Open the air up, burn drier wood, and watch the difference.
Maintenance and Cleaning Schedule
Wood stoves repay maintenance with safety and efficiency. Build a routine and stick to it.
| Frequency | Task |
|---|---|
| Daily | Empty most of the ash but leave a half inch of insulating ash on the bottom. Wipe the glass with a damp paper towel dipped in ash. Walk around the chimney outside for the visual look. |
| Weekly | Check the air controls move freely. Inspect the door gasket for compression marks. Look up the stove pipe with a flashlight for fresh creosote. |
| Monthly | Brush the stove pipe inside the room. Empty the ash pan completely if it has filled. Test the smoke alarm and the CO detector. Top off the ash bucket outside, not inside. |
| Seasonal (spring) | Sweep the entire chimney with the correct size brush. Inspect every section of pipe for rust, soot stains, or warping. Replace the rain cap screen if it is clogged. |
| Annual (fall) | Professional WETT or CSIA inspection. Replace the door gasket and the glass gasket if compressed. Touch up stove paint. Replace the stove pipe thermometer batteries. Restock dry firewood. |
| Every 3 to 5 years | Replace baffle insulation. Inspect refractory bricks. Replace catalyst (if applicable) at the manufacturer recommended interval. |
A small notebook in the woodshed where you log sweeps, gasket changes, and inspections turns into a goldmine for your insurance company and for the next owner if you ever sell. It also catches drift in your burn quality long before it becomes a chimney fire.
Common Mistakes Beginners Make
Almost every new wood heater makes the same handful of mistakes. Skip them and your first winter will feel like your fifth.
- Burning wet wood. The most common mistake by a mile. Wet wood smolders, smokes, and builds creosote three times faster than dry wood. Test every load with a moisture meter until you trust your stack.
- Choking the air down too far. A starved fire is a creosote factory. If your stove pipe temperature falls below 250 degrees Fahrenheit on a single wall section, open the air up.
- Oversizing the stove. A stove that is too big forces small smoldering fires all winter. Buy the right size for the space and let it run hot.
- Skipping the annual sweep. Creosote builds invisibly inside the chimney. A 200 dollar sweep beats a 30,000 dollar house fire.
- Storing wood against the house. A wood pile touching siding invites carpenter ants, termites, and mice straight into the wall. Keep the main stack at least 30 feet from the house and rotate a small ready stack onto the porch.
- No CO detector. A 30 dollar detector is the cheapest safety device you will ever buy. There is no excuse to skip it.
- Loading green wood the same day you light a fire. Green wood needs months in the stack before it is ready. Stay one full season ahead and the problem disappears.
- Improvising clearances. The clearance numbers in the manual are not suggestions. Hire a pro or follow the manual exactly. Your insurance policy depends on it.
Avoid those eight and you will join the small group of homesteaders whose wood heat actually saves them money every winter.
What It Costs to Heat with Wood
The math swings hard based on your land, your stove, and how much labor you do yourself. Here is the realistic spread.
| Category | Realistic Spend |
|---|---|
| Modest stove (budget brand) | $800 to $1,500 |
| Mid range stove (popular brands) | $2,000 to $3,500 |
| Premium stove (soapstone or catalytic) | $3,500 to $6,000 |
| Hearth pad | $250 to $800 |
| Class A chimney and stove pipe | $1,200 to $3,500 |
| Roof flashing and storm collar | $150 to $400 |
| Professional install labor | $1,500 to $3,500 |
| WETT or CSIA inspection | $150 to $400 |
A typical complete homestead install lands between 4,000 and 8,000 dollars. A DIY install with a budget stove can come in under 2,500 dollars. A premium soapstone with a pro install can pass 12,000 dollars. All three keep you warm.
Annual fuel costs depend on whether you cut your own or buy. A cord of seasoned hardwood delivered runs 250 to 450 dollars in most regions, more in the Northeast and West Coast. A typical homestead burns 3 to 6 cords a winter. If you cut your own from your land, the cost is gas, bar oil, chain sharpening, and your time.
Compared to propane, wood usually wins by half. A propane furnace burning a thousand gallons in a cold winter at 3 dollars a gallon runs 3,000 dollars. The same heating load on bought firewood runs 1,000 to 1,800 dollars. If you cut your own, the same load runs under 200 dollars in fuel and consumables. The stove pays for itself in 3 to 6 winters in almost every climate north of the Mason Dixon.
Your First Winter: A Step by Step Plan
If you are starting from scratch this year, here is the friendly arc that gets you to a warm house by Christmas.
- Now. Measure the space the stove needs to heat. Decide rough size class. Walk the room and pick the stove location. Look up local code and call your insurance agent to confirm what they require.
- Spring. Order the stove during the spring sale. Order the hearth pad, the class A chimney kit, the stove pipe, and the rain cap. Schedule the install for early summer.
- Summer. Install the stove, the hearth, and the chimney. Pass the WETT or CSIA inspection. Burn a small test fire on a cool evening to break in the paint outside.
- Late summer. Order or cut two full cords of next year's wood. Stack it on pallets, in the sun, top covered, with airflow. This is the wood for winter two.
- Early fall. Buy or set aside this winter's wood, which should be wood cut at least one full year ago and below 20 percent moisture. Stack a ready cord on the porch.
- Mid fall. Sweep the chimney. Check gaskets. Stock kindling. Test the CO detector. Run the first real fire on a chilly evening.
- Winter. Burn dry wood. Stack tomorrow's wood inside the house overnight to drop it that last percent. Sweep again midwinter if you are seeing brown soot drifts on the porch. Bank fires before bed. Empty ash buckets outside in a metal can.
- Spring again. Sweep the chimney. Inspect the gaskets. Touch up paint. Plan next year's wood. Repeat.
You can compress the whole arc into a single summer and fall if you have to. You can also stretch it across two seasons if money is tight. Either way the key is that by Christmas you have a dry stack, a clean chimney, and a habit.
Build Skills Alongside the Hardware
The stove is the easy part. The skills around the stove are what make wood heat sustainable on a homestead.
Chainsaw basics. Learn how to sharpen a chain, replace a bar, mix two stroke fuel, and fell a small tree safely. A tenth of an hour of chain sharpening saves an hour of cutting time and a fingerful of bandage.
Splitting form. Use the maul like a hinge. Let the weight of the head do the work. Set up a tire on a chopping block to hold rounds steady. A good rhythm with proper form is faster than thrashing for an hour with bad form.
Reading the fire. A clean burn shows ghostly blue flames at the top of the firebox and a thin clear plume out the chimney. A dirty burn shows yellow lazy flames and a thick gray plume. Train your eye on what good looks like.
Gasket and brick replacement. Gaskets, glass gaskets, and refractory bricks are wear items. Learn how to swap them with stove cement and a screwdriver. The first one is intimidating. The fifth one takes ten minutes.
Chimney sweeping. Many homesteaders learn to sweep their own chimney once they have a few seasons under their belt. A proper sweep brush, a set of extension rods, and a shop vac give you full control of the most important maintenance task in the system. Hire a pro every two or three years anyway for the inspection.
A working wood heat system is a stack of small skills. Each one you add makes the next one easier and the heat cheaper.
You Can Start This Winter
The biggest trap with wood heat is overthinking it. People spend two winters comparing stoves on forums and another winter haggling over catalytic versus non catalytic. Meanwhile, the perfectly good stove at the local dealer has been sitting on the floor since April and the dealer would knock 15 percent off just to move it.
Pick a stove this month if you are ready. Pick a hearth, pick a chimney path, and pick a pro for the install if you want one. Order one cord of seasoned wood from a trusted local seller this fall and one cord of green wood to stack for next year. Light a small fire on a cool evening and let the paint cure outside while you grin like a kid.
When you are ready for more, our off grid hub gathers every water, power, and heat guide on the site. Pair this article with our off grid living for beginners pillar for how heat fits with solar, water, and waste. If solar is next on the list, our beginner solar power guide is the friendly companion to this one. And if you have not yet caught your water, our rainwater harvesting guide takes you from a downspout to a tank in one weekend.
For the broader homesteading roadmap, lean on our homesteading for beginners pillar. If you want to build your own outdoor storage to keep your wood dry, watch for our upcoming firewood storage shed plans under the DIY section. And if cooking on wood interests you, the cast iron section under our gardening hub and the food preservation pieces will pair nicely.
You can do this. We are glad you are here.
Frequently Asked Questions
Most homesteads burn 3 to 6 cords per winter. A small tight cabin in a mild climate may only need 2 cords. A drafty farmhouse in northern country can pass 8 cords. A cord is a stack 4 feet wide, 4 feet tall, and 8 feet long, totaling 128 cubic feet. Stay one full season ahead so the wood you burn has had at least a year to dry.
Yes, and it is one of the best bonuses of wood heat. A flat top freestanding stove will hold a cast iron skillet, boil a kettle, simmer a pot of soup for hours, and bake bread inside the firebox in a dutch oven. Some stoves are designed specifically as cook stoves with an oven box on the side. For everyday meals on a regular heating stove, treat the top like a giant slow burner.
The safest stove is one with EPA 2020 certification, installed by a WETT or CSIA certified pro, with the manufacturer required clearances, on a code compliant hearth pad, vented through an insulated class A chimney that runs straight and tall. The brand matters less than the install. A modest stove installed correctly is safer than a premium stove installed poorly.
At minimum once a year, ideally before the first fire of the season. Heavy users who burn 4 or more cords through a long winter benefit from a midwinter check and a second sweep in spring. If you see brown flaky soot piles around the rain cap, you are due. Burn dry wood and run hot fires and your sweep will find very little to remove.
Often yes, especially in an open floor plan. A correctly sized stove in a central location can hold the whole main level of a 1,500 to 2,500 square foot home. Bedrooms with doors will run cooler, which most people prefer for sleeping. Two story homes pull heat upstairs naturally through stairwells. For tightly partitioned older homes, a single stove may need help from a small backup heater in one or two distant rooms.
Hickory, oak, sugar maple, beech, and ash sit at the top for BTU per cord. Hickory and oak burn the longest. Ash is famous for burning well even slightly green. The best firewood is whatever is dry, locally available, and split to fit your stove. A cord of dry pine beats a cord of wet oak every time. Mix species so you have fast lighters and long burners on the same stack.
It depends on your state and county. Most jurisdictions require either a building permit, an inspection, or both. Many insurance companies require a WETT or CSIA inspection certificate regardless of local rules. Call your local building department before you order anything. Skipping permits can void your homeowners coverage and create resale problems.

Cole
Founder & Lead Researcher
Cole is the founder of Plan Your Homestead. He works in clinical research and brings a research-first lens to every guide on the site, drawing on a long family line of farmers for grounded, practical perspective.
More in Off-Grid
More articles coming soon. Check back for new off-grid content.