
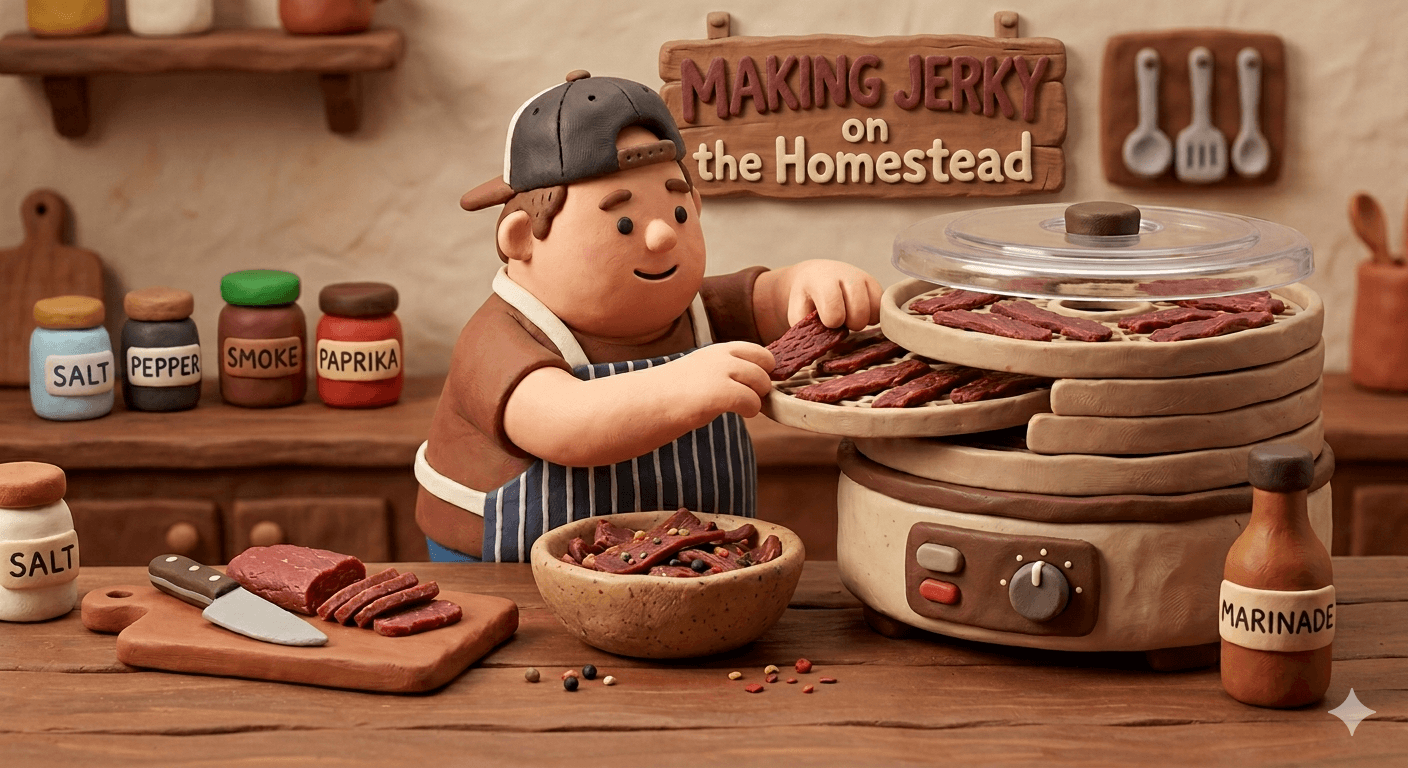
Jerky is the easiest preserved meat project on the homestead. You do not need a smokehouse, a salt cellar, or a degree in food science. You need a sharp knife, a gram scale, a little Cure #1, and any tool that holds steady warm air for a few hours.
This guide walks you through making safe, deeply flavored jerky from the meat you already have. Beef, venison, elk, turkey, and ground meat all follow the same playbook. By the end, you will know which cuts work, how to slice them, how to cure them, how to dry them in a dehydrator or a smoker or an oven, and how to store the result so it lasts.
You can absolutely do this on your first try. Skip the safety steps and jerky gets risky. Follow them and jerky is one of the most forgiving meat projects in the kitchen. Your first batch will probably disappear in a day. Plan for that.
Why Make Jerky on the Homestead
Jerky has fed travelers, soldiers, hunters, and farmers for thousands of years for one reason. It packs a lot of protein into a tiny, shelf stable, no power package. A pound of fresh beef shrinks to about six ounces of jerky once the water leaves. That is real food security in a tin.
Cost is the next reason. Store bought jerky runs 40 to 60 dollars a pound. The same cut from a sale freezer or a homestead steer costs a fraction of that, and the seasoning is yours. Hunters get an even better deal. A single deer turns into months of trail snacks for the cost of a marinade.
Flavor is where homemade jerky pulls away from the bag. You control the salt, the sugar, the smoke, the heat, and the cut. Store jerky tastes like soy sauce and corn syrup. Your jerky tastes like the meat and the wood and the spice you chose. The first batch ruins the bagged stuff for you, in the best way.
Jerky also pairs beautifully with the rest of the preservation pantry. Use pressure canning for bone broth from the trim. Use dehydrating for the fruit and veg that ride along. Use smoking and curing meat for the bigger cuts. Jerky is the gateway. Once you nail one batch, the whole craft opens up.
How Jerky Preserves Meat
Jerky works because water leaves and salt stays. Take the water out of meat and the bacteria that cause spoilage have nothing to grow in. Add enough salt and the few microbes that can survive in a dry environment cannot get a foothold either.
The target is a finished moisture content around 15 percent. That number sits well below the threshold where mold, yeast, and most bacteria can grow. Combined with the salt in the cure, you end up with a piece of meat that can sit in a sealed bag for weeks at room temperature without spoiling.
Three forces do the actual work. Salt pulls water out of the meat through osmosis and seasons it from the inside out. Sodium nitrite from a tiny dose of Cure #1 blocks the growth of Clostridium botulinum during the slow warm drying step, which is exactly when botulism risk is highest. Heat drives the moisture off and, when high enough, kills any surface bacteria that came in on the raw meat.
The fourth force is time. Cured meat needs hours to absorb salt evenly, and drying needs hours to pull water from the inside of every strip. Rush either step and the jerky tastes flat, dries unevenly, or goes bad early.
Note
Drying meat for travel is one of the oldest forms of food preservation on earth. The Quechua word "ch'arki" gave us the English word "jerky." Long before refrigerators, families dried strips of meat in the sun and wind on simple racks. The science has not changed. Salt, low humidity, and gentle heat still do the job.
The Best Meats for Jerky
Lean meat makes good jerky. Fat does not. Fat goes rancid long before the rest of the meat spoils, so every visible piece of fat needs to come off before drying.
Beef is the classic choice. Eye of round is the gold standard. It is dense, almost fat free, and slices cleanly. Top round, bottom round, and sirloin tip all work well and cost less. Flank steak makes excellent jerky if you slice it across the grain. Skip ribeye, brisket, and chuck roast. They are too marbled.
Venison and elk are jerky magic. Wild game is naturally lean, the flavor is bold, and one deer yields a lot of strips. Trim every speck of silverskin and fat before slicing. Slice partially frozen for clean edges.
Turkey breast makes a lighter jerky that travels well in summer. Cure and pre cook to 165 degrees Fahrenheit instead of 160 because poultry carries a higher load of salmonella risk.
Pork loin can become jerky, but freeze the meat at zero degrees Fahrenheit for 30 days first to handle any trichinosis risk in home raised or wild pork. Then cure and cook like beef. The flavor is mild and clean.
Goat and lamb make a strong, gamey jerky that some people love and others avoid. Trim hard. Cure normally.
Ground meat is its own category. A jerky gun pipes seasoned ground meat into thin strips or round sticks. You can use lean ground beef (90/10 or leaner), ground venison, ground turkey, or any blend. Ground meat jerky is faster, cheaper, easier to chew, and a great way to use trim from a deer or a quarter steer.
Wild caught salmon and trout also dry into excellent jerky, but the brine, the smoke, and the food safety story are different enough that fish jerky deserves its own dedicated guide.
Equipment for the Homestead Jerky Maker
You can get rolling with very little. A few good tools make the work faster and the results more consistent.
A digital gram scale
This is the most important tool on the list. Cure #1 is dosed by weight, and the safety window is real. A scale that reads to one gram costs twenty dollars and lasts for years. Buy this before anything else.
A sharp slicing knife
A long, thin, very sharp knife will slice meat into even quarter inch strips if the meat is partially frozen. A serrated bread knife works in a pinch. Dull knives tear meat and slow the whole process down.
A meat slicer (optional)
If you make jerky often, a home meat slicer is the single biggest time saver in the kitchen. A solid mid range slicer cuts a whole top round into perfect strips in five minutes. Look for a slicer with a removable blade for cleaning.
A dehydrator, a smoker, or an oven
Any of these can dry jerky. A dedicated electric dehydrator is the easiest path. A pellet smoker or kamado adds smoke flavor and works just as well. A standard kitchen oven set to its lowest temperature can dry a small batch with the door cracked open. Pick the gear you already have and start there.
A probe thermometer
Pre cooking jerky meat to a safe internal temperature is the central food safety step in this guide. A probe thermometer takes the guesswork out of it. The same probe checks your smoker chamber temperature.
A jerky gun (for ground meat jerky)
A jerky gun is a plunger style tube with a flat or round nozzle that pipes seasoned ground meat into uniform strips or sticks. Plan on one if you want to make ground meat jerky, which is the cheapest, fastest path to a finished batch.
A vacuum sealer
Vacuum sealed jerky lasts three to four times longer than jerky in a zip top bag. If you make big batches or want shelf stable storage past two weeks, a vacuum sealer pays for itself fast.
Cure #1 (Prague Powder #1)
Cure #1 is 93.75 percent table salt blended with 6.25 percent sodium nitrite, dyed pink so you do not mistake it for regular salt. Every jerky recipe in this guide uses it. A small bag costs ten dollars and lasts for many batches. Order it once and keep it in a labeled jar in the pantry.
The Four Stage Process
Every jerky recipe in this guide follows the same four stages. Once you have the pattern in your head, the variations all make sense.
- Trim and slice. Pull off every visible piece of fat and silverskin. Slice the meat into even quarter inch strips, partially frozen, across the grain for tender bites or with the grain for chewy strips.
- Marinate and cure. Mix the marinade with a measured dose of Cure #1, coat every strip, and refrigerate for 12 to 24 hours.
- Pre cook to a safe internal temperature. Steam or oven cook the strips to 160 degrees Fahrenheit (165 for poultry) before drying. This is the USDA recommended safety step that kills any surface bacteria the drying step cannot.
- Dry until done. Spread the strips on dehydrator trays, smoker grates, or wire racks in the oven. Hold 160 degrees and steady airflow for 4 to 8 hours, until the strips bend and crack but do not break.
The order of steps three and four can flip. Many homesteaders dry the strips first and finish with a quick oven bake to 160 degrees internal. Either order delivers the same safety result. The USDA does not care which side of drying the heat kill step lands on, only that it happens.
Trim and Slice the Meat
Pull the meat out of the fridge and place it in the freezer for 30 to 60 minutes before slicing. Partially frozen meat slices cleanly and evenly. Fully thawed meat squishes under the knife and gives you ragged edges that dry at different rates.
Trim every visible piece of fat. Trim every shiny strip of silverskin. Both ruin the flavor and shorten the shelf life. Be aggressive. A pound of well trimmed top round makes much better jerky than a pound of half trimmed eye of round.
Slice at a quarter inch thickness. Thinner strips dry faster but turn brittle. Thicker strips chew better but take twice as long and need more careful drying.
Decide the grain direction with intention. Across the grain produces tender jerky that breaks easily under your teeth. With the grain produces classic chewy jerky that pulls apart in long strings. Most beef jerky lovers prefer with the grain. Most venison jerky lovers prefer across the grain because deer meat can be tough.
Spread the slices in a single layer on a sheet pan as you go. Once the whole batch is sliced, you are ready for the cure.
Marinades and Cures: the Safety Story
A jerky marinade has five parts. Salt for cure and flavor. Sodium nitrite from Cure #1 for safety during the slow warm dry. Sugar to balance the salt and feed the surface browning. Acid like soy sauce, Worcestershire sauce, vinegar, or citrus juice for tenderness and flavor. Aromatics like garlic, onion, black pepper, smoked paprika, or chili for character.
Cure #1 has a hard safety ceiling of 156 parts per million sodium nitrite in the finished meat. The math only works if you weigh the meat and the Cure #1 on the same gram scale. Use 2.5 grams of Cure #1 per kilogram (1,000 grams) of meat. That comes out to about 1.1 grams per pound. Volume measures like teaspoons are not precise enough and never have been.
Salt sits between 1.5 and 2.5 percent of the meat weight, depending on how salty you want the finished jerky. Mid range is 2 percent. If your marinade includes soy sauce or Worcestershire, count their salt against the total.
Mix the marinade in a glass bowl or a large zip top bag. Drop the sliced strips in. Press out the air. Refrigerate at 38 degrees Fahrenheit or below for 12 to 24 hours. Flip the bag every six hours so the marinade contacts every strip.
The cure does not finish in a few minutes. Quarter inch slices need the full 12 hours to absorb salt and nitrite evenly. Thicker strips need 24. A short cure leaves a pale, gray, under preserved center. The full cure leaves the strip pink to the middle and protected through the dry.
Warning
Always weigh Cure #1 on a gram scale. Never substitute regular table salt, kosher salt, or sea salt for curing salt. Cure #1 contains the sodium nitrite that blocks botulism during slow warm drying. Without it, the marinade is just flavor.
The USDA Pre Cook Step
Here is the part of jerky making that home cooks miss most often. Drying alone does not reliably kill pathogens like salmonella and E. coli on the surface of raw meat. The drying air is warm but not hot. The bacteria can survive the dry and end up in the finished jerky.
The USDA recommends bringing jerky meat to a safe internal temperature of 160 degrees Fahrenheit (165 for poultry) at some point during the process. You have two paths.
Path A: Pre cook before drying. Drain the marinade off the strips. Spread them in a single layer on a wire rack over a sheet pan. Bake in a 275 degree Fahrenheit oven until the strips hit 160 internal on a probe thermometer, usually 10 to 15 minutes. Then move the strips to the dehydrator or smoker for the long slow dry.
Path B: Dry first, then bake. Marinate and cure as usual. Dry the strips at 160 degrees Fahrenheit for the full 4 to 8 hours. Finish by baking the dried strips in a 275 degree oven until a probe in the thickest piece reads 160 degrees. This usually takes 8 to 15 minutes for fully dried jerky.
Either path delivers safe jerky. Path A is the more common homestead approach because the strips finish drying without any rebound moisture from a late bake. Path B is easier when your dehydrator runs cool or you are working with very thin strips.
The one path you should never take is dry only with no heat kill step. A dehydrator set to 160 degrees Fahrenheit moves a lot of air across the meat, which cools the surface through evaporation. The actual surface temperature can sit at 130 to 140 degrees for hours. That is a long bath in the bacterial danger zone with no kill step at the end.
Method 1: Dehydrator Jerky
A dedicated electric dehydrator is the easiest jerky tool in the kitchen. Steady warm airflow at 160 degrees Fahrenheit moves the moisture out without overcooking the strips. Most home dehydrators can hold a full batch on four to eight trays.
Spread the cured strips on the trays in a single layer. Leave a quarter inch of space between strips for airflow. Avoid overlapping. Strips that touch will dry unevenly and form sticky spots.
Set the dehydrator to 160 degrees Fahrenheit. If your unit caps at 155 or 158, that is fine for the drying step as long as you used Path A and pre cooked the strips to 160 before loading. If your unit caps at 145, drop in a finish bake at the end.
Rotate the trays every two hours. Top trays dry faster than bottom trays in stackable units. Box style units dry more evenly but still benefit from a midpoint rotation.
Expect a total dry time of 4 to 8 hours depending on slice thickness, humidity, and the cut of meat. Start checking the strips at the four hour mark. Pull each strip individually as it finishes. Some strips will be done at five hours, others at seven.
The dry is finished when a strip bends and cracks at the bend without breaking. There should be no moisture beads on the surface and no flexible wet spots when you tear a strip in half.
Method 2: Smoker Jerky
A smoker adds something a dehydrator cannot. Real wood smoke. Smoked jerky is the homestead favorite for good reason. The smoke layers in flavor, dries the surface, and gives the strips a deep amber color.
Most pellet smokers, kamados, kettles, and offset smokers can run a jerky session at 160 to 180 degrees Fahrenheit. That is the lowest temperature most home smokers hold reliably. Anything hotter and the strips cook before they dry.
Wood choices matter. Hickory is the classic for beef and venison. Bold, sweet, and a little bacon like. Oak is more subtle, great for big batches. Pecan is mild and forgiving. Mesquite is intense and best blended at 25 percent with a milder wood. Apple and cherry add a delicate sweetness for turkey and pork jerky.
Spread the cured strips on the smoker grates in a single layer. Use a grate spray or thin foil with poked holes if your grates are wide and strips might fall through. Leave airflow space.
Run the smoker at 160 to 180 degrees Fahrenheit with thin blue smoke for 4 to 6 hours. Check at four hours and pull individual strips as they finish. Smoked jerky usually dries faster than dehydrator jerky because the smoke air carries less moisture.
If your smoker bottoms out at 200 degrees Fahrenheit, run a shorter session at 200 for 2 to 3 hours and watch closely. The strips will be more cooked than dried, which is fine. They will still keep, just with a slightly different chew.
A probe thermometer in the thickest strip removes all the guesswork. Pull at 160 degrees Fahrenheit internal (165 for poultry) for safety, and pull individual strips as they pass the bend and crack test.
Method 3: Oven Jerky
You do not need a dehydrator or a smoker to make great jerky. A standard kitchen oven dries a small batch beautifully if you have an hour to get the temperature right.
Set the oven to its lowest temperature. Most home ovens bottom out at 170 degrees Fahrenheit. A few go down to 150. If your oven only goes to 200, that is fine. You will pull the jerky a little earlier.
Crack the oven door open by about an inch. A folded kitchen towel or a wooden spoon wedged in the door does the job. The crack lets moisture escape instead of building up inside the oven and stalling the dry.
Spread the cured strips on wire racks set over sheet pans. The racks lift the strips off the metal so air circulates above and below. Skip the parchment paper. It traps moisture.
Slide the racks into the middle of the oven. Dry for 4 to 6 hours at 170 degrees Fahrenheit. Check at the three hour mark and rotate the trays. Pull individual strips as they pass the bend and crack test.
Ventilate the kitchen. Oven jerky throws a lot of smell and a fair amount of steam into the room. Run the range hood on high. Open a window. Your roommates and your dog will thank you.
Doneness Test
Every method ends with the same test. Pull a single strip off the tray. Let it cool for two or three minutes. Bend the strip in half.
Done strips bend and crack along the bend without breaking apart. The surface looks dry and slightly leathery. No moisture beads form when you press the strip between two fingers. The center is the same color as the outside.
Underdone strips bend smoothly without cracking, feel soft in the middle, or show wet spots when you tear them in half. Put them back on the trays for another hour and check again.
Overdone strips snap clean and feel brittle. They are not ruined, but they will be harder to chew. Pull the rest of the batch a little earlier next time.
If you are not sure, condition the batch. Place all the cooled jerky in a glass jar with a loose lid and watch for 12 to 24 hours. If condensation forms on the inside of the jar, the jerky is not dry enough. Put it back on the trays for another hour or two. Conditioning is the homestead trick that saves a batch from premature mold.
Three Tested Recipes
These three recipes cover most of what you will want to make. Each one scales up or down based on the meat weight. Always weigh the Cure #1.
Classic Beef Jerky
A balanced, slightly sweet, savory jerky that disappears fast. Works with eye of round, top round, sirloin tip, or flank.
- 1,000 grams (about 2.2 pounds) lean beef, sliced into quarter inch strips
- 1/2 cup soy sauce
- 1/4 cup Worcestershire sauce
- 2 tablespoons brown sugar
- 1 tablespoon black pepper
- 1 tablespoon garlic powder
- 1 tablespoon onion powder
- 1 teaspoon smoked paprika
- 1 teaspoon red pepper flakes (optional)
- 2.5 grams Cure #1 (weigh on a gram scale)
Mix the marinade in a bowl. Add the strips and toss to coat. Transfer to a zip top bag, press out the air, and refrigerate 12 to 24 hours, flipping every 6 hours. Pre cook to 160 degrees Fahrenheit in a 275 degree oven, then dry at 160 in a dehydrator or smoker for 4 to 6 hours until the strips bend and crack.
Sweet Heat Venison Jerky
A bright, warm, hunting season favorite that turns deer trim into the best snack in the freezer.
- 1,000 grams trimmed venison, sliced quarter inch
- 1/3 cup soy sauce
- 1/4 cup pure maple syrup
- 2 tablespoons apple cider vinegar
- 1 tablespoon smoked paprika
- 1 tablespoon garlic powder
- 1 teaspoon ground black pepper
- 1 teaspoon cayenne pepper (adjust to taste)
- 2.5 grams Cure #1
Trim every speck of fat and silverskin off the venison before weighing. Slice partially frozen, across the grain. Mix the marinade, coat the strips, and refrigerate 12 to 24 hours. Pre cook to 160 degrees Fahrenheit. Dry at 160 in a dehydrator or 170 degree oven for 4 to 6 hours, or smoke at 160 to 180 over hickory or pecan.
Ground Beef Jerky Sticks
The fastest, cheapest path to a finished batch. A jerky gun pipes seasoned ground meat into uniform strips. Use lean ground beef (90/10 or leaner), ground venison, or ground turkey.
- 1,000 grams lean ground beef
- 2 tablespoons soy sauce
- 1 tablespoon Worcestershire sauce
- 1 tablespoon brown sugar
- 1 tablespoon garlic powder
- 1 tablespoon onion powder
- 1 teaspoon black pepper
- 1 teaspoon smoked paprika
- 2.5 grams Cure #1
- 1 teaspoon encapsulated citric acid (optional, for tang)
Mix everything by hand in a large bowl until the cure and seasonings are evenly distributed. Refrigerate the seasoned ground meat for 12 to 24 hours so the cure can do its work. Load the mix into a jerky gun and pipe flat strips or round sticks directly onto dehydrator trays or wire racks. Pre cook to 160 degrees Fahrenheit by baking the piped strips in a 275 degree oven for 10 minutes. Finish by drying at 160 degrees for 3 to 5 hours.
Storage and Shelf Life
Properly dried jerky stores beautifully. The numbers below assume the jerky passed the bend and crack test and the conditioning jar showed no condensation.
Sealed at room temperature. Vacuum sealed jerky keeps for two to four weeks in the pantry. Add an oxygen absorber and the window stretches to six weeks. Heat and light shorten the window, so keep the bags out of direct sun.
Refrigerator. Jerky in a sealed zip top bag keeps for two to four weeks in the fridge. Vacuum sealed jerky in the fridge keeps for two to three months.
Freezer. Vacuum sealed jerky in the freezer keeps for six to twelve months without significant quality loss. This is the best storage option for big hunting season batches or quarter steer hauls. Pair it with the food freezing guide for organization tips.
Pantry without sealing. Unsealed jerky in a paper bag or open jar starts going stale after a few days. The fat oxidizes, the surface attracts moisture, and the flavor flattens. Always seal for storage past 48 hours.
If you ever spot fuzzy mold, wet sticky surfaces, or an off rancid smell, compost the batch. Mold on jerky means the dry was not complete or the storage let moisture back in. Both are fixable next time.
Troubleshooting
Even careful homesteaders make mistakes. The fixes below cover the issues you are most likely to see.
The jerky is too tough
You sliced too thick, dried too long, or cut with the grain when you wanted across. Slice thinner next time, pull at the first sign of done, and try across the grain for a more tender bite.
The jerky is too soft
You did not dry long enough. Put the strips back on the trays at 160 degrees Fahrenheit for another hour and recheck. Then condition the batch in a glass jar for 24 hours and watch for condensation.
Off rancid flavor
Fat went rancid. Trim more aggressively next time. Even small specks of fat oxidize during the long warm dry and ruin the flavor of the whole batch.
White bloom on the surface
White bloom on jerky is rendered fat that solidified during drying. It is not mold. The fix is the same as for rancid flavor. Trim harder.
Real mold (green, blue, black, fuzzy white)
The strips were not dry enough or storage let moisture back in. Compost the batch. Next time dry longer and condition in a glass jar for 24 hours before sealing.
Uneven drying across the batch
Slices were not uniform, or the trays were not rotated. Slice with a slicer or freeze the meat firmer before knife cutting. Rotate trays every two hours.
The jerky is too salty
You used too much salt in the marinade or left it in the cure too long. Drop the marinade salt by 25 percent next batch and stick to the 12 hour cure window for quarter inch strips.
The strips stuck to the dehydrator trays
The marinade dried into a glaze that bonded the meat to the plastic. Spray trays with a light coat of cooking oil before loading next time, or use silicone tray liners.
Frequently Asked Questions
Frequently Asked Questions
Yes, when you follow the USDA safety steps. Use Cure #1 in your marinade at 2.5 grams per kilogram of meat, refrigerate the cure for 12 to 24 hours, pre cook the strips to a safe internal temperature (160 degrees Fahrenheit for beef, venison, and pork, 165 for poultry), and finish drying at 160 degrees. Skip the cure or the heat kill step and you take on real food safety risk. With both in place, jerky is one of the safest homestead meat projects there is.
For safe jerky, yes. Cure #1 contains the small dose of sodium nitrite that blocks Clostridium botulinum during the long warm drying step. Drying without nitrite leaves you in the bacterial danger zone for hours with no protection. The dose is tiny, 2.5 grams per kilogram of meat, well below the FDA safety ceiling. A ten dollar bag lasts for dozens of batches. Skip it only if you are following a tested recipe that uses a high heat smoker and a very short dry time.
Eye of round is the homestead favorite. It is lean, dense, almost fat free, and slices into clean uniform strips. Top round, bottom round, and sirloin tip all work well and cost less. Flank steak makes excellent jerky if you slice across the grain. Skip marbled cuts like ribeye, brisket, and chuck roast. The fat goes rancid during the long warm dry and ruins the flavor.
Yes, and ground meat jerky is the cheapest and fastest way to a finished batch. Use lean ground beef (90/10 or leaner), ground venison, or ground turkey. Mix the seasoning, salt, and Cure #1 into the raw meat by hand. Cure in the fridge for 12 to 24 hours. Load the mix into a jerky gun and pipe flat strips or round sticks onto dehydrator trays. Pre cook to 160 degrees Fahrenheit in a 275 degree oven, then finish drying at 160 for 3 to 5 hours.
Drying alone does not reliably kill bacteria on the surface of raw meat. A dehydrator set to 160 degrees Fahrenheit cools the meat surface through evaporation, which can leave the surface at 130 to 140 degrees for hours. That is a long bath in the bacterial danger zone. Pre cooking the strips to a safe internal temperature of 160 degrees (165 for poultry) in a 275 degree oven before the dry kills surface pathogens like salmonella and E. coli. The USDA recommends this step for all home jerky.
Hickory is the classic for beef and venison. Bold, slightly sweet, and a little bacon like. Oak is milder and great for big batches. Pecan is the most forgiving and pairs with anything. Mesquite is intense and best blended at 25 percent with a milder wood. Apple and cherry add a delicate sweetness that works well for turkey and pork jerky. Avoid resinous softwoods like pine or cedar. Always aim for thin blue smoke, not thick white smoke.
Vacuum sealed jerky keeps for two to four weeks in the pantry, two to three months in the fridge, and six to twelve months in the freezer. An oxygen absorber stretches the pantry window to six weeks. Unsealed jerky in a paper bag or open jar starts losing quality after a few days. Always seal for storage past 48 hours. Mold or off rancid smells mean compost the batch and dry a little longer next time.
Yes. A pellet smoker, kamado, kettle grill, or offset smoker dries jerky beautifully at 160 to 180 degrees Fahrenheit over the course of 4 to 6 hours. A standard kitchen oven on its lowest setting (usually 170 degrees) with the door cracked open will dry a small batch in 4 to 6 hours. Crack the door an inch with a folded kitchen towel or a wooden spoon to let moisture escape. Wire racks over sheet pans hold the strips off the metal so air can circulate.
Either the marinade had too much salt or the cure ran too long. Drop the total salt in the next marinade by 25 percent and remember that soy sauce and Worcestershire sauce both add salt. Stick to a 12 hour cure for quarter inch strips and 24 hours for thicker cuts. If a current batch is already too salty, soak the finished jerky in a damp paper towel for an hour, pat dry, and the salt will balance out a little.
Venison, elk, antelope, moose, and bear all make excellent jerky. Wild game is naturally lean and full of flavor. Trim every speck of fat and silverskin before slicing because game fat tastes worse than beef fat when it goes rancid. For wild boar and home raised pork, freeze the meat at zero degrees Fahrenheit for 30 days first to handle any trichinosis risk, then cure and dry like beef. Use Cure #1 at the same 2.5 grams per kilogram dose and pre cook to 160 degrees Fahrenheit.
Start with One Batch This Weekend
Jerky sounds intimidating until you actually do it. The first batch teaches you more than any video. You learn how your dehydrator runs, how your knife handles partially frozen meat, what a finished strip feels like, and how fast a pound of jerky disappears at the kitchen counter.
Start small. Grab two pounds of eye of round on sale or pull a venison roast out of the freezer. Weigh out 2.5 grams of Cure #1 on a gram scale. Mix the Classic Beef Jerky marinade above. Slice, cure, pre cook, dry. By Sunday evening you will have a jar of homemade jerky and a small grin on your face.
Track what you do. Weigh the meat. Weigh the cure. Note the marinade. Time the dry. By your third or fourth batch you will have a house recipe that fits your family and your gear perfectly.
A balanced homestead pantry uses several methods together. Pair your jerky with dehydrating 101 for fruit and vegetable snacks, smoking and curing meat for the bigger cuts, smoke and cure your own bacon for breakfast, pressure canning for bone broth from the trim, and the food freezing guide for the rest of the steer or the deer.
Welcome to homestead jerky. Your great grandparents made it the same way. They would be proud.

Cole
Founder & Lead Researcher
Cole is the founder of Plan Your Homestead. He works in clinical research and brings a research-first lens to every guide on the site, drawing on a long family line of farmers for grounded, practical perspective.
More in Food Preservation
More articles coming soon. Check back for new food preservation content.