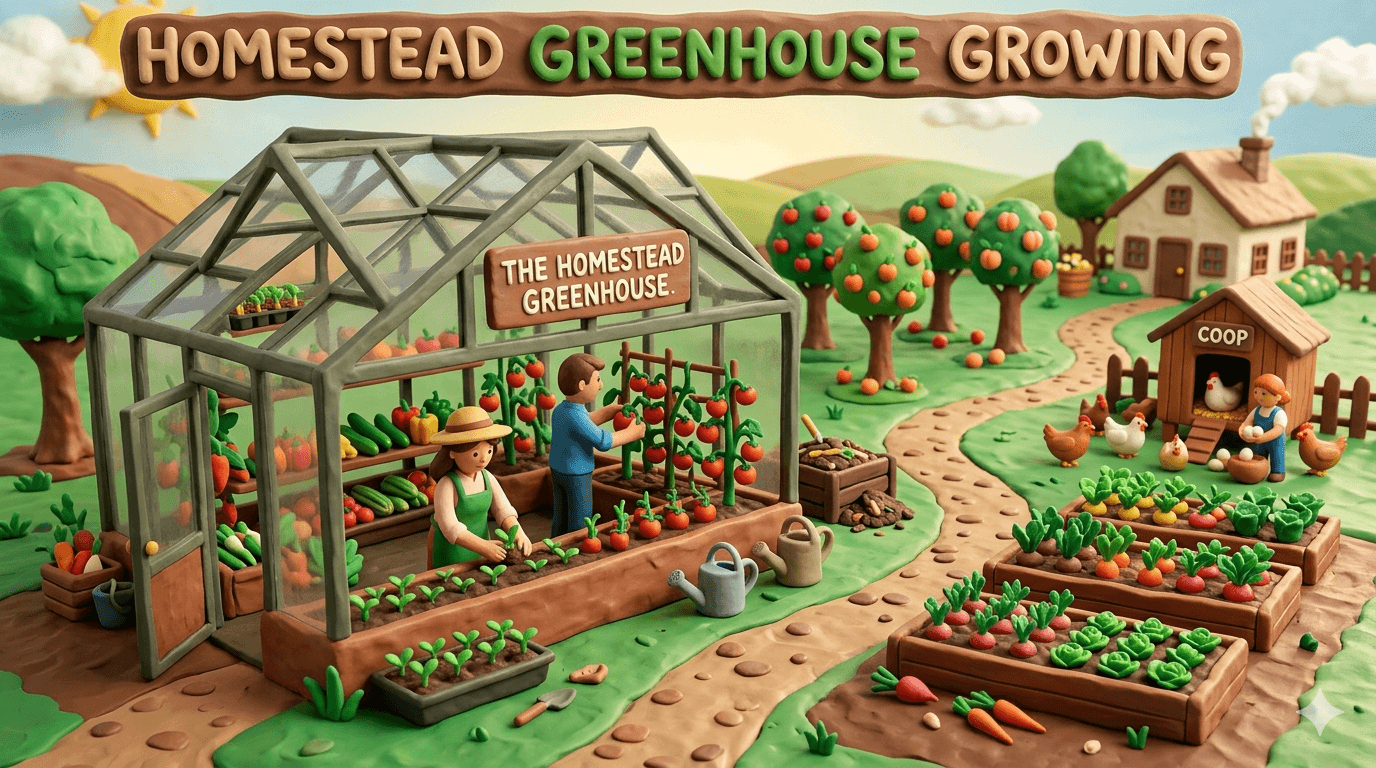
A real greenhouse is the difference between a garden that sleeps from October to May and a homestead that puts food on the table every single month of the year. It is the single biggest upgrade you can make once you have outgrown raised beds and tunnels.
A permanent greenhouse holds heat that plastic sheeting never could. It stands up to wind, snow, and decades of weather. You can wire it for power, run water to it, and walk inside on a January morning to harvest tomatoes that are still warm from the sun.
This guide walks you through everything a beginner needs to know about homestead greenhouse growing. You will learn how to size and place your greenhouse, which glazing actually pays for itself, how to keep it warm without a giant power bill, and exactly what to grow inside it through every season.
Let us get into it.
What Is a Homestead Greenhouse?
A homestead greenhouse is a permanent structure with rigid walls, a real foundation, and clear panels that let sunlight pass through while trapping heat inside. Most are wood or metal framed and glazed with double walled polycarbonate, twin wall plastic, or glass.
These are not throwaway tunnels. A well built greenhouse lasts twenty years or more. You can stand up inside it, walk between benches, and use it three hundred sixty five days a year for seed starting, tropical fruit, winter greens, or out of season tomatoes.
The point of a homestead greenhouse is to give you full control over the growing environment. You decide the temperature. You decide the humidity. You decide what gets in and what stays out. That control is what turns a hobby into real food production.
Greenhouse vs Hoop House vs Cold Frame
Before you spend money on a permanent greenhouse, it helps to know how it compares to the cheaper options. Each one has a place on a homestead.
| Structure | Typical Cost | Lifespan | Best Use |
|---|---|---|---|
| Cold frame | 30 to 100 dollars | 5 to 10 years | Hardening off seedlings, growing salad greens in fall |
| Hoop house | 100 to 400 dollars | 5 years (plastic) | Season extension over raised beds, winter greens |
| Permanent greenhouse | 1,500 to 8,000 dollars | 20+ years | Year round growing, seed starting at scale, heat loving crops |
If you only need to push your season by six weeks on each end, a DIY hoop house does the job for under a hundred dollars. If you want to actually grow food in January, start tomatoes in February, and keep peppers fruiting in October, a permanent greenhouse pays for itself in a few seasons.
A good rule. Start with a hoop house. Outgrow it. Then build the greenhouse.
How to Choose the Right Size
The biggest regret of every greenhouse owner I have ever talked to is that they built one too small. Plants take up more room than you think. Benches steal floor space. Walkways have to be wide enough to wheel a cart through.
Pick the size that fits the food you actually want to grow.
| Size | Floor Space | Best For |
|---|---|---|
| 6 by 8 feet | 48 square feet | Seed starting and a few tomato plants |
| 8 by 10 feet | 80 square feet | A small family of four, mixed crops |
| 10 by 12 feet | 120 square feet | Serious year round growing for one household |
| 12 by 16 feet | 192 square feet | Market style production, two crop rows with a center path |
A 6 by 8 greenhouse looks roomy when it is empty. Fill it with two work benches, a few tomato plants, and a tray of seedlings and suddenly you cannot turn around. Build the biggest greenhouse your space and budget allow. You will use every square foot.
Height matters too. Aim for at least seven feet at the peak. Eight is better. Tall greenhouses heat more evenly and give tomatoes and pole crops room to climb.
Tip
Picking a Location and Orientation
A greenhouse is only as good as the spot you put it in. The right location can double its winter performance. The wrong one will leave it cold, dim, and frustrating.
Three rules guide the choice.
Maximum winter sun. The greenhouse needs at least six hours of direct sun in December and January, when the sun sits low in the south. Watch the light pattern in your yard through one full winter day before you commit to a spot. Trees that drop their leaves in fall still block plenty of light from the bare branches.
Long side facing south. Run the long axis of the greenhouse east to west. That puts the biggest wall facing south and exposes the most surface area to the low winter sun. This single decision can mean ten to fifteen extra degrees inside on a cold day.
Protection from wind. Cold north and west winds steal heat fast. A row of evergreens, a barn wall, or a small berm to the north and west of the greenhouse cuts the wind without blocking the sun.
Stay out of low areas where cold air settles overnight. Stay away from anywhere water pools in heavy rain. And give yourself a clear path from the house, because you will be walking out there in the dark, in the rain, and in the snow.
Glazing Options Compared
Glazing is the clear material that makes up the walls and roof of the greenhouse. It is the single most important choice you will make, because it controls how much light gets in and how much heat stays put.
| Glazing | Light Transmission | Insulation | Lifespan | Cost |
|---|---|---|---|---|
| Single pane glass | 90 percent | Low | 25+ years | High |
| Double walled polycarbonate | 80 percent | Good | 15 to 20 years | Medium |
| Twin wall acrylic | 85 percent | Very good | 20+ years | High |
| 6 mil greenhouse film | 85 percent | Low | 4 to 6 years | Low |
For most homesteads, double walled polycarbonate is the right answer. It blocks most ultraviolet light, scatters the sun so it reaches the lower leaves, and traps a layer of air between two skins for real insulation. It will not shatter when a branch falls on it. It costs about a third of glass.
Glass is beautiful and lasts forever, but it is heavy, fragile, and a poor insulator unless you pay for double pane. Skip it unless you already have salvaged windows.
Film is fine for hoop houses but does not belong on a permanent structure. You will be re skinning the greenhouse every four years and watching the inside fog over in the meantime.
Heating Your Greenhouse Through Winter
A greenhouse without a heat plan is a greenhouse that freezes solid on the first hard night. The good news is you do not need a furnace. A few smart layers of passive and active heat will carry you through almost any winter.
Thermal mass. Stack fifty five gallon drums of water along the north wall. Paint them black. They soak up sun all day and release it slowly all night. A dozen drums of water inside a 10 by 12 greenhouse can hold the temperature ten to fifteen degrees warmer overnight.
Compost heat. Build a hot compost pile inside or against the back wall. A working compost pile pushes one hundred forty degrees of warmth into the surrounding air. You feed it kitchen scraps and animal bedding all winter and harvest the finished compost in spring.
Electric heaters. A 1,500 watt greenhouse safe heater on a thermostat is the simplest backup. Run it only when the inside drops below thirty five degrees. Plug it into a heavy duty outdoor cord rated for the load.
Propane heaters. Vented propane heaters work great in larger greenhouses, but the unvented kind dump moisture and carbon monoxide into the air. Choose carefully, install correctly, and vent everything that burns fuel.
Wood stove. A small wood stove with a proper chimney can heat a large greenhouse for nothing more than the cost of split firewood. This is the homesteader's favorite because it pairs perfectly with the wood lot you already have.
A combination almost always works best. Thermal mass and compost handle the easy nights. The electric or wood backup picks up the worst cold snaps. You can keep a polycarbonate greenhouse above freezing in zone 5 winters with surprisingly little active heat.
Ventilation, Cooling, and Humidity
Heat is only half the battle. A sealed greenhouse on a sunny February afternoon can climb past one hundred degrees in an hour and cook every plant inside. Cooling matters as much as heating, and most beginners learn this lesson the hard way.
Roof vents. Hot air rises. Roof vents let it escape. Aim for vent area equal to fifteen to twenty percent of the floor space. Automatic vent openers with wax pistons cost twenty five dollars and open the vents on their own when the temperature climbs.
Side or end vents. Pair the roof vents with intake vents low on the side walls. The cool air comes in low, sweeps across the plants, and exhausts out the top. This is called passive chimney ventilation and it works without any electricity.
Exhaust fans. For greenhouses over one hundred square feet, add a thermostatically controlled exhaust fan on one end and a louvered intake on the other. Set the thermostat to kick on at eighty degrees.
Shade cloth. A thirty percent shade cloth thrown over the roof in midsummer cuts the heat without starving the plants for light. Roll it off in September when the sun drops.
Humidity control. A closed greenhouse traps moisture. Damp air invites mold, mildew, and fungal disease. Water in the morning so leaves dry before night. Crack a vent every day, even in winter. Hang a humidity gauge and aim for fifty to seventy percent.
Warning
What to Grow Inside a Greenhouse Year Round
A homestead greenhouse turns the calendar into one long growing season. Different crops shine in different months, and the trick is to match what you plant to what the structure can hold.
| Season | Best Crops |
|---|---|
| Late winter to spring | Onions, leeks, lettuce, spinach, kale, chard, seed starts of every kind |
| Late spring to summer | Tomatoes, peppers, cucumbers, basil, eggplant, ginger |
| Summer to early fall | Continued tomatoes, peppers, melons, peppers held for fall harvest |
| Fall to winter | Carrots, beets, salad greens, mache, scallions, parsley, cold hardy herbs |
The summer crops are the showpiece. Tomatoes that ripen in May and again in October. Peppers that fruit for ten months because they never get frozen back. Cucumbers that climb to the rafters. These are the crops the grocery store never gets right and the greenhouse always does.
The winter crops are the real homestead win. Spinach, mache, lettuce, and kale planted in September will hold inside the greenhouse all winter, ready to pick whenever you need a salad. They barely grow in deep winter, but they sit there alive and fresh, waiting for you.
For seed starting, the greenhouse is unmatched. You can fill it with trays in February, transplant out to the garden in May, and start a whole new crop of tomatoes and peppers right inside the greenhouse for late season harvest.
If you are planning out what to start when, the planting calendar gives you exact dates for your zone.
Planting Calendar Tool
Enter your zip code to get a personalized planting schedule based on your USDA zone.
Try it free →A Seasonal Greenhouse Calendar
The greenhouse is busy every month. Here is a simple rhythm to follow through the year.
January. Vent on sunny days. Check thermometers daily. Harvest stored greens. Start onions and leeks from seed in flats.
February. Start peppers, tomatoes, eggplant, and brassicas in heated trays. Top up compost heap. Plant first lettuce sowings.
March. Transplant up potted starts. Begin hardening off cool weather crops. Plant in ground tomatoes inside the greenhouse for early harvest.
April. Move the bulk of seed starts to a hardening off shelf. Direct seed warm season crops in greenhouse beds.
May. Move the last starts outside. Pull thermal mass drums for the season. Open vents wide. The greenhouse becomes a tomato and pepper jungle.
June through August. Run shade cloth on the hottest days. Water daily. Pinch tomato suckers. Harvest constantly. Watch for spider mites and whitefly.
September. Pull tired summer crops. Sow fall and winter greens in ground beds. Clean and disinfect every surface before cold weather.
October. Move thermal mass drums back in. Cover beds with row cover for extra warmth. Start overwintering herbs.
November. Reduce watering. Crack vents on warm days. Harvest greens as needed. The greenhouse holds its winter form.
December. Daylight is the limit, not temperature. Plants pause. You pick salad once a week and dream of spring.
Pair this rhythm with succession planting so you always have a fresh row coming on as the last one finishes.
Common Greenhouse Mistakes to Avoid
Most greenhouse problems come from a few predictable errors. Watch for these and you will avoid years of frustration.
Building too small. A 6 by 8 greenhouse feels enormous on day one and tiny by week three. Build bigger than you think you need.
Skipping ventilation. Plants die from heat more often than from cold inside a greenhouse. Add roof vents, side vents, and automatic openers from day one.
Ignoring the foundation. A greenhouse with a weak base settles, twists, and lets cold air leak in at every seam. Set it on a proper gravel pad, concrete piers, or a knee wall.
Choosing the wrong glazing. Painter's plastic and single sheet polycarbonate both fail fast. Spend the money on double walled material the first time.
Forgetting humidity. A closed greenhouse is a mold farm. Water in the morning, vent every day, and run a humidity gauge.
No heat plan. Hoping the sun will be enough on a zero degree night is how you lose a year of work overnight. Have at least two layers of backup heat ready.
Cluttering the floor. Empty pots, hose reels, and stacks of trays steal growing space and trap pests. Keep the greenhouse tidy and you double its productive area.
Frequently Asked Questions
Frequently Asked Questions
A basic 8 by 10 foot polycarbonate greenhouse kit runs 1,500 to 3,000 dollars. A custom built 10 by 12 wood framed greenhouse with quality glazing usually lands between 3,500 and 6,000 dollars including the foundation. DIY builds with salvaged windows can come in under 1,000 dollars, but expect significant time and skill investment.
Yes, but only with the right setup. Tomatoes need temperatures above 55 degrees and at least ten hours of light to set fruit. In zones 7 and warmer, an unheated polycarbonate greenhouse can keep tomatoes producing eight to ten months a year. North of zone 6, you will need supplemental heat and grow lights to fruit through the darkest months.
It depends on your climate and what you want to grow. Cold hardy greens like spinach, kale, and mache survive in an unheated greenhouse down to zone 4. Tomatoes, peppers, and tropicals need active heat to stay above 50 degrees. Most homesteaders use a mix of passive heat from water drums and compost plus a small electric or propane backup for the coldest nights.
Orient the long side of the greenhouse to face south. This exposes the biggest wall to the low winter sun and traps the most heat during short days. East to west is the standard long axis for homestead greenhouses in the Northern Hemisphere. The peak of the roof should run east to west as well.
Double walled polycarbonate is the best balance of light, insulation, durability, and cost for most homesteaders. It transmits about 80 percent of available light, holds heat better than single pane glass, lasts fifteen to twenty years, and shrugs off hail and falling branches. Glass is beautiful but heavy and fragile. Film is cheap but only lasts four to six years.
Use a combination of roof vents, side vents, automatic vent openers, exhaust fans, and a 30 to 50 percent shade cloth thrown over the roof in midsummer. Open the door early and close it after dark on the hottest days. Water plants in the morning to wet the floor and walls and add evaporative cooling through the day.
Start Building Toward Your Greenhouse
A homestead greenhouse is one of the biggest investments you will ever make in your garden, and one of the most rewarding. It pays you back in fresh food, in seed starting space, in early tomatoes, and in winter mornings spent in a warm sunny room while snow falls outside.
If you are not ready for a permanent structure, start with a DIY hoop house over your best raised bed. Get a season of cold weather growing under your belt. Learn what crops you actually use through the winter, how often you want to walk outside to harvest, and what size feels right.
When you are ready to upgrade, pair your greenhouse with the rest of the food system. The seed saving guide gives you free seed for every tray you fill. The easiest vegetables to grow for beginners tell you what to plant first inside the new structure. And the succession planting guide keeps the beds inside full from January through December.
Pick your spot this fall. Pour the pad before winter. Build through the cold months. Plant your first crop in late winter and harvest fresh food before your neighbors have even ordered their seeds.

Cole
Founder & Lead Researcher
Cole is the founder of Plan Your Homestead. He works in clinical research and brings a research-first lens to every guide on the site, drawing on a long family line of farmers for grounded, practical perspective.
More in Gardening
More articles coming soon. Check back for new gardening content.