
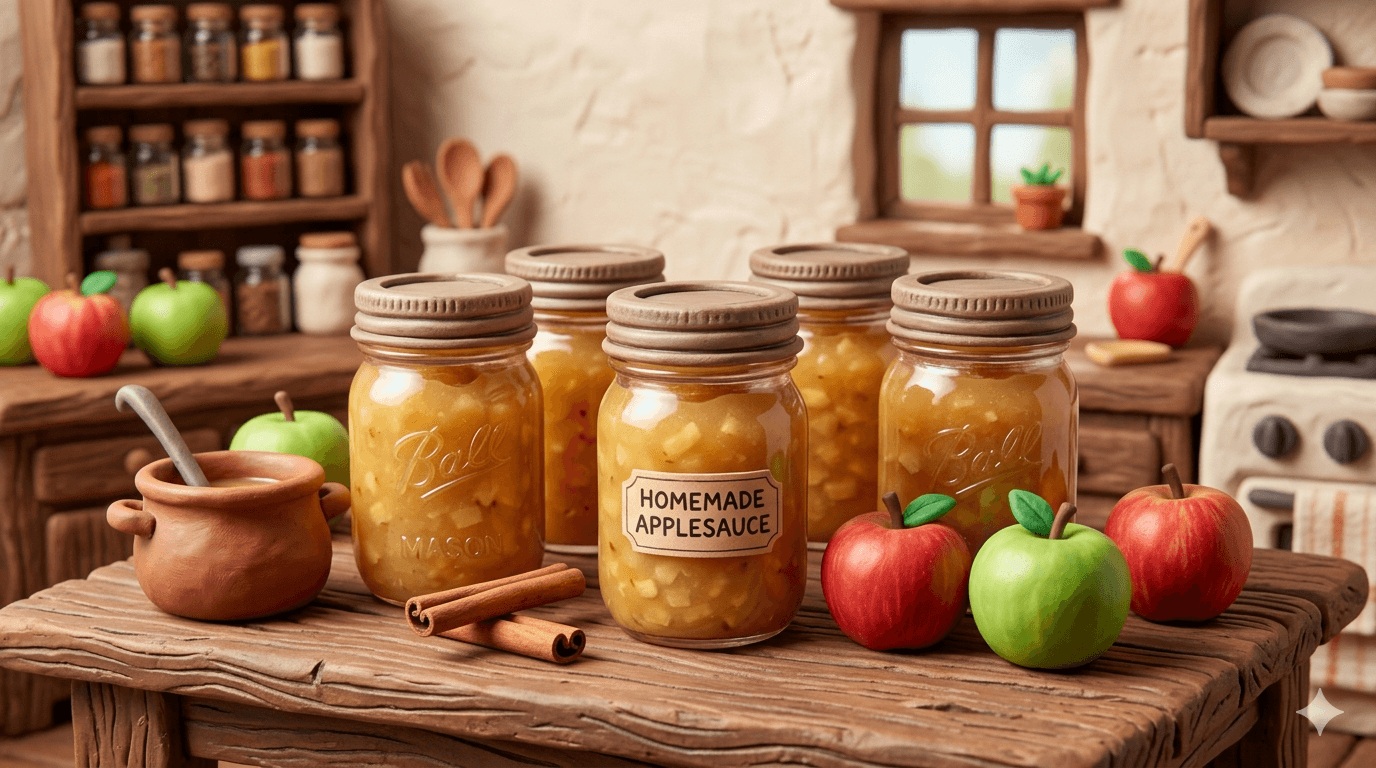
A good canned applesauce recipe turns a bushel of fall apples into a row of warm golden jars that last the whole year. The kitchen smells like cinnamon and orchard. Apples soften on the stove until the skins almost melt. You hear the lids ping as the jars cool on a towel, and you know lunchbox snacks and weeknight desserts are already taken care of.
This guide gives you one tested signature applesauce recipe, a step by step water bath canning process, and three sweetener variations so the sauce fits any pantry style. You will learn which apple varieties cook into the smoothest sauce, why a splash of bottled lemon juice is non negotiable, and how to dial in spice without overwhelming the fruit.
You do not need to be a seasoned canner to nail this. Pick the right apples, follow the recipe by weight, hit the processing time for your altitude, and let the lids do their job. Your first batch will probably disappear before the leaves drop. That is normal.
Why Can Your Own Applesauce
A jar of store applesauce costs three to five dollars and tastes like sweetened pulp. The same jar from your kitchen costs about seventy cents in ingredients if you picked the apples yourself, and it tastes like an actual apple.
Applesauce is also the perfect answer to a glut of fruit. Backyard apple trees give you bushels in a single weekend. A pick your own orchard run fills the truck bed in an hour. Windfall apples that the deer have not gotten to need to be processed within a few days or they turn brown and soft. You can only freeze so many slices. A canning afternoon turns a perishable mountain of fruit into shelf stable jars that hold for a year and a half.
Flavor is the real reason though. You pick the apple blend. You pick the sweetness. You can leave the cinnamon out, add a vanilla bean, swap maple syrup for sugar, or go completely unsweetened for baby food and baking. Once your pantry has a dozen pints of homemade applesauce lined up, the store version is dead to you. The leftover jars become Christmas gifts and lunchbox staples through the spring.
Canning the harvest also locks in nutrition that store sauce loses on the long ride from a factory. Heat processing keeps vitamin C levels solid and preserves the apple fiber. The only thing you give up compared to fresh fruit is a little crunch.
Best Apple Varieties for Applesauce
Not every apple makes good sauce. The best applesauce apples break down fast under heat, balance sweet against tart, and hold their color well. Mealy storage apples are actually a feature here. They turn into silky pulp without much effort.
| Variety | Sweet or Tart | Texture | Notes |
|---|---|---|---|
| McIntosh | Sweet tart | Soft, breaks down fast | The classic applesauce apple. Cooks into a thick pink tinged sauce in twenty minutes. |
| Cortland | Mildly tart | Soft and creamy | Resists browning longer than most. Great for unsweetened sauce. |
| Gala | Sweet | Medium soft | Adds natural sweetness and a fragrant base note. Pair with a tart apple. |
| Honeycrisp | Sweet | Holds shape, then crumbles | Bright flavor, but blend with a softer apple for the right texture. |
| Granny Smith | Tart | Firm, cooks slowly | Adds backbone and acidity. Use up to a third of the blend. |
| Golden Delicious | Sweet | Soft, smooth | Reliable workhorse for a thick golden sauce. |
| Pink Lady | Sweet tart | Firm | Holds its color well and adds a rosy hue. Best in a blend. |
| Jonathan | Tart | Soft | Old fashioned sauce apple with rich flavor. Worth seeking out at orchards. |
| Mixed orchard blend | Variable | Variable | The best applesauce on the planet. Use whatever the tree gives you. |
The single best move you can make is to blend two or three varieties. A two thirds soft sweet apple to one third firm tart apple ratio gives you a sauce that has depth, holds color, and sets up at the right thickness. A pure Honeycrisp sauce will be too sweet and oddly chunky. A pure Granny Smith sauce will be sharp and gray. Mix and the result is balanced.
Skip the spongy, bruised, or freezer burned apples for canning. Soft fruit can be salvaged with a quick trim, but anything fermenting or moldy goes to the compost. The whole batch tastes like the worst apple in the pot.
Why Acidity Matters for Safe Canning
Applesauce is a high acid food. That is what makes water bath canning safe for it. Most apples sit between pH 3.3 and pH 4.0, well below the safety cutoff of pH 4.6. As long as the pH stays low, botulism spores cannot grow inside a sealed jar.
That said, sweet modern apple varieties like Gala and Golden Delicious can creep up close to the safety line. A two tablespoon splash of bottled lemon juice per quart pushes the pH back into a safe zone, locks in apple color, and gives the finished sauce a clean finish. Bottled lemon juice every time. Bottled is standardized. Fresh lemon varies by season and storage and is not safe to rely on for the acid math.
You also need to keep the headspace right. Half an inch of empty space at the top of each jar gives the contents room to expand during processing and produces a strong vacuum seal as the jar cools. Too little headspace and the sauce siphons out under the lid. Too much and the jar may not seal at all.
Warning
Never freelance the acid. Skipping the lemon juice, using an untested sweet apple variety alone, or adding low acid ingredients like onions or extra pumpkin to applesauce can push the pH above the safe limit. Botulism is rare but deadly. Follow the recipe. If you want a tested low sugar or honey version, use the variations in this guide rather than improvising.
This is also why the canning safety rules are worth a careful read before your first batch. The rules are short, they are based on real test data from the USDA and the National Center for Home Food Preservation, and they keep your family safe.
Equipment You Need
Applesauce canning does not need fancy gear. You can do every step with basic kitchen tools and one large pot.
You will need a water bath canner or a tall stock pot with a rack on the bottom that holds jars off the heat. The canner needs to be deep enough to cover the jar tops with at least one inch of water. A second heavy bottomed pot for cooking the apples. A jar lifter, a wide mouth funnel, a headspace tool or chopstick, and a clean ladle. Pint or quart Mason jars, new flat lids, and reusable bands. A digital kitchen scale that reads to one gram. An apple peeler corer slicer if you are doing more than a half bushel. A food mill or fine mesh sieve if you want a smooth sauce without peeling first.
A food mill is the game changer for applesauce. You cook the apples whole with skins and cores on, then crank the soft fruit through the mill. The mill catches every seed, stem, and skin and pushes only smooth golden sauce into the bowl below. No peeling. Half the prep time. And the skins actually add color and pectin that make the finished sauce thicker and rosier.
The hand crank countertop apple peeler corer slicer is the second game changer if you skip the mill. For about thirty dollars it peels, cores, and slices an apple in five seconds with one turn of the handle. A half bushel of apples that would take an hour by hand goes in fifteen minutes.
The scale matters too. Applesauce recipes by weight are far more accurate than recipes by cup or by apple. A medium apple varies wildly. A pound of apple is always a pound of apple. Buy the scale before you buy anything else.
If you are brand new to the process, walk through the canning for beginners guide first. It covers jar prep, lid handling, headspace, and the small details that decide whether a lid seals or pops.
The Signature Homestead Applesauce Recipe
This is the recipe to start with. A blended apple sauce with a touch of brown sugar and just enough cinnamon to taste like fall without overwhelming the fruit. It yields about seven pints or three and a half quarts and processes for twenty minutes in a water bath at sea level.
Ingredients by weight
| Ingredient | Weight | Approximate volume |
|---|---|---|
| Mixed apples (two thirds sweet, one third tart) | 5.5 kg (12 lb) | About one half bushel |
| Water | 240 ml | 1 cup |
| Bottled lemon juice | 90 ml | 6 tablespoons |
| Light brown sugar (optional) | 200 g | 1 cup packed |
| Ground cinnamon (optional) | 6 g | 1 tablespoon |
| Pinch of fine sea salt | 2 g | Half teaspoon |
Prep notes
Use ripe but firm apples. Soft fruit cooks into mush quickly and tastes flat. Overripe apples lose their bright flavor and turn the sauce dull. The sweet spot is an apple that still has a snap when you bite a slice but yields to a thumb press.
Wash the apples in cold water and pat them dry. If you are using a food mill, leave the skins and cores on and just quarter the apples. If you are skipping the mill, run the apples through a peeler corer slicer or peel and core by hand, then quarter or roughly chop. The pieces do not need to be uniform. They are all going to collapse in the pot anyway.
The brown sugar is optional and modest. A cup of brown sugar over twelve pounds of apples adds warmth without making the sauce candy sweet. You can leave it out completely for an unsweetened sauce, swap it for honey or maple, or double it for a dessert style sauce. The recipe still cans safely either way because the acid is doing the safety work, not the sugar.
Tip
Cook a small test batch first. Take two pounds of your apple blend, cook it down with a splash of water, and taste before you commit the whole half bushel. The blend will tell you fast whether you need more tart apples, more sugar, or no sugar at all. The test takes twenty minutes and saves a whole afternoon of disappointment.
Method
-
Prep the canner. Fill your water bath canner two thirds full, put the rack in, and start heating it on medium. Wash seven pint jars or three quart jars, place them in the hot water to warm, and set new flat lids in a small bowl of hot tap water. Bands stay clean and dry on the counter.
-
Wash, quarter, and prep the apples. If using a food mill, just quarter and toss into the pot. If skipping the mill, peel, core, and roughly chop. Drop the prepped apples into a bowl of cold water with a splash of lemon juice to keep them from browning while you work.
-
Cook the apples. Drain the apples and transfer them to a heavy bottomed pot. Add the cup of water to keep the bottom from scorching while the apples start releasing their own juice. Cover and cook over medium heat, stirring every five minutes. The apples will collapse into a soft pulp in about twenty to thirty minutes. Mash with a potato masher if you want chunky sauce. Keep cooking until the texture is what you want.
-
Mill or blend the cooked apples. Run the hot fruit through a food mill set over a large bowl. The mill catches skins, seeds, and any stray stem and leaves you with a smooth golden sauce. If you peeled first, mash with a potato masher for rustic chunky sauce or use an immersion blender for smooth sauce.
-
Return the milled sauce to the pot. Stir in the bottled lemon juice, the brown sugar if using, the cinnamon if using, and the salt. Bring the sauce back to a gentle simmer for five minutes so the sugar dissolves and the flavors marry. Taste and adjust. Add a little more lemon juice for brightness, a little more sugar for sweetness, or a little more cinnamon for warmth.
-
Fill the jars. Lift a hot jar out of the canner with a jar lifter and place it on a folded towel. Set the wide mouth funnel on top. Ladle hot sauce into the jar, leaving half an inch of headspace from the rim. Slide a chopstick or headspace tool down the inside of the jar in a couple of spots to release any trapped air bubbles. Top off if needed to keep the half inch headspace.
-
Wipe the rims. Dip a clean cloth or paper towel in hot water and wipe each jar rim and threads to remove any sauce drips. A clean rim is what makes a clean seal. Center a flat lid on top of each jar and screw a band on fingertip tight. Fingertip tight means just snug. The lid should not move sideways but the band should not be cranked down. Air needs to escape during processing.
-
Process in the water bath. Lower the jars into the canner with the jar lifter, making sure the water covers the tops by at least one inch. Add boiling water from a kettle if needed. Bring the water to a full rolling boil, then start the timer. Process pints for twenty minutes and quarts for twenty minutes at sea level. Adjust for altitude using the chart in the next section.
-
Cool and check the seals. When the timer goes off, turn off the heat and let the jars sit in the water for five minutes. Lift them out with the jar lifter and set them on a folded towel on the counter with at least an inch of space between jars. Leave them undisturbed for twelve to twenty four hours. You will hear the lids pop as they seal.
-
Test the seals. After the jars are completely cool, press the center of each lid. A sealed lid is concave and does not flex. An unsealed lid pops up and down like a button. Refrigerate any unsealed jars and use them within two weeks, or reprocess within twenty four hours with a fresh lid.
Altitude Adjustment Chart
Water boils at a lower temperature as you climb in elevation. Any time you can above 1,000 feet, you have to extend the processing time to make up for the lower boiling point. Use this chart for pint and quart applesauce.
| Altitude | Processing time |
|---|---|
| 0 to 1,000 feet | 20 minutes |
| 1,001 to 3,000 feet | 25 minutes |
| 3,001 to 6,000 feet | 30 minutes |
| Above 6,000 feet | 35 minutes |
If you are not sure of your elevation, search your address on any elevation lookup site. Round up to the next bracket if you are within fifty feet of a cutoff. There is no penalty for processing a few extra minutes. There is a real penalty for processing too little.
Sweetener Variations
The signature recipe uses a modest amount of brown sugar. The same base recipe takes any sweetener you want, including no sweetener at all. The acid from the lemon juice is doing the safety work, so you have freedom to play with the sugar side.
Unsweetened Applesauce
Leave the sugar out entirely. Use a heavier hand on the sweet apples in your blend, like Gala, Golden Delicious, and Honeycrisp, and lean lighter on the tart apples. The natural fruit sugar carries the sauce. Keep the lemon juice and the salt for the acid math and a clean finish.
Unsweetened sauce is the right choice for baby food, baking applications where you control sugar elsewhere, and anyone watching added sugar. It also pairs well with savory dishes like pork chops and potato pancakes. The flavor is purer and more apple forward than the sweetened version. Expect the color to be slightly paler since brown sugar adds depth.
Processing time stays the same. Twenty minutes for pints and quarts at sea level.
Honey Sweetened Applesauce
Replace the cup of brown sugar with three quarters of a cup of mild honey. Use clover, wildflower, or orange blossom honey for a cleaner flavor. Buckwheat or dark forest honey will overwhelm the apples.
Stir the honey in at the end of cooking, after the milling step, rather than at the start. Boiling honey for long stretches drives off the delicate floral notes that made you reach for honey in the first place. A short five minute simmer to dissolve and combine is plenty.
Honey gives the sauce a warm rounded sweetness and a faint floral lift. It pairs beautifully with a vanilla bean variation. The color comes out a deeper amber than the brown sugar version. Processing time is unchanged at twenty minutes.
Maple Sweetened Applesauce
Replace the cup of brown sugar with three quarters of a cup of pure maple syrup. Use Grade A Amber or Dark for the strongest flavor. Avoid pancake syrup, which is mostly corn syrup and artificial flavor and will dilute the sauce while ruining the taste.
Stir the maple syrup in at the end of cooking like the honey version. Heat too long and the maple flavor fades to a generic sweetness. A short final simmer keeps the maple notes bright.
Maple applesauce tastes like New England in October. It is exceptional with whole grain pancakes, pork roast, and oatmeal. The color leans toward a rich golden brown. Processing time stays at twenty minutes for pints and quarts at sea level.
Spice and Flavor Variations
The base recipe takes spice well without losing the apple flavor. Start with small amounts and adjust to taste before filling jars.
Classic cinnamon. One tablespoon of ground cinnamon per twelve pounds of apples gives the sauce that warm fall flavor everyone expects. For a stronger cinnamon hit, simmer two cinnamon sticks in the apples during the cook and fish them out before milling.
Vanilla bean. Split one whole vanilla bean lengthwise, scrape the seeds into the sauce after milling, and drop the empty pod in for the final simmer. Vanilla applesauce is luxurious and pairs perfectly with the honey or maple variations.
Ginger and cardamom. Add one teaspoon of ground ginger and a quarter teaspoon of ground cardamom for a chai spiced sauce. Excellent over yogurt or with a slice of pound cake.
Apple pie spice blend. Substitute the cinnamon with a tablespoon of pre mixed apple pie spice for instant pie flavor in a jar. The blend usually contains cinnamon, nutmeg, allspice, and clove.
Chunky vs smooth. Mash by hand for chunky sauce with visible apple pieces. Run through a food mill for smooth classic sauce. Blend with an immersion blender for super smooth almost yogurt textured sauce that babies and toddlers love.
Rosy pink sauce. Cook a couple of red skinned apples like McIntosh or Pink Lady with the skins on, then mill. The skins release a beautiful natural pink color into the sauce.
Troubleshooting
Browning sauce. Apples brown when cut surfaces hit air. Drop prepped apples into lemon water immediately, work fast, and add the bottled lemon juice during cooking. Browned sauce is still safe to eat but loses some visual appeal.
Separation in the jar. A layer of clear liquid on top of the sauce after a few weeks of storage. Caused by under cooking the apples or using too dry an apple variety. The sauce is safe. Stir before serving and the texture comes right back. Next batch, cook the apples a few minutes longer or add a softer apple to the blend.
Sauce that did not seal. Common causes are food residue on the rim, bands tightened too hard, jars not covered with enough water during processing, or a hairline crack in a jar. Refrigerate the unsealed jar, eat within two weeks, and try again next batch. Wipe rims carefully. Use fingertip tight, not crank tight, on the bands.
Mushy or watery sauce. Too much water added during cooking, or apples that were too soft to begin with. Drain off some liquid before milling. Next time, use less water at the start and let the apples release their own juice as they cook down.
Sauce that is too thick. Run an immersion blender through the sauce or stir in a splash of warm water before filling jars. A sauce too thick to ladle smoothly will trap air pockets and may siphon during processing.
Foam on top of the jars. Cosmetic only. Skim foam off with a slotted spoon before filling jars, or stir a half teaspoon of butter into the sauce before ladling to break the foam.
Dark spots inside a sealed jar. Likely oxidation from a poor seal or air trapped above the sauce. If the lid is sealed and the sauce smells right when opened, it is safe. If anything smells off or looks moldy, throw the jar out without tasting it.
Storage and Shelf Life
Stored cool and dark, sealed jars of applesauce hold for at least eighteen months and often longer. The sauce stays safe well past two years but the color and flavor start to fade after the first year. A basement pantry, a cool closet, or any room that stays below seventy degrees Fahrenheit and out of direct sunlight is ideal.
Label each jar with the contents and the canning date. A simple piece of masking tape with a sharpie line works fine. Rotate the oldest jars to the front so you eat the older ones first. Once opened, refrigerate the jar and use the sauce within ten to fourteen days. The sauce will not spoil dangerously in the fridge during that window. It may develop a faint fermented note after two weeks, which is your sign to either eat it fast or compost it.
Freezing is the right move for any unsealed jars or for extra sauce that did not fit into the canning batch. Applesauce freezes beautifully in plastic containers or freezer bags with an inch of headspace for expansion. Frozen applesauce holds for a year and thaws overnight in the fridge. For more on the freezer side of preservation, the homestead freezing guide covers everything from organization to power outage prep.
Frequently Asked Questions
Frequently Asked Questions
Only if you do not own a food mill. The mill catches every skin, seed, and stem in one pass and pushes silky sauce into the bowl below. Cooking the skins on actually makes the sauce thicker, rosier, and slightly more nutritious because apple skins are full of pectin and antioxidants. If you have no mill, peel and core before cooking using a hand crank apple peeler or a paring knife.
Yes. Sugar in applesauce is purely for flavor. The safety comes from the natural acidity of apples and the bottled lemon juice. Pick sweet apple varieties like Gala or Golden Delicious to compensate, keep the lemon juice and salt, and process for the same time as the sweetened version. Unsweetened applesauce is perfect for baby food, baking, and savory dishes.
Roughly fourteen to eighteen quarts per bushel, depending on the apple variety and how much you cook it down. A half bushel, which is around twenty pounds of apples, yields about seven to nine quarts of finished sauce. Plan for the lower end if you are using very juicy varieties since they cook down more.
Yes for safe canning. Bottled lemon juice is standardized to a known acid level. Fresh lemon juice varies from pH 2 to pH 4 depending on the lemon and the season. The acid is what keeps the pH below the safety cutoff for water bath canning. Save fresh lemon for lemonade and stick with bottled for canning.
Yes, within twenty four hours. Pop the lid, check the rim for nicks or food residue, wipe it clean, add a brand new flat lid, and run the jar through the full water bath again. After twenty four hours, refrigerate or freeze the sauce instead. Repeated heat cycles degrade the flavor and waste energy.
Pints are the workhorse for everyday use. A pint of sauce is just right for two or three people in a meal, fits in lunchboxes after opening, and gets used up fast in the fridge once opened. Quarts make more sense for big families or for using sauce in baking. Half pints are great for baby food portions. All three sizes process for the same twenty minutes at sea level.
Apples brown when exposed to air or when cooked too long without enough acid. Drop cut apples into lemon water as you prep, add the bottled lemon juice early in cooking, and do not over cook the sauce. Some browning is normal and harmless. If the sauce smells right and the seal is good, the jar is fine to eat. Cosmetically, lighter colored apple varieties and a faster cook produce the brightest sauce.
Yes, with care. Trim any bruised, soft, or insect damaged areas and use the rest. Any apple that smells fermented, has mold, or is brown all the way through goes to the compost. One bad apple in the pot taints the whole batch. Windfall apples that are still firm and smell fresh make excellent sauce and are often the best price of the season.
Yes. USDA approved steam canners are safe for high acid foods with processing times under forty five minutes. Applesauce qualifies. Follow the steam canner manufacturer instructions and use the same processing time you would for water bath canning. Steam canners save a lot of water and heat up faster than a full water bath.
Pair Your Applesauce With the Rest of the Pantry
A shelf full of applesauce is a beautiful thing, but applesauce works even better as part of a bigger preservation plan. Pair it with home canned tomato sauce and salsa for the savory side of the pantry, strawberry jam and grape jelly for the rest of the sweet shelf, and dehydrated apple rings for snacks and trail mix. The whole apple harvest gets turned into something useful, and nothing rots in a bowl on the counter.
Before you run your first batch, read the canning safety rules one more time and walk through water bath vs pressure canning if any step of the process feels unfamiliar. The rules are short, the technique is simple, and the result is a pantry that pays you back all year.
If you want to dial in altitude or batch size for your specific setup, the canning calculator does the math for you in a few clicks. Bookmark it before apple season starts.
Now go fill some jars. Your future self, on a cold January morning with a warm bowl of homemade applesauce on a stack of pancakes, is going to thank you.

Cole
Founder & Lead Researcher
Cole is the founder of Plan Your Homestead. He works in clinical research and brings a research-first lens to every guide on the site, drawing on a long family line of farmers for grounded, practical perspective.
More in Food Preservation
More articles coming soon. Check back for new food preservation content.