The average American flushes 24 gallons of drinking water down the toilet every single day. Stop and read that again. We take the cleanest, most expensive water on the property, mix it with our waste, and then pay someone to clean it up downstream. For most homesteaders, the moment they really sit with that math is the moment a composting toilet starts to sound less weird and more obvious.
A composting toilet handles the same job with no water, no septic tank, no leach field, and no monthly bill. Done right it produces a rich, soil safe finished compost that feeds your fruit trees and ornamentals for years. Done wrong it produces a smelly bucket that scares your in laws away forever. The difference is almost entirely in the setup and the routine, and both are easier than you think.
This guide walks you through every part. You will learn how composting toilets actually work, the honest pros and cons, which system fits your homestead, how to install one, how to handle humanure safely, and what the law says about all of it. By the end you will be able to pick a toilet, build a finishing pile, and run the whole loop with confidence. Grab a coffee. Let us walk through it together.
What a Composting Toilet Actually Is
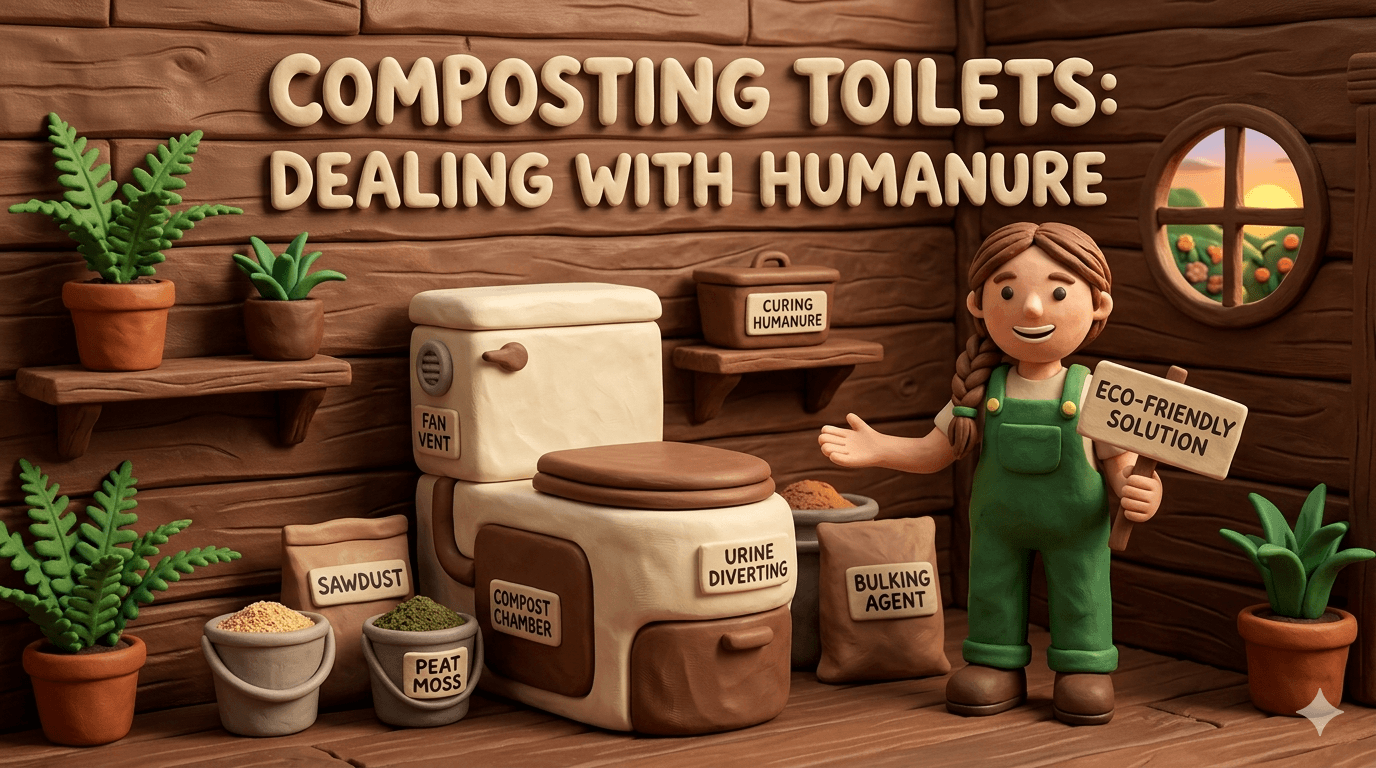
A composting toilet is a sealed bathroom fixture that collects human waste in a dry chamber and lets natural decomposition turn it into stable organic matter. There is no flush. There is no water in the bowl. There is no pipe to a city sewer or a backyard septic tank. Everything happens inside the unit until you empty it onto a finishing pile.
The basic recipe is simple. Solids drop into a sealed compost chamber. A handful of dry carbon material like sawdust or peat moss covers each deposit. A vent fan pulls air down through the chamber and out a roof stack, which keeps the bathroom smelling neutral and dries the contents. Time, microbes, and oxygen do the rest.
A composting toilet is not the same as a chemical toilet. A chemical toilet uses a blue formaldehyde based liquid that pickles the waste and has to be dumped at an approved sewer station. A composting toilet is not an incinerating toilet either. Incinerating toilets burn waste to ash with electricity or propane and use serious amounts of power. The composting approach is the only one that produces a useful end product and works completely off grid with almost no inputs.
Carbon cover material is the unsung hero of every system. Every visit to a composting toilet ends with a scoop of dry organic carbon dropped on top. Sawdust is the classic. Peat moss, coco coir, and crushed leaves all work. The cover material absorbs moisture, blocks odor, balances the carbon to nitrogen ratio, and gives the microbes a structure to colonize. Skip the cover and you do not have a composting toilet. You have a bucket.
Why a Composting Toilet Is Worth It
The first reason is water. A modern flush toilet uses 1.6 gallons per flush. A family of four flushes 20 to 30 times a day. That is roughly 35 to 50 gallons of clean water sent down the drain every day, or around 15,000 gallons a year. On a well that is wear and tear on the pump. On a cistern that is your entire summer of rainwater. On a city connection that is real money. A composting toilet uses zero gallons.
The second reason is the soil. Finished humanure is one of the richest soil amendments on the planet. A two year cured pile breaks down to a dark crumbly compost that smells like a forest floor and feeds fruit trees, perennials, and ornamentals for years. The Joseph Jenkins method has been documented by gardeners for almost fifty years with no safety incidents when the compost is properly cured. Done right, your bathroom feeds your orchard.
The third reason is independence. A composting toilet has no pipes to freeze, no septic tank to pump, no leach field to clog, and no power requirement beyond a small 12 volt fan. When the well loses pressure, when the power goes out for three days, when the septic guy is six weeks out, your bathroom still works exactly the same. Few systems on a homestead match that level of reliability.
The fourth reason is the install cost. A septic system runs 5,000 to 25,000 dollars depending on soil type and slope. A composting toilet runs 25 dollars for a five gallon bucket setup, 1,000 to 1,500 dollars for a quality self contained unit, or 2,500 to 4,500 dollars for a full central system. Even the premium tier is less than half the cost of conventional waste infrastructure, and there is no excavation crew involved.
The fifth reason is the long timeline. A septic tank gets pumped every three to five years. A leach field has a 25 to 40 year lifespan and then needs full replacement. A composting toilet has no comparable failure point. You replace a fan after a decade. You swap a gasket every few years. The chamber lasts as long as the structure.
The Pros and Cons of Composting Toilets
Time for the honest version. Every homesteader weighing a composting toilet deserves a straight read on both sides before they spend the money. Here are the real composting toilet pros and cons after the marketing brochures and the doomers both go quiet.
| Pros | Cons |
|---|---|
| Uses zero gallons of water per flush | Requires daily habit changes, like remembering cover material |
| Produces a rich soil amendment for fruit trees and ornamentals | Finished compost is not legal everywhere for any garden use |
| Install cost is a fraction of a septic system | Initial sticker price on premium units feels steep |
| Works during power outages and water shortages | Self contained units need emptying every 2 to 6 weeks |
| No pipes, no leach field, no annual pumping | Wet pile or low carbon means odor problems |
| Compact enough to fit a tiny home or RV | Some local codes still require a backup approved system |
| Handles the waste of multiple seasonal visitors | A finishing pile needs space, often a dedicated outdoor area |
| One small 12 volt fan is the only power draw | Urine diverting models add a second container to manage |
Notice that almost every con on the right side is a workflow issue, not a fundamental problem. A wet pile is a fixable maintenance habit. A space need is a planning choice. A code rule is a paperwork step. The pros on the left, by contrast, are structural advantages that no flush toilet can match.
Tip
If you are choosing between a composting toilet and a brand new septic system for a small cabin or off grid build, run the math on a single sheet of paper. Most homesteaders find the composting setup pays for itself in the first year just on water savings and skipped excavation.
The Main Types of Composting Toilets
Most beginners assume a composting toilet is one thing. There are actually five common designs, and each one fits a different lifestyle and budget. Pick the right type up front and the rest of the setup falls into place.
Self contained electric units
These are the all in one boxes that sit on a bathroom floor and look mostly like a regular toilet. The compost chamber is built right into the base. Most include a urine diverter in front and a solids chamber in the back. A small 12 volt fan vents the unit through a flexible hose to the outside. Capacity runs from one weekend to about three weeks for a family of two before the chamber needs emptying.
Nature's Head and Air Head are the two best known examples. Both have urine diverting bowls, low power draw, and reasonable capacity for a small cabin or van. The interior is fiberglass, the fan is a 12 volt computer style fan, and the agitator handle on the side mixes fresh deposits into the compost mass. These are the most popular composting toilet in North America by a wide margin.
The trade off is capacity. A self contained unit is fine for two adults using it part time. A family of four living full time will be emptying solids weekly, which gets old. If your household is bigger than two people full time, look at a central system instead.
Urine diverting dry toilets
A urine diverting dry toilet, often shortened to UDDT, splits the two outputs at the bowl level. Urine drains to one container or to a soakaway pit outside. Solids drop into a separate bucket or bin lined with cover material. Because liquid never enters the solids chamber, the contents stay dry, odor stays low, and emptying is easier.
Separett, Privy 500, and OGO Origin are the well known commercial UDDT brands. Separett is the Swedish standard and has been in continuous production since the 1970s. These units almost always include a small 12 volt vent fan but they do not have an internal agitator. Instead, the solids bucket gets carried out to a finishing pile every few weeks.
UDDTs shine in cold climate cabins where keeping the pile warm is a constant battle. The dryness alone solves most odor problems before they start. The downside is the extra urine handling. You will be emptying a jug or running a drain line through the wall.
Central or remote composting systems
A central system separates the bowl in the bathroom from the composting chamber somewhere else, usually in a basement, a crawl space, or an attached outbuilding. The bowl is a low water or waterless throne that drops material down a chute to a much larger compost reactor below. Sun-Mar Centrex and Phoenix Composting Toilets are the leading examples in this category.
Because the chamber sits below the bowl, capacity is measured in person years instead of person weeks. A Phoenix unit can handle a family of four full time with emptying only once or twice a year. The compost finishes inside the reactor, so what you remove is already on its way to being finished compost.
The downside is install complexity. A central system needs a vertical chute, a chamber location with drainage and venting, and usually a small electric heating element to keep the reactor warm. Cost runs 2,500 to 5,500 dollars before installation. For a full time off grid home, this is the gold standard. For a weekend cabin, it is overkill.
Site built sawdust toilets
This is the original Joseph Jenkins humanure system, made famous by his book The Humanure Handbook in 1995. The toilet is a wooden box with a regular toilet seat on top and a five gallon bucket inside. Every deposit gets covered with a generous scoop of sawdust. When the bucket is two thirds full, you carry it to an outdoor humanure pile, dump it, cover it with straw, and put a clean bucket back.
The total parts cost is about 25 dollars and a free afternoon of woodworking. The system works in every climate, has no moving parts, and produces excellent finished compost when the pile is built and maintained correctly. It is the most economical composting toilet in existence and arguably the most reliable.
The trade off is the labor and the public image. You will be carrying buckets two or three times a week for a family of four. You will need a covered outdoor area for the finishing pile. And telling your neighbors you have a sawdust toilet earns a different reaction than telling them you have a Nature's Head. The performance is identical. The optics are not.
Vermicomposting worm toilets
A worm toilet adds a colony of red wiggler composting worms to the solids chamber. The worms accelerate the decomposition, reduce volume by 60 to 80 percent, and produce vermicompost as a byproduct. Designs range from DIY plywood boxes to the commercial Vermitoilet system in Australia.
Worm toilets have a passionate following in warm climates where the worms can stay active year round. In cold climates the worms slow down or die off in winter, which removes the main benefit. They also need careful attention to moisture and pH. Done right they are the best smelling composting toilet of any type. Done wrong they are a learning experience nobody wants to repeat.
Commercial Model Comparison Table
Here is how the main commercial categories stack up. Specific brand models vary, but the pattern by category is consistent enough to plan around.
| Category | Example Models | Typical Cost | Power Need | Install Complexity | Maintenance Cadence |
|---|---|---|---|---|---|
| DIY sawdust bucket | Joseph Jenkins design | 25 to 75 dollars | None | Very low | Empty every 3 to 5 days |
| Self contained electric | Nature's Head, Air Head, OGO Origin | 900 to 1,500 dollars | 12 volt fan, 1 to 3 watts | Low | Solids every 2 to 4 weeks, liquid every 2 to 4 days |
| Urine diverting dry | Separett Villa, Privy 500 | 700 to 1,400 dollars | 12 volt fan, 2 to 5 watts | Low | Solids every 3 to 6 weeks, liquid daily or piped |
| Central composting | Sun-Mar Centrex, Phoenix | 2,500 to 5,500 dollars | 12 volt fan plus optional heater | High, vertical chute and chamber room | Finishing tray every 4 to 12 months |
| Vermicomposting | Vermitoilet, DIY worm bin | 200 to 900 dollars | Low to none | Medium | Add worms once, harvest castings yearly |
A useful rule of thumb. If you have two adults part time, a self contained unit is the easiest entry. If you have a family full time, a central system pays back its higher cost in saved labor inside a year. If you want the cheapest reliable setup and you do not mind the bucket ritual, the DIY sawdust toilet wins on every measure except curb appeal.
How the Composting Process Actually Works
A composting toilet is not just storage. It is a slow living chemistry experiment in a box. Understanding what is happening inside the chamber will save you most beginner mistakes.
Composting needs four inputs. Carbon, nitrogen, oxygen, and moisture. Get any one of them wrong and the pile shifts from aerobic decomposition into anaerobic rot, which is where the smell comes from. Get all four right and the contents break down into stable compost with no notable odor at all.
Human waste is high in nitrogen. Cover material is high in carbon. The target ratio for hot composting is roughly 25 to 30 parts carbon to 1 part nitrogen by volume. In practice, a generous scoop of sawdust per deposit gets you close to the right ratio without measuring anything. If you ever notice an ammonia smell, you need more carbon.
Oxygen comes from two places. The vent fan pulls air down through the chamber, and the structure of the cover material creates pockets of air throughout the pile. This is why fine dense materials like garden soil are bad cover and coarse dry materials like sawdust are good. A pile that gets compressed and wet loses its oxygen and goes anaerobic in days.
Moisture is the variable most beginners get wrong. A composting pile likes the moisture of a wrung out sponge. Drier than that and decomposition stalls. Wetter than that and the pile goes anaerobic. The single biggest reason for a stalled, smelly pile is too much liquid. Urine diversion solves most of this. Adequate cover material handles the rest.
There are two temperature ranges to know. Mesophilic composting happens between 50 and 105 degrees Fahrenheit and is the slower, lower temperature breakdown. Thermophilic composting kicks in above 105 degrees and accelerates the work dramatically. Thermophilic temperatures also kill almost every pathogen that could be present in human waste. A well built outdoor finishing pile will hit 130 to 160 degrees within a week of being topped up.
The full breakdown timeline depends on your method. Inside a heated central composting toilet, finished compost is ready in 4 to 12 months. In an unheated outdoor humanure pile, the standard recommendation is one year of active composting followed by one year of curing for a total of two years before the compost is used. The extra year is the safety margin. Use it.
Warning
Never use fresh humanure on a vegetable garden. Fresh material can carry pathogens like E. coli, salmonella, and parasites. A properly built two year cured humanure compost is safe for most uses. Fresh humanure is not. The waiting time is the whole safety system. Respect it.
Installation and Setup
The install is simpler than most people expect. The main task is venting. Almost every composting toilet ships with a 12 volt fan and a few feet of flexible hose that need to be routed to the outdoors.
Pick a location with a short straight vent path. The fan in most units is small, around 1 to 5 watts, and it cannot push air through 20 feet of bent ducting. A vent run under 10 feet with one or two gentle bends is ideal. The vent can exit through a wall or through the roof. A roof vent draws better thanks to the stack effect and is the standard.
Use the kit hardware. The flexible hose, the wall thimble, the rain cap, and the rodent screen all come together for a reason. Substituting parts is where leaks and pest problems start. If you upgrade anything, upgrade to a metal vent pipe for the run outside the wall. UV breaks down plastic over time.
The fan needs a 12 volt power source. On grid that means a small wall transformer. Off grid that means a tap on your 12 volt battery system or a tiny dedicated solar panel and battery for just the fan. A 5 watt panel and a 7 amp hour battery will run a composting toilet fan year round with energy to spare. Wire it through a low voltage disconnect to protect the battery.
Floor protection is a small detail that prevents big problems. Place the unit on a waterproof mat or a sealed tile pad. Spills happen, especially during emptying. A simple shower style pan keeps the floor underneath safe from any accident.
Urine drainage depends on the unit. Most self contained models collect urine in a jug that you carry out every two to four days. Most UDDT models can be plumbed through the wall to a soakaway pit, a discreet outdoor garden bed, or a covered jug that you empty weekly. Whichever you choose, plan a slope of one quarter inch per foot of run and keep the line short. Urine corrodes long thin tubing fast.
For central systems, the install is the actual project. You will be cutting a 10 to 12 inch chute through the bathroom floor down to the chamber room. The chamber room itself needs a vent, a small access door, a level floor with a drain, and ideally a small space heater for cold climates. Plan a weekend with a friend who has framed before.
Note
The single most overlooked install detail is making the unit easy to empty. Leave at least 18 inches of clear space in front of the toilet and a clear path from the bathroom to the door. Carrying a half full chamber out of a tight space is the moment most people regret saving an inch on the layout.
Daily, Weekly, and Annual Maintenance
A composting toilet rewards routine. Build the habit once and the work becomes invisible. Skip the routine and the bathroom tells on you within a week.
| Frequency | Task |
|---|---|
| Every visit | Add a small scoop of dry cover material after solids |
| Daily | Check urine container or drain, top off cover material bin |
| Weekly | Wipe down the bowl with vinegar and water, check fan operation |
| Every 2 to 4 weeks | Empty solids chamber to outdoor finishing pile (self contained units) |
| Every 3 to 6 weeks | Empty solids bucket to outdoor finishing pile (UDDT units) |
| Every 4 to 12 months | Harvest finished compost from central system tray |
| Quarterly | Wash the urine collection container with vinegar to control mineral buildup |
| Annually | Replace 12 volt fan if airflow drops, inspect hoses and gaskets |
| Every 2 years | Replace bowl gasket and any worn agitator parts |
A few subtle habits separate a calm bathroom from a struggling one. Always close the bowl trap door or seat after each use to keep the air seal tight. Keep the cover material bin within arm's reach so nobody is tempted to skip a scoop. And never, ever pour graywater, mop water, or food scraps into the composting chamber. Those four habits alone prevent most of the problems beginners report.
Cover Materials and the Odor Question
Cover material does more work than any other single ingredient in the system. Choose well and the bathroom smells like nothing at all. Choose poorly and even the best toilet on the market becomes unpleasant.
Sawdust is the classic and still the standard. The best sawdust comes from a real lumber operation, not from a pet store. Pet store sawdust is often kiln dried pine shavings that pack down too tightly. Mill sawdust has a mix of particle sizes that holds air pockets while still absorbing liquid well. A 5 gallon bucket of mill sawdust lasts a couple of two adult households about three weeks.
Peat moss is the next most common cover material. It is widely available, light to handle, and slightly acidic, which suppresses odor causing bacteria. The downside is peat moss is mined from peat bogs that are not a renewable resource on a human timescale. For most homesteaders that ethical concern is enough to pick another option.
Coco coir is the renewable alternative to peat moss. It is made from the husk of coconuts and has nearly identical absorbency and texture. A compressed coco brick the size of a paperback expands into a 5 gallon bucket of cover material when you add a quart of water. Many composting toilet owners who care about sustainability have switched entirely to coir.
Crushed dry leaves work great in fall and winter when you have a free supply. Run the leaves through a mulching mower or a shredder first. Whole leaves clump and lose their air pockets. Shredded leaves behave a lot like coarse sawdust.
Biochar is a more recent addition and worth knowing about. A handful of biochar in the cover material binds nitrogen, absorbs odors at the molecular level, and pre charges the carbon for the finishing pile. Most homesteaders use biochar as 10 to 20 percent of their cover mix rather than the whole thing.
Avoid clay heavy soil, sand, kitty litter, and pet store bedding labeled as a urine absorbent. All of them either pack down, fail to compost, or contain chemicals you do not want in your finishing pile.
About the odor itself. A properly run composting toilet does not smell. People who visit a well maintained system are usually surprised by how neutral the bathroom is. If you smell ammonia, your pile needs more carbon. If you smell rotten eggs or anything sour, your pile is too wet and has gone anaerobic. If you smell anything at all, the fan probably stopped. Track odor as your first diagnostic tool.
Humanure: Finishing, Curing, and Using It Safely
This is the section every beginner wants to read first. Humanure is the finished compost made from human waste plus cover material plus time. Done correctly it is one of the safest, richest soil amendments you can make. Done incorrectly it is a public health risk. The whole game is in the finishing pile.
Build a dedicated humanure pile area outside, away from food gardens and water sources, ideally 100 feet from any well. The Joseph Jenkins design calls for three open topped bays roughly 4 feet on each side. Bay one collects active material for a year. Bay two cures for a year. Bay three holds finished compost ready for use. You rotate through the bays on a yearly cycle.
When you empty the toilet bucket or chamber, dump the contents in the center of the active pile. Pull material from the edges to cover. Add a generous layer of straw, leaves, or weeds on top. The cover layer is critical. It traps heat, blocks flies, controls odor, and keeps the pile aerobic.
A properly built pile heats up. Within a week of a fresh addition, the interior of the pile should hit 130 to 160 degrees Fahrenheit. A 20 dollar compost thermometer is the only tool you need to verify this. The high temperatures are what kill pathogens. The longer the pile sits above 130, the safer the finished compost.
After the first year, stop adding to the pile. Cover it with a final layer of straw and let it cure undisturbed for a full second year. The curing phase is when remaining pathogens die off, when the pile cools, and when the compost transforms into a dark crumbly material that smells like a forest floor. Two full years from the last addition is the minimum.
Where to use finished humanure depends on your comfort level and your local laws. The conservative use case is fruit trees, ornamental shrubs, perennial flower beds, and hardwood plantings. The compost goes on the surface as a mulch and is allowed to work its way into the soil naturally. The cautious use case adds berry bushes and tree fruits as long as the compost does not contact the harvest directly.
Many experienced humanure composters also use the finished compost on vegetable gardens after the full two year cure. The science supports this when the pile has been properly managed and has hit thermophilic temperatures. The conservative approach is still to reserve humanure for non food crops. The choice is yours, but the wait is non negotiable.
Warning
Never short the curing time. The single most dangerous mistake new humanure composters make is using compost from a pile that is only six or twelve months old. The wait is the safety system. If you cannot wait two years, run two piles offset by a year so you always have finished compost ready.
Cost Breakdown
Here is what to expect across the range of options once you include the supporting parts.
| System | Toilet Cost | Setup Cost | Yearly Operating Cost |
|---|---|---|---|
| DIY sawdust bucket | 25 to 75 dollars | 50 dollars for finishing bins | 30 to 60 dollars for sawdust |
| Self contained electric (Nature's Head, OGO) | 900 to 1,500 dollars | 100 to 200 dollars for vent kit and floor pad | 30 to 60 dollars for cover material |
| Urine diverting dry (Separett, Privy) | 700 to 1,400 dollars | 100 to 250 dollars for vent and urine drain | 30 to 60 dollars for cover material |
| Central composting (Sun-Mar, Phoenix) | 2,500 to 5,500 dollars | 800 to 2,000 dollars for chamber room, chute, and small heater | 50 to 150 dollars for cover material and a small heating element |
Compare any of those to a fresh septic system at 5,000 to 25,000 dollars plus the well, the pump, and the running water bill, and the math gets interesting quickly. Even the premium central composting setup pays for itself inside two years on a homestead that would otherwise need full waste infrastructure built from scratch.
Legal Considerations
Composting toilet legality varies more than any other off grid system. The rules depend on your state, your county, your specific use case, and sometimes your individual building inspector. Plan the paperwork before you order the toilet.
Most states allow composting toilets in some form. The catch is what counts as a primary waste system. In many jurisdictions a composting toilet handles the solids legally but you still need an approved system for graywater from sinks, showers, and the washing machine. That graywater system can be as simple as a graywater garden, a mulch basin, or a small leach field, but it has to exist on paper.
A handful of states are openly friendly to composting toilets. Vermont, Maine, Massachusetts, Oregon, Washington, and New Mexico have all built composting toilets into their state plumbing code. Permitting in these states is straightforward. The composting toilet is named in the code and an inspector knows what to look for.
A larger group of states allow composting toilets under general plumbing variance provisions. This means you can use one, but a building inspector has to sign off on your specific installation. Florida, Texas, Colorado, Arizona, California, and most of the Northeast fall in this group. Apply for the variance early in your build, not after the framing is up.
A small minority of jurisdictions still require a full septic system regardless of whether you flush anything into it. In these areas the most common move is to install the septic system as a backup, then install and use the composting toilet as the active waste system. The septic stays empty and dry but satisfies the inspector. It feels redundant. It is. But it is the path of least resistance in those counties.
Internationally the picture is similar. Canada generally allows composting toilets at the provincial level. Australia and New Zealand have national standards that name approved models. The UK and most of Europe treat them as a normal off grid option. Check your specific local rules before you build.
The finished humanure has its own legal layer. Some states regulate where humanure can be applied. Others have no rules at all. Many fall in the middle, where humanure on private property for non food crops is unregulated, and selling, transporting, or applying it commercially is restricted. If you are running a homestead for your own family on your own land, you are usually in the clear.
Note
Call your county health department before you order anything. Ask three specific questions. Is a composting toilet allowed as the primary waste system. Is a graywater plan required separately. And what documentation do you need to submit. A 15 minute phone call will save you months of paperwork later.
Common Mistakes Beginners Make
These are the eight mistakes that turn a calm composting toilet into a regret. Every one of them is easy to avoid once you know it is coming.
- Overloading the solids chamber. Self contained units have a real capacity limit. Push past it and the chamber goes anaerobic. Empty when the manufacturer says, not when you feel like it.
- Letting the pile get wet. Urine in the solids chamber, mop water poured down the bowl, condensation from a poorly vented bathroom. All three drown the pile. Keep liquid out.
- Using the wrong cover material. Garden soil compacts. Kitty litter is a chemical mess. Hardwood pellets do not break down. Stick to sawdust, coco coir, peat moss, or shredded leaves.
- Ignoring the vent fan. The fan is the lungs of the system. Check it weekly. Replace it when airflow weakens. A dead fan turns a working toilet into a smell broadcaster in three days.
- Skipping the second bin. A finishing pile is not optional. The chamber is stage one. The outdoor pile is stage two. You need both. Skipping the cure is the most dangerous mistake.
- Using fresh humanure on the garden. This is the only mistake on this list that has health consequences. Two years cure or do not use it. Period.
- Forgetting urine separation. Urine carries 80 percent of the nitrogen and 100 percent of the liquid problem. Divert it if at all possible. Self contained urine diverting units make this automatic.
- Skipping the temperature check. A 20 dollar compost thermometer is the single most important tool in the system. If the pile is not hitting 130 degrees in the first week, something is wrong. Diagnose before adding more.
Bringing It All Together
A composting toilet is one of the least complicated systems on a homestead once you understand it. Pick a model that matches your household size and how often you will use it. Vent it correctly the first time. Build a proper outdoor finishing pile. Add cover material every visit. Empty on schedule. Wait the full two years before using the compost. That is the whole system in seven sentences.
For most homesteaders the right starting point is either a Nature's Head style self contained unit or a Separett style urine diverting unit, paired with a simple two bin outdoor finishing pile. The total cost is under 1,500 dollars. The labor is one weekend to install and a few minutes a week to run. The payoff is decades of bathroom independence and a steady supply of rich compost for your fruit trees.
If you are deeper into the off grid build, pair your composting toilet with the rest of the closed loop systems. The water you stop flushing can flow back into your garden through a rainwater harvesting setup. The heat that keeps your composting chamber active through winter can come from a wood stove via the heating with wood guide. The finished humanure feeds the fruit trees you planted using the fruit tree guilds guide. The whole homestead starts to look like one connected system because it is one.
For the parent topic and the full picture of how all this fits together, the off grid living guide for beginners is the home base. For the compost side specifically, the three bin compost system is a great template you can adapt for your humanure pile. And if you have a no till garden, the no till gardening guide will show you exactly where the finished humanure earns its keep.
Frequently Asked Questions
Frequently Asked Questions
A properly running composting toilet does not smell. The vent fan pulls air down through the chamber and out a roof stack, which keeps any odor moving away from the bathroom. If you smell anything at all, three things are usually the cause. The fan stopped, the pile got too wet, or you ran out of cover material. Diagnose in that order and the smell almost always goes away within a day.
Yes, and people have been doing it safely for thousands of years. The Joseph Jenkins humanure method has been documented since 1995 with no reported safety incidents when the protocol is followed. The combination of thermophilic composting at 130 to 160 degrees Fahrenheit and a full two year cure breaks down pathogens and produces a finished compost that smells like forest floor. The science is solid and the practice is straightforward.
It depends on the model and household size. A DIY sawdust bucket needs emptying every 3 to 5 days for a family of two. A self contained unit like a Nature's Head holds 2 to 4 weeks of solids for two part time users. A urine diverting dry toilet like a Separett goes 3 to 6 weeks between empties. A central composting system can handle a family of four full time for 6 to 12 months between finishing tray harvests.
Toilet paper is fine and even helpful. It adds carbon to the pile and breaks down quickly during the composting process. Use a single ply or recycled paper for the fastest breakdown. Avoid wet wipes, even those labeled flushable. Wet wipes do not break down and create stringy clumps in the finishing pile. Stick to regular toilet paper and the system handles it without a thought.
Menstrual pads, tampons, and applicators do not compost and should be disposed of in a regular trash receptacle. Period blood itself composts fine and is no different from any other human waste. A small lined bin next to the toilet for product disposal handles this cleanly. Cloth pads and menstrual cups are fully compatible since the blood ends up in laundry water or rinse water that does not enter the toilet.
Probably yes, with some paperwork. Most US states allow composting toilets either explicitly in their plumbing code or through a variance process. Vermont, Maine, Massachusetts, Oregon, Washington, and New Mexico have the most friendly rules. Most other states allow them with a building permit or a graywater plan filed separately. A few counties still require a backup septic system on paper. Call your county health department to confirm before you order.
It depends on the toilet location and the system type. A self contained or urine diverting unit indoors stays at room temperature year round and runs the same in January as in July. The outdoor finishing pile slows down dramatically in freezing weather, which is fine. The pile resumes thermophilic activity in spring when temperatures rise again. A central composting system with a chamber room may need a small electric heater rated at 50 to 150 watts during the coldest weeks to keep the chamber active.
The conservative answer is to use finished humanure on fruit trees, ornamentals, and perennials only, never on annual vegetables that you eat directly. The thorough humanure approach, after a full two year cure with verified thermophilic temperatures, has been used on food gardens for decades by experienced practitioners with no reported issues. The choice depends on your comfort level. The waiting time is the entire safety system. If you cannot wait two full years, use the compost only on non food plantings.
You now know more about composting toilets than 99 percent of homesteaders ever bother to learn. The hardest part was the reading. The easiest part is the routine. Pick the system that matches your household, vent it well, build your finishing bins, and add a scoop of sawdust after every visit. Two years from now you will be spreading rich dark compost under your fruit trees and wondering why anyone still flushes drinking water down a drain.

Cole
Founder & Lead Researcher
Cole is the founder of Plan Your Homestead. He works in clinical research and brings a research-first lens to every guide on the site, drawing on a long family line of farmers for grounded, practical perspective.
More in Off-Grid
More articles coming soon. Check back for new off-grid content.